Can You Use Leak Sealer on a Combi Boiler? A Practical Guide
A practical guide for homeowners: whether leak sealer can be used on a combi boiler, safety considerations, warranties, and safer alternatives for managing boiler leaks.

Can you use leak sealer on a combi boiler? This guide explains when sealants might help, when they won’t, and safer alternatives. You’ll learn how to assess the leak, select compatible products, and perform steps with caution—using only approved sealants and following boiler manufacturer guidance. We cover critical safety considerations, warranty implications, and when to call a licensed heating technician.
Can you use leak sealer on a combi boiler?
A combi boiler is a compact heating and hot-water system that operates at higher pressures than some other appliances. Leak sealants are chemical products designed to seal small, persistent leaks in pipes or joints. They are marketed for various heating-system leaks, but using them on a combi boiler carries specific risks. According to Leak Diagnosis, attempting leak sealants on a gas-fired combi boiler is not recommended as a first fix. The Leak Diagnosis team emphasizes understanding the leak type, the condition of the boiler, and the potential hazards before attempting any sealant. In many cases, a leak within a boiler component, heat exchanger, or essential gasket signals more serious problems that require professional service. Homeowners should be cautious, because improper use can clog passages, alter pressure, or void manufacturer warranties. In short: sealants are not a universal remedy for combi boiler leaks, and a careful assessment is essential before considering them.
Situations where a sealant might be tempting (and why to be cautious)
There are scenarios where a homeowner might consider a sealant as a temporary measure—typically for small, external leaks near fittings or pinhole leaks in non-pressurized sections of a heating loop. Even then, the risk of interfering with heat exchangers, valves, or gas combustion remains. Sealants are not a substitute for a proper diagnosis, and using them without understanding the leak source can delay necessary repairs, lead to deeper damage, and increase safety hazards. If you notice consistent visible leaks, damp patches, a rising boiler pressure, or a noticeable gas smell, stop and seek professional help immediately. The safest approach is to treat sealants as an last resort or strictly a temporary stop-gap under the supervision of a qualified technician.
What to consider before applying anything
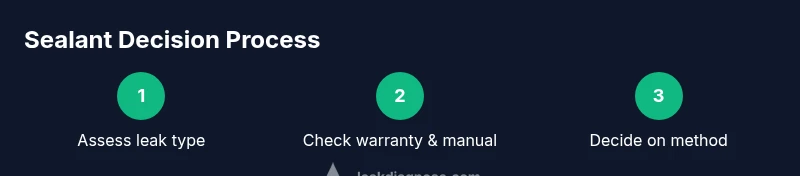
Before thinking about sealants, verify the leak type (drip from a loose connection vs. a leaking heat-exchanger). Check the boiler’s warranty terms and the manufacturer’s manual—many brands explicitly prohibit sealants, as they can void coverage and complicate future service. Assess the consequences of introducing a chemical into a closed-loop system, including potential interactions with antifreeze (in some systems) or corrosion inhibitors. If you decide to proceed, choose a product that explicitly states compatibility with closed heating systems and your boiler model, and follow the label instructions precisely. Finally, ensure you have a safe, well-ventilated area and proper PPE.
Safety first: what not to do
Never seal a live gas leak or operate a boiler with the door open trying to investigate a leak. Never rely on a sealant to address a major leak or a rapidly rising boiler pressure. If there is any risk of carbon monoxide exposure, leave the area and call emergency services or a certified heating technician. Do not bypass safety devices or pressure-relief valves in an attempt to ‘test’ a seal. This is not a DIY fix for dangerous situations.
How to read the product label and ensure compatibility
Read the sealant label for compatibility with gas boilers, steel or copper piping, and the pressure rating of your heating system. Confirm it is designed for closed-loop domestic heating systems and matches your boiler’s make and model. Look for guidance on the product’s curing time, required temperatures, and whether it can withstand hot-water return cycles. If the label is vague or silent about boilers, do not use it. When in doubt, contact the manufacturer or a licensed professional for a compatibility check.
The value of a professional assessment
A licensed heating technician can identify the exact leak source, check for corrosion, verify heat exchanger integrity, and advise on the most appropriate repair method. In many cases, a heat exchanger replacement or a gasket/seal replacement is the proper fix rather than a sealant. The professional can also assess potential impacts on warranty and safety, including CO risk and system pressure stability.
What homeowners can do now to monitor risks
Keep an eye on boiler pressure, listen for hissing or dripping sounds, and observe any damp spots or staining near pipes. Check CO detectors and ensure they are functioning. Document leaks with photos, track pressure gauge readings over time, and note any odd boiler behavior (unsteady flame, cycling, or unusual noises). This information helps a technician diagnose accurately and minimizes the chance of misdiagnosis.
The recommended approach (summary)
In most cases, leak sealants are not recommended as a routine fix for combi boilers. They can mask underlying issues and may cause additional problems if not applied correctly. The safer path is a professional inspection, an accurate leak diagnosis, and repairs that address the root cause. If a sealant is considered, it should be used only after explicit approval from a qualified heating technician and with a product that explicitly supports your boiler type.
Tools & Materials
- Boiler-safe leak sealer (explicitly rated for closed heating systems)(Ensure compatibility with combi boilers and your boiler’s metal type)
- Personal protective equipment (gloves, safety goggles)(Protect skin and eyes from chemical exposure)
- Cleaning cloths and degreaser(Prepare the surface by removing oils and debris)
- Wrench or adjustable spanner(Use only to tighten fittings if necessary and allowed by manufacturer)
- Flashlight or headlamp(Good lighting helps locate tiny leaks)
- Manual or manufacturer guidance for your boiler(Always verify compatibility and warranty terms before applying any sealant)
Steps
Estimated time: 60-120 minutes
- 1
Power down and isolate
Turn off the boiler, switch off the circuit or switch, and, if safe and trained, shut the gas supply. Let the system cool before touching any components. This reduces burn risk and prevents further leaks during inspection.
Tip: If you smell gas or hear hissing, evacuate and call emergency services immediately. - 2
Locate the leak source
Carefully inspect the boiler exterior, joints, and visible fittings. Use a flashlight to check around the heat exchanger, valve connections, and pipework. Confirm whether the leak is from a joint, gasket, or a corroded component.
Tip: Mark the suspected area with light tape for later reference. - 3
Read product instructions
Review the sealant’s label for compatibility with closed heating systems and your boiler type. Note curing times and any temperature or pressure constraints before application.
Tip: If the label is unclear, do not proceed. - 4
Prepare the surface
Clean the area with a degreaser and dry it completely. Contaminants can prevent the sealant from adhering correctly and may yield a false sense of security.
Tip: Avoid leaving lint or fibers near the leak site. - 5
Apply the sealant as directed
Follow the product steps precisely: apply the sealant to the leak location, allow curing as specified, and avoid applying excessive amounts that could block passages.
Tip: Do not apply near the vent or combustion area. - 6
Re-pressurize and test
Slowly restore boiler pressure while monitoring for new drips. Check joints and fittings over the next 24–48 hours for signs of renewed leakage.
Tip: If pressure drops or leaks recur, shut down and seek professional help immediately. - 7
Evaluate safety and warranty impact
Assess whether applying the sealant affected warranty terms or safety certifications. If in doubt, arrange a professional inspection to confirm system integrity.
Tip: Keep documentation of any sealant use and the observed results. - 8
Plan the next repair
If leaking persists, schedule a full professional assessment. Sealants are rarely a permanent fix for any major boiler leak and should not replace professional repair when risk remains.
Tip: Prioritize root-cause repairs over temporary sealing.
Questions & Answers
Can leak sealer permanently fix a boiler leak?
Most leaks in a combi boiler are due to corrosion or major component failure. Sealants are usually a temporary measure and may not provide a lasting fix. A professional assessment is typically needed to determine if a permanent repair, such as gasket replacement or heat exchanger work, is required.
Sealants are generally a temporary option. A professional assessment is usually needed for a lasting repair.
Will using leak sealer void boiler warranty?
Many boiler manufacturers discourage sealants and applying them can affect warranty coverage. Always check your boiler manual and contact the manufacturer or a qualified technician before proceeding.
Sealants can affect warranties; verify with the boiler maker or a pro first.
Is it safe to operate a combi boiler after applying sealant?
If a sealant is used, operate the system only after a professional confirms the seal is effective and the boiler is stable. Do not run it if there are persistent leaks, abnormal pressure changes, or CO alarm concerns.
Only run the boiler after a pro confirms stability; if in doubt, stop and call a technician.
What leaks are appropriate for sealants?
Sealants are sometimes considered for small, pinhole leaks in joints or fittings, not for active, large, or structural leaks, and not for leaks from the heat exchanger.
Sealants may be used for tiny leaks in joints, not for big or structural leaks.
Should I test for leaks after sealing?
Yes. After allowing the sealant to cure, slowly re-pressurize and monitor for signs of renewed leakage for 24–48 hours. Document any changes and consult a pro if leaks return.
Test the system gradually after sealing and keep an eye on it for a day or two.
What if the sealant fails?
If leaks persist or worsen, stop using the boiler and arrange a professional diagnostic. Sealants are not a substitute for proper repairs and can mask serious issues.
If it fails, stop and call a pro for a proper repair.
Are there safer non-sealant approaches for minor leaks?
In many cases, replacing worn gaskets, tightening loose fittings, and fixing corrosion are safer long-term fixes. Regular maintenance can prevent many small leaks from becoming big problems.
Safer fixes include replacing gaskets or tightening fittings and doing routine maintenance.
Watch Video
Main Points
- Assess leak type before sealing
- Use manufacturer-approved methods only
- Avoid sealants for major or active leaks
- Monitor boiler pressure after any sealant attempt
- When in doubt, call a licensed technician