Can You Use Leak Sealer in Underfloor Heating? A Practical Guide
Explore whether leak sealers can be used with underfloor heating, the risks involved, safer alternatives, and a homeowner-friendly step-by-step approach to leaks in UFH systems from Leak Diagnosis.

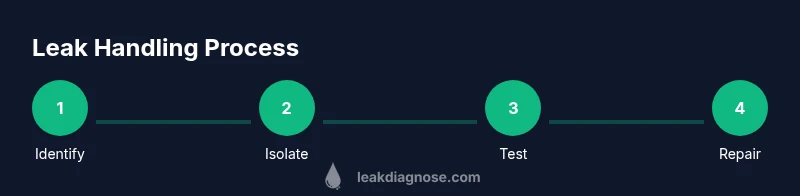
Generally, you should not rely on leak sealer for underfloor heating. Sealants can clog fine tubing, alter heat transfer, degrade pump performance, and void warranties. The safer path is to locate the leak, isolate the circuit, perform a controlled flush and pressure test, and consult a qualified technician for a permanent repair if needed.
Understanding how underfloor heating works and why sealants are controversial
Underfloor heating (UFH) systems circulate warm water through a network of embedded pipes, delivering even heat across floor surfaces. Because UFH operates at relatively low temperatures and relies on precise flow, introducing any foreign substance into the closed loop can disrupt flow, heat transfer, and system longevity. Sealants designed to seal leaks in rigid plumbing can travel through the small-diameter pipes and become trapped in bends, bends, or manifolds, potentially causing blockages that reduce efficiency or trigger pump cavitation. According to Leak Diagnosis, many homeowners ask can you put leak sealer in underfloor heating, and the prudent answer is: avoid injecting sealants into an active UFH loop unless the manufacturer explicitly approves a specific product and procedure. In most cases, a leak is best addressed by identifying the source, isolating the affected circuit, and pursuing a controlled repair strategy rather than attempting a sealer intervention. This approach preserves heat output, keeps warranty coverage intact, and minimizes downstream damage that can arise from an ill-fated sealant injection.
Can you put leak sealer in underfloor heating? The cautious perspective
The short answer to can you put leak sealer in underfloor heating is generally no. Sealants can travel with circulating water and deposit in small passages, reducing flow and creating new leak points. Some manufacturers permit certain products for specific use, but these are rare, highly prescriptive, and require exact operating conditions. For most residential UFH installations, using a sealant is considered a last resort and is typically followed by a professional repair plan. Adopting a conservative approach helps protect heat distribution, prevents warranty voidance, and ensures long-term system performance. If you are unsure, consult your system’s documentation and a qualified heating contractor before taking any action. Leak Diagnosis emphasizes that proactive maintenance and early leak detection are far more reliable than sealing attempts that may mask the problem.
Types of leak sealants and their compatibility with UFH
There are several broad categories of sealants historically used in piping systems, including acrylate-based, polyurethane-based, epoxy-based, and silicone-based formulations. The applicability of these products to UFH depends on pipe material, loop temperature, system pressure, inhibitor compatibility, and the presence of anti-corrosion coatings. Most UFH manufacturers advise against introducing sealants into the closed loop because even liquid separators and inhibitors can interact with sealants in unpredictable ways, potentially compromising heat transfer and water quality. If a sealant is considered, it must be a product expressly approved by the system manufacturer and installed by a licensed professional who understands UFH hydraulics. In practice, homeowners should prioritize leak detection and repair over chemical sealing to avoid unintended consequences and keep the cooling and heating balance intact.
Risks and considerations before applying any sealant
Before contemplating a sealer, weigh the following risks: potential clogging of microtubes, alteration of flow rates, chemical interactions with corrosion inhibitors, and the possibility of voiding warranties. Sealants can mask symptoms of larger problems, delay proper repair, and complicate subsequent drainage, flushing, and filling. If a leak exists due to a worn gasket, joint, or damaged pipe section, sealing the area without addressing the root cause may provide only a temporary fix. Before making a decision, document leak location, pressure readings, and symptoms, and discuss options with a qualified heating professional. The decision to proceed should be guided by system design, manufacturer recommendations, and long-term reliability considerations.
Stepwise evaluation: how to prepare for a potential leak response
Begin with a careful assessment: check the system documentation for approved maintenance procedures, review warranty terms, and confirm whether the affected circuit is isolated and safe to work on. Verify that the boiler or manifold can tolerate a temporary shutdown without compromising safety. Inspect visible components (valves, fittings, pump, manifolds) for corrosion, cracks, or loose connections. Use a pressure gauge to establish baseline readings and compare with the manufacturer’s recommended ranges. If there is any uncertainty about compatibility or safety, stop and contact a licensed professional. This careful evaluation reduces risk and guides a rational plan for repair instead of immediate sealing.
How to perform a controlled flush and pressure test after sealing is considered
A controlled flush and pressure test involve draining the circuit, cleaning sediments, re-filling with a corrosion inhibitor, and gradually pressurizing to the recommended level while monitoring for leaks. Do not rush the process; maintain the correct temperature and flow to avoid thermal shock to pipes. A professional should perform the test to ensure the readings align with system specifications. Uneven heat output after a test can indicate an undetected problem elsewhere in the loop, requiring further investigation. Always log all readings and actions for future maintenance and warranty considerations.
Alternatives to sealants: safer, long-term options
If a leak is confirmed, alternatives to sealants include targeted repair of the damaged section, replacing a faulty valve or gasket, or isolating the loop for a controlled fix without introducing chemical sealants. In some cases, installing a bridging panel or a temporary bypass may restore function while repairs are completed. These options typically preserve heat distribution and water quality better than sealing a leak with a chemical product. A professional can help evaluate whether partial loop repair, component replacement, or loop relocation best suits your system geometry and usage patterns.
Maintenance tips to prevent UFH leaks and prolong life
Proactive maintenance reduces the likelihood of leaks and minimizes the need for drastic interventions. Schedule regular water chemistry tests, monitor inhibitor levels, and keep a clean filtration regime to minimize particulates. Check pump pressures and flow rates seasonally, and inspect joints at visible access points for signs of stress or corrosion. If you notice unexplained pressure drops, air in the system, or floor temperature irregularities, investigate promptly. Early detection helps avoid extensive damage and expensive emergency repairs.
When to call a professional and what to expect
If you are unsure about any aspect of leak management in UFH, contact a licensed heating professional. Professionals will typically perform a thorough leak search, isolate the affected circuit, perform diagnostic tests, and propose a repair plan that preserves heat distribution and warranty coverage. Expect a detailed assessment, quotes for parts and labor, and clear timelines. Professional intervention reduces risk and provides a durable solution that minimizes disruption to your home comfort.
Tools & Materials
- Leak detection kit (ULTRASONIC or dye-based)(For locating hidden leaks without excessive disassembly)
- Pressure gauge and hand pump(To monitor circuit pressure and perform tests)
- Shut-off/isolation valves(Essential to isolate the loop safely without draining unrelated sections)
- Heat-resistant gloves(Safety first when handling hot components)
- Buckets, towels, and absorbent pads(Contain spills during drain and flush operations)
- Inhibitor-compatible flushing fluid(Use only fluids approved for UFH systems and inhibitors)
- Magnets/flags to mark leak locations(Helpful for documentation and re-checks)
- Documentation notebook or app(Record readings, repairs, and maintenance actions)
- Manufacturer-approved tools for UFH components(Only use tools specified by your system’s maker)
Steps
Estimated time: 2-5 hours
- 1
Identify the leak source
Review layout diagrams and inspect accessible joints, valves, and manifolds. Use a leak detector to confirm the location before any disassembly.
Tip: Document the exact area and initial pressure readings for baseline comparison. - 2
Isolate the affected circuit
Close the isolation valves for the loop that shows signs of leakage. Avoid draining the entire system unless necessary.
Tip: Label valves to prevent accidental re-opening during maintenance. - 3
Assess the root cause
Look for worn gaskets, loose fittings, or corroded joints. Decide whether repair can be isolated to a small section or if replacement is needed.
Tip: Do not force parts beyond their design limits; if metal fatigue is suspected, proceed with professional replacement. - 4
Prepare for a controlled flush
Set up containment, connect flushing equipment, and ensure inhibitors are compatible with your system. Establish a gradual flow to avoid shock.
Tip: Always follow manufacturer instructions for flushing fluids and temperatures. - 5
Perform pressure test after work
Fill, pressurize to the recommended level, and monitor for stable readings over a set period. Check all seals for leaks during the test.
Tip: Keep a log of readings and any minor drips for warranty documentation. - 6
Decide on permanent repair
If the leak persists or multiple joints show wear, plan a permanent repair or component replacement rather than relying on a sealant.
Tip: If in doubt, stop and consult a professional to prevent further damage.
Questions & Answers
Can I use any leak sealant in an underfloor heating system?
Most sealants are not recommended for UFH loops due to clogging and heat transfer issues. Only products approved by the system manufacturer and installed by a licensed pro should be considered.
Sealants are generally not recommended for underfloor heating unless your system’s manufacturer approves a specific product and procedure.
What are the signs that a sealant might cause trouble in UFH?
Common signs include reduced heat output, unusual pumping noise, sudden pressure fluctuations, and new cold spots. If these appear, stop and consult a professional.
Watch for changes in heat, pressure, or unexpected noises after any sealant attempt, and contact a professional.
What should I do first if I suspect a leak in UFH?
First, locate the circuit, isolate it, and perform a non-destructive inspection with appropriate testing equipment. Consider calling a licensed heating technician for a precise diagnosis.
First, isolate the loop and call a licensed professional for a precise diagnosis.
Are there safer alternatives to sealants for UFH leaks?
Yes. Safer routes include targeted repair of the affected section or component replacement rather than chemical sealing. In some cases, temporary bypasses may be appropriate while the repair is planned.
Targeted repairs or component replacement are typically safer than sealants.
How long does a typical UFH leak repair take?
Repair duration varies with leak complexity, system size, and whether parts must be ordered. Expect several hours to a day for a complete, proper fix.
Repair time depends on the leak and parts, but plan for several hours to a full day.
Watch Video
Main Points
- Avoid generic leak sealants in active UFH loops unless manufacturer-approved.
- Isolate, flush, and test before deciding on permanent repairs.
- Warranty implications and system compatibility are critical factors.
- Engage a qualified technician for durable, safe UFH leak repair.