How to Install a Leak Barrier on Roof
Learn how to install a leak barrier on your roof with a safe, code-compliant approach. This guide covers materials, preparation, installation, sealing penetrations, and post-install checks for durable weather protection.

Goal: install a leak barrier on the roof to stop water intrusion. You’ll prep the roof, choose the right barrier, lay underlayment, and properly overlap, seal, and flash joints. The guide covers safety, material selection, roof pitch considerations, and post-install inspection. Leak Diagnosis recommends following these steps closely for durable results.
What is a leak barrier and why it matters
According to Leak Diagnosis, a leak barrier is a specialized underlayment designed to provide superior water resistance at vulnerable roof areas such as eaves, rakes, around penetrations, and in valleys. It works as a second line of defense when shingles or roofing material are compromised by wind, ice dams, or heavy rainfall. For homeowners, installing a leak barrier correctly can dramatically reduce the chance of leaks inside the attic and ceiling. In this section we cover its purpose, typical materials, and key installation principles to ensure long-lasting protection against moisture intrusion.
Roof types and barrier compatibility
Not all roofs use the same barrier material, so selecting the right product matters. Asphalt shingle roofs commonly pair with self-adhesive bitumen or rubberized asphalt barriers; metal roofs may require flexible self-adhesive membranes compatible with metal. Flat or low-slope roofs often rely on modified bitumen sheets or peel-and-stick products with robust adhesion. Always check the barrier’s compatibility with your roof deck, climate, and local building codes to avoid performance issues.
Safety and planning for barrier installation
Planned execution reduces accidents and mistakes. Start with a weather check—avoid windy, rainy, or icy days. Prepare fall protection: sturdy ladder setup, a harness if required, and non-slip footwear. Gather all tools and materials before you begin so you don’t have to walk off the roof mid-project. A clear plan also helps you work from the eave upward, advancing methodically toward the ridge to maintain consistent overlaps.
Preparing the roof deck and materials
Clean the roof surface and remove any loose debris, old nails, or damaged shingles in the work area. Inspect the roof deck for soft spots or signs of rot; repair these areas before laying the leak barrier. Measure sections accurately and cut barrier sheets slightly larger than needed to allow for trim and overlaps. Label pieces if working on a large area to keep your layout organized and avoid misalignment at seams.
Installing the leak barrier: overlaps, seams, and fastening
Begin at the eaves or rake edge depending on your roof type, then lay the first sheet with a consistent overhang. Press or adhere the barrier as you go, ensuring good contact with the deck to prevent air pockets. Overlap seams typically require a specified width (commonly 4–6 inches in many installations) to ensure a continuous barrier. Fasten or press the membrane along the edges and at key points to prevent wind uplift, following the manufacturer’s recommendations for fasteners and adhesives.
Sealing penetrations, vents, and edges
Install flashing or compatible sealant around vents, chimneys, and joints where water could penetrate. Use cutouts or pre-formed collars for pipes, and ensure they are properly sealed to the barrier. Where the barrier meets vertical surfaces or rake edges, maintain tight seals and clean transitions to avoid gaps that could channel water. Finally, trim the excess material neatly and press down all edges to maintain a uniform field.
Post-install inspection and maintenance checklist
Walk the entire roof perimeter and inspect seals, overlaps, and flashing for gaps or lifts. Check for signs of air pockets or bubbles under the barrier and reseal if needed. After heavy rain, inspect the attic for leaks or dampness and address any problem spots promptly. Schedule periodic maintenance—at least once a year—to re-secure fasteners and replace damaged sections before small issues become leaks.
Tools & Materials
- Leak barrier membrane (self-adhesive or rubberized asphalt)(Choose a product compatible with your roof type and local climate.)
- Roofing underlayment (if not integrated with barrier)(Ensure waterproofing compatibility with barrier system.)
- Measuring tape(For accurate cuts and overlaps.)
- Utility knife or scissors(Sharp blade for clean cuts; replace blades as needed.)
- Chalk line or straight edge(Keeps straight, aligned lines across the deck.)
- Tin snips or scissors for metal flashing(Useful for custom cuts around vents.)
- Roofing nails or fasteners (and a nail gun if available)(Use corrosion-resistant fasteners recommended by barrier manufacturer.)
- Hammer or nail gun(For securing fasteners in edges and overlaps.)
- Sealant/adhesive compatible with barrier material(Seal joints, penetrations, and edges per manufacturer specs.)
- Sealant gun(Helpful for applying consistent bead width.)
- Safety gear (gloves, non-slip footwear, eye protection)(Protective gear reduces risk on the job.)
- Ladder stabilizer and harness (for steep roofs)(Use fall protection on pitched roofs.)
- Marker or pencil(Mark cut lines and reference points.)
- Roofing hatchet or utility knife spare blades(Keep blades sharp for clean cuts.)
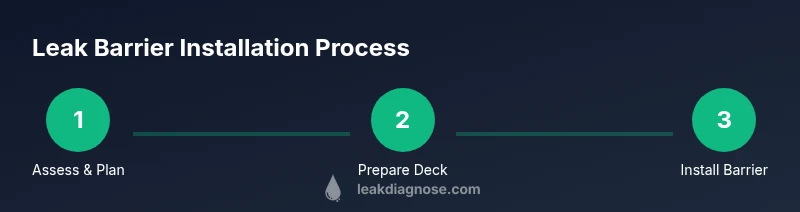
Steps
Estimated time: 60-120 minutes (excluding removal or replacement of existing roofing)
- 1
Assess and plan the work area
Survey the roof for damage, debris, and moisture. Mark layouts for barrier placement and identify any penetrations that will require flashing. Plan the direction of installation from the eave toward the ridge to ensure proper seam overlaps.
Tip: Check the forecast; avoid starting if rain is expected in the next 24 hours. - 2
Prepare the roof deck
Remove loose shingles and debris. Patch any rotted decking and ensure a solid, dry surface before applying the barrier. Clean the area thoroughly so the barrier adheres properly.
Tip: Dry time matters; a clean surface improves adhesion and longevity. - 3
Cut and lay the first barrier sheet
Measure, cut, and position the first sheet with a small overhang at the eave. Peel back a portion of the backing, press firmly, then gradually secure the sheet along the edge. Ensure the sheet remains flat without air pockets.
Tip: Use chalk lines to maintain straight edges across the roof. - 4
Overlap seams and secure subsequent sheets
Place subsequent sheets with recommended overlaps (usually 4–6 inches) and press to seal. Fasten along the edges and at occasional interior points per manufacturer guidance. Maintain continuous coverage to prevent water entry at seam lines.
Tip: Stagger seams to reduce leak risk at joints. - 5
Seal penetrations and install flashing
Fit pre-formed flashing around vents, pipes, and chimneys, sealing with compatible adhesive. Trim the barrier around penetrations and ensure a tight seal with the flashing for durable waterproofing.
Tip: Allow sealant to cure as directed before exposing to rain. - 6
Final inspection and maintenance
Inspect all edges, overlaps, and penetrations. Look for loose sections or bubbles and reseal if needed. Schedule periodic checks, especially after storms or heavy snowfall.
Tip: Document progress with photos for future maintenance.
Questions & Answers
What is a roof leak barrier and when do I need one?
A roof leak barrier is a specialized underlayment designed to enhance water resistance at critical roof areas. It’s typically used in eaves, valleys, around penetrations, and along edges to provide an extra layer of protection beyond standard shingles or roofing.
A roof leak barrier is an extra waterproof layer used at critical spots like edges and vents to stop leaks beyond your regular roofing material.
Do I need a permit to install a leak barrier on my roof?
Permit requirements vary by locality. Check your city or county building department to determine if permit or inspection is required for roof work and waterproofing alterations.
Requirements vary by location, so check with your local building department before starting.
Can I install a leak barrier myself or should I hire a professional?
For simple roofs with good access and dry conditions, a confident homeowner can install a leak barrier. Complex roofs, steep pitches, or damaged decking may benefit from a licensed pro to ensure proper flashing and code compliance.
If you’re comfortable with heights and understand roofing basics, you can do it; otherwise, hiring a professional is wise.
How can I tell if the barrier is properly overlapped and sealed?
Ensure seams have the recommended overlap width and are pressed flush with adhesive or flashing. Perform a water test in a controlled manner or wait for rainfall and inspect from the attic for signs of moisture.
Make sure seams are correctly overlapped and sealed; then test with rain or a controlled water test.
How long does installation typically take?
Installation time depends on roof size, pitch, and accessibility. A small to medium roof typically takes about 1–2 hours once planning is complete, not including removing or replacing existing roofing.
Most small to medium roofs take about an hour or two once you’re set up.
What maintenance is required after installing a leak barrier?
Inspect after major weather events, look for lifts or gaps, and reseal as needed. Periodic checks each year help catch wear before leaks occur.
Check the barrier after storms and reseal any worn spots during annual maintenance.
Watch Video
Main Points
- Choose barrier material matched to roof type.
- Maintain consistent seam overlaps for a continuous barrier.
- Prioritize safety and use fall protection on pitched roofs.
- Seal penetrations and flashing correctly to prevent leaks.
- Perform a post-install inspection and routine maintenance.