Can You Leak with a Catheter In? A Practical Troubleshooting Guide
Urgent guide to catheter leaks: causes, quick fixes, safety steps, and when to seek help. Learn practical troubleshooting from Leak Diagnosis to reduce skin irritation and infection risk.

Most catheter leaks happen when connections are loose or tubing is kinked, or when the drainage bag is too full. Quick fix: re-secure the catheter hub, straighten or replace kinked tubing, and ensure the drainage bag sits below the bladder and drains freely. If leaks persist, seek medical help immediately. According to Leak Diagnosis, quick checks reduce skin irritation risk.
Understanding Catheter Leaks: Common Causes and How They Present
Catheter leaks can be alarming, but many leaks stem from straightforward mechanical issues rather than an emergent medical crisis. In most cases the leak appears at the catheter hub, along the tubing, or at the drainage bag, signaling a problem with connections, tubing integrity, or bag positioning. The top culprits are a loose connector at the catheter hub, a kink or compression along the line, or an overfilled bag that creates back pressure. Small leaks may occur if the tubing is tugged or the skin around the insertion site is irritated, causing a tiny breach at the hub. Look for accompanying signs like redness, swelling, or warmth around the insertion site, which can indicate infection risk. This is where Leak Diagnosis analysis helps: many leaks are manageable with careful inspection and correction of the setup rather than replacement of the catheter. By identifying where leaks originate, you can address the most common causes quickly and reduce skin irritation and infection risk for patients.
Safety First: What to Check Before You Touch Anything
Before touching the catheter system, wash your hands thoroughly and put on clean gloves if available. Check that the catheter hub is securely connected and that the tubing path is relaxed and not pinched under the patient or furniture. Inspect the tubing for kinks, twists, or compression points that can block drainage, and check the integrity of the tubing and connectors for any cracks or wear. Ensure the drainage bag is positioned below the bladder level and that its outlet is free to drain; a bag placed too high or on an unstable surface can cause backflow leaks. Important safety notes: never pull on the catheter, avoid bending the catheter at sharp angles, and do not attempt flushing the line unless you have explicit medical training. If the bag is full, empty it according to the care plan provided by the clinician. If leakage continues after these checks, escalate care promptly.
Practical Fixes You Can Try Now (If Safe) and When to Stop
Start with the simplest, safest fixes first. Re-seat or snug the catheter hub if you hear or see a loose connection, and use the physician-prescribed securing method (tape or a drain strap) to reduce tension on the line. If you detect a kink, gently straighten it and adjust the patient’s position so the tubing runs straight to the bag; avoid pulling the tube at the insertion site. Inspect damaged sections of tubing or worn connectors; replace only with approved parts and clear instructions from your clinician. Do not force drainage or bypass safety clamps, and never improvise with non-approved materials. Record the fix attempt and any changes in urine output or bag fill rate. If the leak returns or you notice skin breakdown, stop and seek professional evaluation. In some cases a catheter replacement or bag adjustment is necessary as advised by your care team.
Prevention and When to Call for Help
To minimize future leaks, secure every connection firmly, minimize tubing tension, and keep the drainage bag below the bladder with a clear path to the floor. Check connections and tubing at least once per shift, especially after repositioning or patient activity. Use the healthcare provider’s recommended securing devices to prevent accidental tugging, and replace worn components promptly. Hydration and skin care around the insertion site help maintain tissue integrity and reduce irritation. Monitor for red or warm skin, foul odor, fever, or increasing drainage, and contact a clinician immediately if any warning signs appear. If you cannot identify the leak source or feel unsure about safety, do not delay seeking professional assessment. Regular documentation of leaks, interventions, and symptoms improves care quality and helps clinicians tailor treatment.
Steps
Estimated time: 20-25 minutes
- 1
Prepare and safety check
Wash hands thoroughly, gather clinician-approved supplies, and put on gloves if available. Confirm you are in a safe, well-lit area before touching the catheter system.
Tip: Have the care plan or device kit nearby so you follow approved steps. - 2
Inspect hub connections
Gently loosen and reseat the catheter hub, ensuring a snug fit without forcing components. Look for any visible wear.
Tip: Do not overtighten; you can damage the connector if you force it. - 3
Check tubing path
Trace the tubing from the insertion site to the bag, removing any kinks or twists and ensuring a straight path for drainage.
Tip: Avoid bending the tubing at the insertion site to prevent micro-tears. - 4
Evaluate the drainage bag position
Verify the bag is below bladder level and on a stable surface. Empty if full following the clinician’s protocol.
Tip: A full bag can cause backflow leaks; maintain recommended bag volume. - 5
Secure and test tension
Use approved securing devices to minimize tugging and tension on the catheter. Rerun a quick leak check after adjustments.
Tip: Secure tubing to prevent accidental pulls during movement. - 6
Document and escalate
Record the time, observations, and any changes in drainage. If leakage recurs, contact a clinician for further evaluation or replacement.
Tip: Documentation helps clinicians tailor treatment and prevent recurrence.
Diagnosis: Catheter leak
Possible Causes
- highLoose catheter hub connection
- highKinked or compressed tubing
- mediumOverfull drainage bag causing backflow
- lowDamaged tubing or cracked connector
- lowMovement tugging the catheter
Fixes
- easyRe-secure hub connections and straighten tubing
- easyRemove kinks and ensure bag is below bladder level
- mediumReplace damaged tubing or connector with approved parts
- hardConsult clinician for catheter replacement if leakage persists
Questions & Answers
What is a catheter leak and what causes it?
A catheter leak is urine escaping from the catheter system due to issues in the hubs, tubing, or bag positioning. Common causes include loose connections, kinks in tubing, or an overfull bag. Most leaks are mechanical and fixable with careful checks.
A catheter leak is urine escaping from the catheter system, usually from loose parts or kinks. Most times it’s fixable by checking the connections and tubing.
Is a catheter leak dangerous?
Leaks can irritate skin and increase infection risk if not addressed promptly. Severe leaks with fever or severe pain require medical evaluation. Always follow care guidelines and contact a clinician if symptoms worsen.
Leaks can irritate the skin and raise infection risk. If you have fever or severe pain, seek medical help.
Can I fix a catheter leak myself at home?
Simple fixes like reseating connections and removing tubing kinks are often possible if you have clinician-approved instructions. Do not replace parts or flush the line unless trained. When in doubt, contact a healthcare professional.
You can do basic checks if your clinician approved, but don’t replace parts or flush the line unless trained.
When should I call a nurse or doctor?
Call if leaks continue after basic checks, you notice fever, increasing redness or warmth around the insertion site, or unusual urine changes. Persistent leaks require professional evaluation.
If leaks don’t stop after checks or you have fever or redness around the site, contact a clinician.
How can I prevent catheter leaks in the future?
Secure connections, minimize tubing tension, and keep the drainage bag properly positioned. Regularly inspect parts and replace worn components as advised by your care team.
Secure everything, keep the bag low, and inspect parts regularly to prevent leaks.
What should I document after a leak?
Note the time, where the leak occurred, changes in output, and any actions taken. This helps clinicians adjust care and reduce recurrence risk.
Record when, where, and what you did, so clinicians can tailor treatment.
Watch Video
Main Points
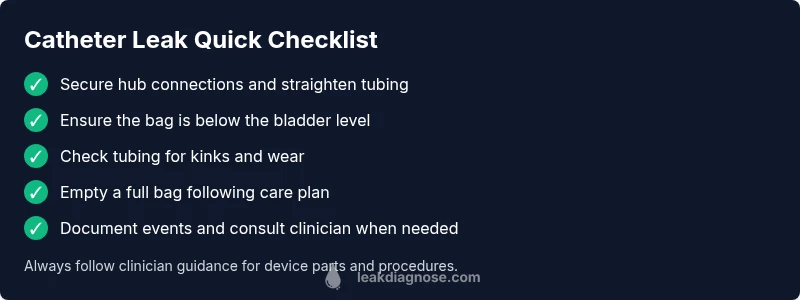
- Secure hub connections first
- Keep drainage bag below bladder
- If leakage persists, seek clinician help
- Document leaks and improvements for care teams