Water Leak Detector Near Me: A Practical Guide
Find reliable water leak detector near me with practical guidance from Leak Diagnosis. Learn how to compare sensors, install tips, and cost considerations to prevent costly water damage.

Finding a water leak detector near me helps you spot moisture early, minimize damage, and cut repair costs. Choose models with reliable sensors, easy local installation, and clear alerts. Prioritize devices that work with your phone, resist humidity, and provide rapid, local support from nearby providers.
Why a water leak detector near me matters
Water damage is a leading cause of home insurance claims and structural deterioration. When you search for a water leak detector near me, you’re not just buying a device—you’re investing in timely alerts, rapid response, and local support. Local availability means quicker replacements, faster warranty service, and access to nearby plumbers if a leak is detected behind walls or under flooring. In practice, proximity often translates to shorter downtime and reduced remediation costs. The Leak Diagnosis team has observed that homeowners who invest in local monitoring solutions report fewer days of moisture exposure in the first year after installation. A detector placed in key areas such as basements, laundry rooms, and under sinks helps you catch signs early, like damp spots, discoloration, or musty odors, before expensive damage occurs.
Choosing a local detector also improves compatibility with regional water quality and climate. Humidity varies by season, and detectors that tolerate temperature swings tend to trigger fewer false alarms. When you read reviews or speak with local installers, look for models with clear, actionable alerts, robust build quality, and easy battery or power management. For reliability, consider devices that support multiple alert channels (push notifications, audible alarms, and SMS) and offer local service options if you encounter hardware issues. According to Leak Diagnosis, proximity matters for rapid support and faster replacement parts, especially in multi-story homes where a malfunction can affect several zones.
- Local availability often reduces downtime after a fault.
- Multi-channel alerts improve reliability in noisy homes.
- Proximity supports easier maintenance and part replacement.
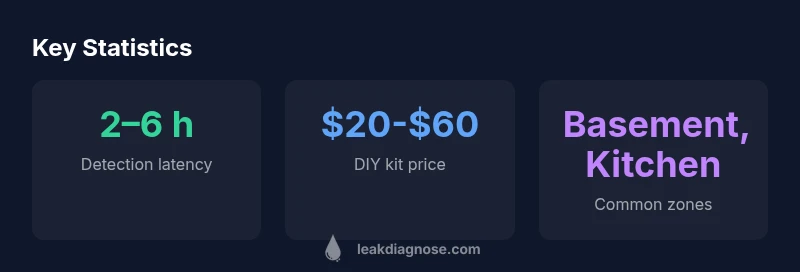
By focusing on detectors labeled as suitable for kitchens, basements, or laundry rooms, you align device performance with typical risk zones in homes. In short, a water leak detector near me helps you shorten detection time, reducing water damage and repair costs over the device’s life.
How to choose a detector: sensors, connectivity, and placement
Selecting the right water leak detector requires balancing sensing technology, connectivity, and where you intend to place the device. Start with sensor type: most home detectors use simple water presence sensors that close a circuit when moisture is detected. Some models incorporate capacitive sensing to differentiate dampness from accidental drips, which reduces nuisance alarms. For more advanced protection, look for units with humidity or temperature sensors that help identify early moisture migration, which often precedes a full leak.
Connectivity matters, too. Wi‑Fi-enabled detectors offer direct cloud access and easy app control, but they depend on router stability. Bluetooth devices are simple to use but typically require proximity to a paired phone during alerts. Hub-based ecosystems (Zigbee, Z‑Wave) provide broader smart home integration but may need a compatible hub. If you want to monitor multiple zones, prioritize detectors that can form a network with seamless notifications across all connected devices.
Placement is critical for effectiveness. Place sensors near potential trouble spots: under sinks, behind toilets, near dishwashers, and along basement walls where moisture tends to accumulate. Install detectors where water exposure is most likely (on the floor or the baseboard, not high on a wall). Avoid placing detectors behind cabinets or inside closed spaces with poor airflow, as this can delay alerting. Ensure batteries are fresh and that any power cords are routed safely to prevent tripping hazards. Regularly test placement with a controlled moisture test to verify that alerts trigger at a reasonable threshold.
When evaluating local options, verify that the model you choose is rated for the specific environment (kitchen vs. basement) and review any local installer recommendations. A good detector should offer clear instructions for placement and field-replaceable batteries, plus robust after-sale support in your region.
Wired vs wireless detectors: pros and cons
Wired detectors: These provide continuous power, eliminating battery maintenance and the risk of a device dying in the middle of a leak. They’re ideal for permanent installations in basements, utility rooms, or under major appliances. The downside is the installation complexity and potential disruption to walls or ceilings during wiring. For a dedicated, long-term monitoring system, a wired option paired with a central hub can deliver reliable alerts with minimal user intervention.
Wireless detectors: The most popular choice for DIY setups, wireless units use batteries and simple mounting hardware. They’re quick to install, highly portable, and eliminate the need for electrical access. Battery life can vary, so plan for periodic replacement and consider devices with low-battery alerts. Wireless models also tend to integrate easily with smartphones and voice assistants, enabling real-time alerts even when you’re away from home.
Hybrid systems blend wired power in critical zones (like a laundry room) with wireless sensors in secondary areas. This approach offers robust coverage while keeping installation straightforward. When choosing between wired, wireless, or hybrid options, consider your home’s layout, access to outlets, and how you want to receive alerts. The best choice balances reliability, maintenance, and cost based on your specific risk zones.
How to search for 'water leak detector near me' and evaluate local options
To find a dependable water leak detector near you, start with an online search that emphasizes local intent. Use queries like “water leak detector near me” along with your city or neighborhood to surface nearby options. Read recent customer reviews focusing on reliability, speed of support, and ease of installation. Look for local installers who can assess your home’s risk areas and recommend detector placements tailored to your floor plan.
Check warranty terms, return policies, and whether local providers offer installation assistance, calibration, and occasional re-testing services. A good local option should provide a quick response time for replacements or service calls, especially in basements or crawl spaces where leaks are most common. If possible, request a demonstration or a remote setup check to verify that alerts are promptly delivered and that the device works with your smartphone or smart home hub. Finally, compare the total cost of ownership, including batteries, potential monthly monitoring fees, and replacement parts, to ensure you’re selecting a solution that fits your budget over the long term.
Installation tips you can do yourself
DIY installation is feasible for most residential detectors, particularly wireless models. Start by mapping your home’s risk zones and selecting a few target locations: beneath sinks, near water heaters, around washing machines, and in the basement. Mount detectors at a height and location that maximize sensitivity to rising moisture without being obstructed by cabinets or furniture. For floor-mounted units, place them on the floor where leaks are most likely to pool.
Follow the manufacturer’s mounting guidelines and verify that each device has a stable power source or fresh batteries. If you’re using a hub-based system, ensure the hub is centralized for consistent connectivity. Perform a test after installation by pouring a small amount of water near the sensor or triggering a leakage test if the device includes a dedicated test mode. Document the test results and set up notifications on your phone, tablet, or smart speaker so you receive alerts immediately. Finally, create a simple maintenance routine: inspect batteries quarterly, perform a sensor check every six months, and reassess placement after major renovations.
How to verify a detector's effectiveness and reduce false alarms
Regular verification is essential to maintain detector reliability. Create a routine to perform a weekly quick test: trigger the test button or apply a small amount of water near the sensor and confirm that an audible alarm and push notification occur within seconds. Calibrate the sensitivity in environments with high humidity or potential for mist. If you notice frequent false alarms, recheck placement (avoid vents, humid bathrooms, or dusty shelves) and clean sensor surfaces gently with a dry cloth. Ensure the device isn’t exposed to direct sunlight, heat sources, or steam from cooking that can skew readings.
Consider pairing detectors with a centralized monitoring routine. A simple rule of behavior is to check that all alerts are reflected on your phone within moments of triggering. If you rely on a smart hub, ensure the automation doesn’t create delays due to network congestion or battery-saving modes. Maintain software updates and review any firmware changes that improve detection logic or reduce nuisance triggers. If false alarms persist, contact customer support for a site-specific calibration or consider relocating the unit to a more appropriate location.
What to do when a leak is detected: immediate steps and longer-term fixes
Immediate actions matter when a leak is detected. If you receive an alert, locate the water supply shutoff valve to minimize further damage. If you’re unsure about the leak’s source, call a licensed plumber to assess the premises, especially if you detect dampness behind walls or beneath cabinets. Document the moisture patterns with photos or video for insurance purposes and to guide the repair. While awaiting professionals, move valuables to higher ground and place towels or absorbent materials to limit water spread.
In the longer term, identify and address the root cause. Replace worn-out hoses on appliances, seal joints where moisture migrates, and consider installing additional detectors in other high-risk zones. Look into a preventive maintenance plan that includes regular inspection of plumbing lines, appliance fittings, and water heaters. To prevent recurring incidents, install check valves, improve drainage around the home foundation, and maintain proper ventilation to minimize humidity-induced mold growth. By combining proactive placement with timely alerts, you can significantly reduce the risk and impact of future leaks.
Cost considerations and warranty expectations
Cost varies with detector type and installation complexity. DIY wireless detectors typically range from $20 to $60 per unit, with multi-sensor kits or smart hub integration costing more. For homes with multiple risk zones or complex plumbing, you may invest in a small system of interconnected sensors that communicate with a central app. Professional installation adds to the upfront cost but can yield better coverage in hard-to-reach spaces and provide a professional calibration for optimal sensitivity.
Warranty terms vary by brand and model but generally cover manufacturing defects for one to three years. Some suppliers offer extended warranties or bundled service plans that include periodic re-testing and sensor replacement. When evaluating options, calculate total cost of ownership, including batteries, potential professional maintenance, and any ongoing monitoring fees. Finally, consider ROI in terms of water damage prevention, insurance premium impact, and peace of mind for your family.
Comparison of common water leak detector setups
| Detector Type | Typical Use Case | Pros & Cons |
|---|---|---|
| Wireless detector (battery) | Basement, kitchen, laundry | Pros: easy install; portable; easy to relocate; Cons: battery life varies, needs replacements |
| Wired detector (hardwired) | Permanent monitoring | Pros: constant power; fewer battery concerns; Cons: higher installation effort |
| Smart hub integrated | Centralized monitoring | Pros: unified alerts; Cons: depends on hub/network |
| Appliance-based sensors | Near washers/dryers | Pros: direct appliance coverage; Cons: higher cost |
Questions & Answers
How quickly can a water leak detector respond after a leak starts?
Most detectors trigger audible alarms within seconds of moisture contact, with smartphone notifications arriving within a few seconds to a minute depending on network latency. Regular testing helps ensure timing stays reliable.
Most detectors sound and send a notification within seconds of moisture contact, and you’ll see the alert on your phone almost immediately when tested.
Do I need to replace my current detectors if I move homes or relocate?
Detectors can be moved to new risk zones if the layout changes, but verify power and connectivity in the new location. Recalibrate sensitivity after moving, and perform a test to confirm alerts trigger correctly.
You can move detectors, but recheck setup and run a test after relocation.
Are smart detectors compatible with home assistants like Alexa or Google Home?
Many smart detectors offer app control and integrate with major home assistants. Check compatibility lists and ensure the hub or app can handle multiple alerts across rooms.
Yes, most smart detectors work with popular home assistants through their companion apps.
What is the typical lifespan of a water leak detector?
Lifespan varies by model and battery life; expect several years for wired units, and 1–3 years for most battery-powered devices with regular battery replacements.
Most detectors last several years; expect battery swaps for wireless models.
Can these detectors detect hidden leaks behind walls?
Yes, many detectors sense moisture migration that can indicate hidden leaks behind walls or under flooring, but detection may be less direct and may require professional inspection to confirm the source.
They can catch moisture moving behind walls, but a plumber may still need to locate the exact leak.
What is the best placement for detecting leaks?
Place near major water sources (under sinks, near water heaters, around appliances) and along basement walls. Avoid direct sun, vents, or humid zones like bathrooms when possible to reduce false alarms.
Put them near where leaks happen most, away from vents or steamy spots.
“Effective leak detection hinges on proper sensor placement, system testing, and regular maintenance. There is no one-size-fits-all solution; tailor your setup to your home layout.”
Main Points
- Act quickly: a local detector reduces water damage time.
- Choose multi-channel alerts for reliability.
- Place sensors in high-risk zones for best coverage.
- Prefer detectors with replaceable batteries or easy maintenance.
- Always test detectors after installation and annually thereafter.