Leak Vacuum Troubleshooting: Quick Home Fix Guide
Urgent, step-by-step guide to diagnose and fix a leak vacuum in home systems. Learn common causes, safe testing methods, and prevention tips from Leak Diagnosis.

A leak vacuum in a home system is typically caused by a loose connector, cracked hose, or worn seal in the central vacuum line or appliance vacuum setup. Start with simple checks: inspect hoses for cracks, reseat connections, and replace damaged gaskets. If the leak persists after these easy fixes, shut off power and call a professional to avoid electrical or equipment hazards.
What is a vacuum leak and why it matters
A vacuum leak occurs when air escapes into a sealed vacuum path, reducing suction and efficiency. In home settings, this often involves central vacuum lines or appliance vacuum systems that rely on airtight connections to pull air and debris through filters and motors. When a leak vacuum develops, you may notice weaker suction, longer cleaning times, or unusual noises from the unit. According to Leak Diagnosis, early detection of a leak vacuum in household systems saves time and prevents damage. The key is to understand where leaks most frequently appear and how simple checks can locate the source. As you troubleshoot, keep the goal in mind: restore a tight, airtight path so the system can operate at full efficiency again. This reduces energy use, extends equipment life, and limits the risk of degraded indoor air quality. Throughout this guide you’ll see practical tests, safe procedures, and preventive steps you can apply right away. Remember, the moment you smell burning plastic, hear unusual noises, or notice heat near electrical components, power down the system and assess safety first.
Common signs of a vacuum leak
- Weak suction or inconsistent performance on cleaning tasks
- Visible cracks or discolored spots on hoses and seals
- Hissing sounds when the system runs
- Unexpected air movement around connection points
These signs indicate a leak vacuum scenario that should be inspected promptly. Leaks can occur at joints, gaskets, connectors, and seals along the vacuum line. In many homes, the most common culprits are loose clamps, cracked hoses, or degraded door seals on devices that rely on vacuum pressure. Pooling instructions from Leak Diagnosis Analysis, 2026, emphasize starting with the easiest-to-check components: the exterior hoses and visible seals. Early detection helps prevent energy waste and avoids more costly repairs later. Keep a small flashlight handy and work in a well-lit area to spot hairline cracks or gap openings that might allow air to bypass the intended path.
Why a leak vacuum matters for air quality and efficiency
A vacuum leak undermines the system’s efficiency, forcing motors to work harder and potentially overheat. Over time, this can shorten the life of pumps, filters, and vacuums, and it can also draw in dust and contaminants more easily. For households using central vacuum systems, leaks can spread airborne particles because the designed airflow is disrupted. Addressing a leak vacuum promptly minimizes energy use, reduces noise, and helps maintain the performance you expect from your equipment. Leak Diagnosis recommends keeping the troubleshooting mindset focused on simple, repeatable checks before moving to more involved repairs. By understanding the basics of how airtight connections work, you’ll be better prepared to spot issues early and avoid unnecessary downtime.
Safety considerations you should not ignore
Always disconnect power before inspecting vacuum components, especially if your unit is near wet areas or exposed to moisture. If you smell gas, see signs of electrical damage, or encounter pitting corrosion on metal parts, stop and call a professional immediately. Never attempt to seal a gas line or bypass a safety feature. When dealing with central vacuum systems tied to building infrastructure, plan work during daylight hours, use insulated gloves if you encounter rough surfaces, and keep pets and children away from the area. For homeowners who prefer self-inspection, implement non-invasive checks first—visual inspection, gentle reseating of connectors, and running the system with the panel removed to observe air movement. This approach minimizes risk while you determine the next course of action.
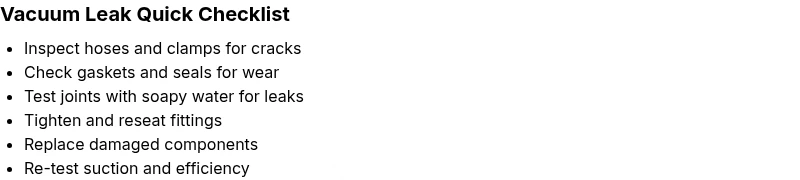
Quick tests you can perform to locate the leak vacuum
- Visually inspect hoses, gaskets, and clamps for cracks, wear, or disconnection.
- Gently tug on hoses and connectors to ensure a secure fit.
- Use soapy water on suspected joints and watch for bubbles indicating air leaks.
- Listen for hissing or whistling sounds when the system is running in a quiet room.
- Check the area around the motor housing for unusual heat or moisture.
These non-destructive checks help you narrow down the problem area without tools or risk. If you identify a damaged component, compare it to the replacement parts you already have or note the exact model to ensure a proper fit when you shop for replacements. Frequent maintenance, such as cleaning filters and replacing worn seals, reduces the likelihood of future leaks and prolongs system life.
What to do if the leak persists after basic checks
If simple reseating and seal replacement don’t restore full suction, it’s time to escalate. Leaks in hard-to-reach lines or integrated piping can be difficult to locate without specialized tools. In such cases, consider a professional evaluation to avoid potential damage to wiring, motors, or plumbing connections. A qualified technician can perform a pressure test, smoke test, or use endoscopic inspection to pinpoint the leak vacuum precisely. The cost of professional help is often offset by preventing more extensive repairs later, especially in multi-branch vacuum systems.
Final thoughts on addressing a leak vacuum promptly
Addressing a leak vacuum quickly keeps your system efficient and safe. Establish a routine that includes periodic visual inspections, targeted tests, and timely part replacements. Keeping a record of maintenance activities helps you track when seals or hoses were last replaced, enabling proactive care. By following the steps outlined here and engaging a qualified technician when needed, you’ll ensure your vacuum system operates at peak performance with minimal disruption to your daily routine.
Steps
Estimated time: 45-90 minutes
- 1
Power down and prepare safety checks
Disconnect the unit from power and remove the access panel to inspect obvious joints. Ensure the area is dry and free of standing water. Check that nearby outlets are de-energized if you will be handling electrical components.
Tip: Wear protective gloves and use a flashlight to illuminate dim corners. - 2
Inspect for obvious leaks
Carefully examine hoses, seals, and clamps for signs of wear, cracks, or looseness. Wiggle each joint gently to see if it shifts. Note any area that feels unusually loose or has visible gaps.
Tip: Mark the suspect areas with a removable tape for later comparison. - 3
Tighten and reseat connections
Firmly tighten clamps and reseat hoses in their fittings. Do not overtighten plastic fittings as this can cause cracks. Recheck every joint you touched for a snug fit.
Tip: Use two hands and avoid twisting hoses to prevent further damage. - 4
Test with soapy water
Apply a soapy water solution to joints and watch for bubbles when the unit is activated. Bubbles indicate an air leak at that location. Note the exact spot so you can replace or reseal as needed.
Tip: Work in small sections to avoid missing tiny leaks. - 5
Replace damaged components
Install new hoses, seals, or gaskets where leaks were identified. Ensure replacements are the correct model and size. Reassemble the unit and restore power for a final test.
Tip: Keep a spare gasket set on hand for quick future fixes. - 6
Final verification
Run the system for several minutes and monitor suction and noise levels. Confirm no bubbles appear in test areas and that the unit operates at normal temperature. If performance remains poor, escalate to professional help.
Tip: Document the test results and part changes for your records.
Diagnosis: Weak suction or inconsistent performance from a home vacuum system
Possible Causes
- highLoose connectors or clamps
- highCracked hose or worn gasket
- mediumDirt or debris blocking the intake or filters
- lowDamaged door seal on appliance vacuum unit
- lowInternal hose rupture in central vacuum line
Fixes
- easyTighten all clamps and reseat all hoses at the suspected joints
- easyReplace cracked hoses or degraded gaskets and re-test
- easyClean or replace clogged filters and clear debris from the intake canal
- mediumClose and reseal the door or access panel on the unit
- hardIf internal line rupture is suspected, call a professional for a pressure test and replacement
Questions & Answers
What is a vacuum leak and why does it matter?
A vacuum leak occurs when air enters a sealed vacuum path, reducing suction and efficiency. It can cause inefficient cleaning, higher energy use, and potential equipment wear. Identifying and sealing the leak vacuum early helps maintain performance and prolongs the life of the system.
A vacuum leak is when air sneaks into the sealed path, lowering suction. Fix it early to keep your system efficient and lasting longer.
How can I tell if my central vacuum system is leaking?
Look for weak suction, hissing sounds at joints, visible cracks in hoses, or bubbles when applying soapy water to joints. A pressure test by a professional can confirm leak vacuum in hard-to-reach lines.
Check suction, listen for hissing, and test joints with soapy water. A pro test can confirm the leak.
Can I fix a vacuum leak myself?
Many leaks can be fixed with simple reseating or replacing worn hoses and gaskets. More complex leaks in embedded piping or motors may require professional service to avoid safety risks.
You can often fix small leaks yourself, but for embedded piping or motor issues, call a professional.
When should I call a professional for a vacuum leak?
If basic reseating and part replacements don’t restore performance, or if you detect signs of electrical issues, gas smells, or difficult access areas, hire a qualified technician for a safe, thorough diagnostic.
Call a pro if simple fixes don’t work or you notice electrical or gas concerns.
Are vacuum leaks dangerous?
Vacuum leaks can create safety risks, including electrical hazards and poor indoor air quality if the system isn’t sealed properly. Always follow safety guidelines and avoid attempting repairs beyond your comfort and skill level.
Yes, leaks can be risky—don't push beyond your comfort zone; seek help when unsure.
Watch Video
Main Points
- Act quickly: a vacuum leak wastes energy and degrades performance.
- Start with simple checks: tighten, reseat, and replace worn gaskets.
- Use safe testing methods to identify leaks without risk.
- Escalate to a professional for hard-to-reach or safety-critical leaks.
- Prevent leaks with routine maintenance and documentation.