Leak Down Test Without a Tester: A DIY Guide
Learn how to perform a leak down test without tester using common tools. This educational guide from Leak Diagnosis covers safety, practical steps, and how to verify results before contacting a professional.

Learn how to perform a leak down test without tester using common household tools. This quick guide outlines the safe approach, key steps, and how to interpret results without professional equipment. You'll know when to stop, how to verify findings, and what to do next before contacting a plumber for guidance.
Understanding the leak down test without tester: what it is and why it matters
A leak down test is a method used to detect leaks in plumbing, appliances, or drainage paths by introducing a safe test medium and monitoring pressure or flow changes. When you lack specialized equipment, performing a tester-free version can still reveal obvious leaks and help you narrow down suspect areas. According to Leak Diagnosis, the goal of a tester-free approach is to spot major leaks and provide a clear plan for repair before engaging a professional. In typical home scenarios, this method is most effective for quick checks behind appliances, under sinks, and along accessible pipe runs. The process emphasizes conservative pressure, careful observation, and precise documentation of all observations. While it cannot replace calibrated tools, it offers homeowners a practical starting point that supports safer, lower-risk troubleshooting. If you observe consistent drops in pressure or persistent wet spots, mark the location, extend your inspection, and prepare a repair plan. This block sets the stage for practical, safe testing without specialized testers. It also introduces the keyword leak down test without tester to keep the topic front and center for readers seeking DIY guidance.
Two important notes: first, this approach is intended for identifying obvious leaks and does not replace professional testing for critical systems; second, safety is paramount, especially when working around hot water, electrical outlets, or gas lines.
Tools & Materials
- Digital pressure gauge or manometer(Choose a model suitable for low-pressure household testing.)
- Shut-off valves or service valves(Needed to isolate sections being tested.)
- Safe test medium (water) or inert gas with caution(Water is generally safer for tester-free tests.)
- Bucket or container(To collect any incidental spills during the test.)
- Soap solution or bubble test liquid(Helps visually identify leaks at joints.)
- Flashlight(Use to inspect dark corners of cabinets and basements.)
- Marker or masking tape(Label test zones and observed changes.)
- Gloves and rags(For safety and cleanup during the test.)
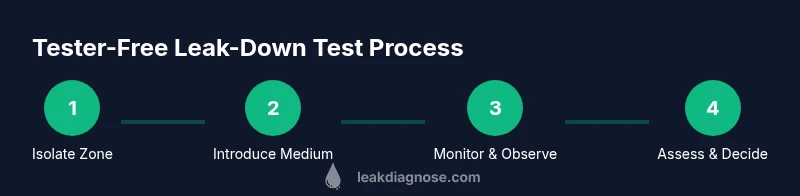
Steps
Estimated time: 45-75 minutes
- 1
Prepare and isolate the test area
Identify the zones to test (e.g., under sinks, behind appliances, drainage lines). Close or isolate the relevant valves to limit the test to a single section. The goal is to contain the test area and reduce false signals from adjacent pipes.
Tip: Label each zone clearly so you can revisit the same spot during verification. - 2
Choose a safe test method
Decide to use water as the test medium or a minimal, non-compressive gas approach, depending on the system. Avoid high-pressure sources and never use compressed air on living systems. This choice minimizes the risk of ruptures or dangerous releases.
Tip: Water-based tests are often safer for home plumbing and easier to observe with a quick visual check. - 3
Build a baseline observation
Record initial readings and visual conditions before introducing the test medium. A stable baseline makes it easier to spot a real drop or change later. Mark the measurement points and ensure you have an adequate viewing angle.
Tip: Take a photo or mark the gauge with a piece of tape for easy comparison. - 4
Introduce the test medium gradually
Start with the chosen medium in a controlled way, ensuring the pressure increases gradually to avoid shocks. Observe the section for any signs of movement, dampness, or leaks. Do not exceed your comfort and safety thresholds.
Tip: If using water, stop if you see unexpected backflow or loud noises. - 5
Monitor pressure and observe changes
Keep an eye on the gauge over a defined window (e.g., several minutes) and look for a stable reading or a slow drop. Small, consistent drops can indicate a leak; a sharp drop typically signals a larger issue. Document what you see.
Tip: Compare readings at multiple time points to distinguish a slow leak from a quick loss. - 6
Inspect suspected joints and components
With the area pressurized, physically inspect joints, fittings, hoses, and valves for signs of moisture, sweating, or bubbles if using soap solution. Tighten connections gently where appropriate and consistent with manufacturer guidance.
Tip: Use a flashlight to illuminate joints from multiple angles to catch small leaks. - 7
Isolate and re-test if needed
If you detect a potential leak, isolate the suspected segment and re-test to confirm. Repeating the test after tightening or reseating components helps verify the fix before moving on.
Tip: Always re-check after any adjustment to ensure the leak is resolved. - 8
Record results and plan next steps
Document the findings with notes and photos. Decide whether to perform a more thorough internal inspection, replace a connector, or contact a professional for persistent or high-risk leaks.
Tip: Keep a simple, organized test log for future reference.
Questions & Answers
What is a leak down test without a tester, and when should I use it?
A tester-free leak down test uses common tools and no specialized equipment to check for leaks in accessible plumbing zones. It’s best for quick, non-critical triage to identify obvious leaks before engaging professional services.
A tester-free leak down test is a DIY check you can do with basic tools to spot obvious leaks before calling a pro.
Is a tester-free test safe for all home plumbing?
No. Tester-free methods are safer for basic checks and small systems. Do not use high pressure or gas on living systems; proceed with caution and consider seeking professional help for complex or hidden leaks.
It’s safer for simple checks, but don’t push high pressure and get a pro for complex systems.
What tools do I need to start?
Essential tools include a pressure gauge or manometer, isolation valves, a safe test medium like water, and a means to observe joints (flashlight, soap solution). These enable a basic, safe tester-free assessment.
You’ll need a gauge, isolation valves, water, and a flashlight to inspect joints.
How long should I observe the test?
Plan for several minutes of monitoring after introducing the test medium. Look for stable readings or a consistent drop in pressure to indicate a leak site.
Watch the readings for a few minutes to confirm a leak pattern.
What signs indicate a real leak vs. a temporary fluctuation?
A real leak typically shows a steady or increasing drop in pressure or visible moisture over time. Short or irregular fluctuations are more likely transient or due to air in the line.
Consistent pressure loss or visible moisture means a real leak; small fluctuations can be normal.
When should I call a professional?
Call a professional if there’s persistent pressure loss, leaks that require specialized tools, gas lines, or if you’re unsure about safety. A professional can perform calibrated tests and ensure safe remediation.
If leaks persist or involve gas lines or complex systems, contact a pro.
Watch Video
Main Points
- Isolate test zones to prevent cross-interference.
- Water is often the safest tester-free method for leaks.
- Document baseline and follow up with verification checks.
- Stop testing if you notice sudden pressure drops or active leaks.
- Use tester-free tests as a first step, not a final diagnosis.