Urgent Leak Troubleshooting Guide: Find and Fix Leaks Fast
A practical, urgent guide to diagnose and fix leaks in homes. Learn step-by-step checks, safety tips, and when to call a pro to prevent water damage.

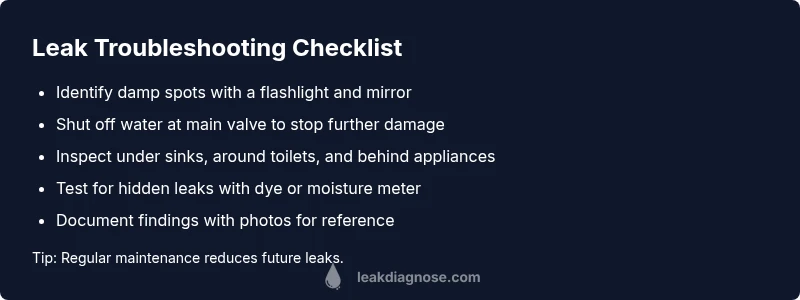
Most leaks start at faucets, supply lines, or appliance connections. Quickly stop damage by shutting off the main water valve and drying the area. Then inspect under sinks, behind appliances, and around toilets for damp spots or puddles. If you can’t locate the source, follow the diagnostic flow for a systematic path to repair.
Why Leaks Happen
A leak is water escaping from its intended path, and understanding why it happens helps you respond quickly. According to Leak Diagnosis, most residential leaks originate from worn seals, loose fittings, or damaged supply lines and can escalate if ignored. Leaks may also stem from appliance connections or hidden pipe faults behind walls. Early signs include damp patches on ceilings or walls, a persistent drip, unexplained increase in water bills, or the musty odor of mold near affected areas. Recognizing the pattern of a leak gives you leverage to stop damage and plan a safe repair. In many homes, the culprit is a simple, fixable component rather than a wholesale pipe replacement, which is why a methodical approach matters.
Key takeaways: keep an eye on fittings, seals, and appliance hoses, and address any moisture quickly to prevent bigger problems.
Common Domestic Leak Sources
Leaks don’t always announce themselves with a dramatic spray. Often they begin as small drips from common household points. The most frequent culprits are dripping faucets, loose supply line connections, and worn toilet seals. Appliance connections—such as dishwasher hoses, washing machine taps, and refrigerator ice-maker lines—are also frequent leak sources because they experience regular movement and pressure changes. In many cases, mineral buildup and corrosion over time weaken joints. Leak Diagnosis analysis highlights that many home leaks originate at these accessible locations, making them highly actionable for DIY troubleshooting. Keep a simple inventory of likely hotspots and check them first when you notice moisture or sounds of running water.
Pro tip: document moisture with photos to track changes over time and avoid repeating checks.
Quick Safety First: Stop Water & Assess
Before you chase the source, ensure safety. If you suspect a significant leak, shut off the main water valve to stop the flow and prevent water damage. If the leak is electrical or occurs near outlets or appliances, turn off power to the affected area only after you’ve stopped the water, and do not touch wet surfaces. Dry the area with towels to prevent slip hazards and to improve visibility for inspection. When handling suspected gas-adjacent lines, evacuate and call professionals. Remember, water plus electricity is a dangerous combination; prioritize personal safety over speed of repairs.
Safety note: never use electrical devices in standing water and always wear protective gloves when inspecting damp areas.
How to Perform a Basic Inspection
A systematic inspection helps identify the leak source without invasive measures. Start with visible fixtures under sinks and around toilets. Inspect hose connections, supply lines, and shutoff valves for signs of moisture or mineral deposits that indicate slow seepage. Look for staining on ceilings or walls that could reveal a concealed leak behind drywall. Use a moisture meter or a simple dye test for fixtures you can’t see directly: add a non-toxic dye to the water supply or toilet tank and watch for color changes downstream. Keep the area well lit and take notes of what you find.
Documentation makes it easier to decide whether you can fix the issue yourself or need a pro.
Interpreting Signs and Tests
Not all leaks leave obvious evidence. A faint, persistent odor of dampness can signal hidden moisture behind walls. Tiny beads of water on pipe joints after operation suggest a slow leak that could worsen with time. If you notice white crust (calcium buildup) around fittings, that’s a sign of ongoing seepage. A change in the rate of water flow or a rise in the water meter when no taps are on also points to a leak somewhere in the system. In situations where you’re uncertain, trust a methodical diagnostic flow rather than guessing, as hidden leaks can cause mold, wood rot, and structural damage over time.
Note: a record of symptoms helps with future prevention and when you escalate to a professional.
When to Hire a Professional
While many leaks are manageable with basic tools, some problems require licensed expertise. If the source is behind walls, ceilings, or involves gas lines, or if you cannot identify the leak after basic checks, it’s time to call a plumber. persistent or rapidly worsening leaks demand professional assessment to prevent water damage and ensure safety. The Leak Diagnosis team recommends a staged approach: secure the area, document findings, and seek professional help when structural or electrical risks exist, or when DIY attempts do not stop the flow. Clear communication with a pro speeds up repair and reduces risk to your home.
Professional reminder: do not delay if you smell gas or hear running water you cannot locate.
Prevention: Protect Your Home From Leaks
Prevention starts with routine checks and proactive maintenance. Schedule annual inspections of hoses, fittings, and seals; replace worn washers and aging supply lines before they fail. Winterize exposed pipes in cold climates to prevent freezing and splitting. Use drip pans under appliances where feasible, and install moisture alarms or water sensors near high-risk areas like laundry rooms and basements. Keep a simple leak-detection kit on hand and review it quarterly to stay ahead of issues. Small, consistent maintenance can significantly cut the risk of major water damage.
Diagnostics at a Glance (What to check first)
- Faucets: inspect handles, aerators, and seals for dampness or mineral buildup.
- Toilets: check the base and internal components for slow leaks; perform a dye test if unsure.
- Appliances: examine hoses and fittings behind washers, dishwashers, and refrigerators.
- Piping: look for damp spots on walls and ceilings, and listen for running water in quiet rooms.
- Drainage: verify that sinks and tubs drain properly and do not trap water that could backflow.
- Exterior: watch for staining around exterior pipes or irrigation connections that might indicate broken lines.
If you detect moisture in any of these areas, document it and plan a targeted fix. The goal is to stop the leak quickly and prevent escalation.
What to Do Next: Quick Reference Cheat Sheet
- Shut off the main water valve to stop the leak.
- Dry the area and take photos for records.
- Inspect obvious sources first (under sinks, near toilets, appliance hoses).
- If not found, perform a dye test or call a pro.
- After repairs, monitor the area for 48 hours to confirm the fix.
Final Note on Leaks and Home Health
Leaks threaten your home’s structure, indoor air quality, and financial health. By adopting a deliberate, layered approach—safety first, basic inspections, and professional escalation when needed—you can minimize damage and save water. The Leak Diagnosis team emphasizes routine maintenance as a cornerstone of long-term leak prevention and home resilience.
Steps
Estimated time: 45-90 minutes
- 1
Shut off water and secure area
Locate the main water shutoff and turn it clockwise until it stops. If the leak is near an appliance or fixture, shut off its dedicated valve first. Clear the area of valuables and protect flooring with towels or a tarp.
Tip: Take a quick photo of the valve position before you start repairs. - 2
Inspect obvious leak sources
Check faucets, hoses, and visible pipe joints for moisture, crust, or staining. Wipe surfaces dry to better identify active drips. Listen for the sound of running water to pinpoint the general area.
Tip: Use a flashlight at low angles to catch drips more clearly. - 3
Perform a simple dye test
For toilets, add food coloring to the tank and wait 15–30 minutes to see if color shows in the bowl. For sinks and fixtures, add dye to the water stream and watch downstream for color changes.
Tip: Only use a small amount of dye to avoid staining and to make changes easy to spot. - 4
Check behind appliances
Carefully inspect hoses and fittings on the washer, dishwasher, and fridge ice maker for moisture. If possible, gently move units to inspect the back panels and connections without pulling the appliance forward.
Tip: Unplug appliances and turn off their water supply valves before touching hoses. - 5
Assess the wall or ceiling area
If you suspect a hidden leak, monitor the area for 24–48 hours after putting on a temporary seal. Look for new damp patches or changes in color and texture that indicate ongoing seepage.
Tip: Keep a log of changes with dates and photos. - 6
Decide on the repair path
If the leak is minor and localized, you may tighten fittings or replace inexpensive hoses. For concealed pipes or structural concerns, plan a professional assessment to avoid damage.
Tip: If you’re unsure, pause and call a pro rather than risking further harm.
Diagnosis: Visible water stain or damp area on wall, ceiling, or under sink
Possible Causes
- highLoose or degraded fittings at faucets, hoses, or supply lines
- mediumConcealed pipe leak behind wall or cabinet
- lowWorn toilet flapper or seal causing slow seepage
Fixes
- easyTighten fittings and replace worn washers or hoses
- mediumIsolate the area and perform dye tests to confirm concealed leaks; access panel or wall opening may be required
- mediumRepair or replace faulty toilet seal or flapper, then test for continuous flushes
- hardIf leak persists behind walls, call a licensed plumber for a pressure test and concealed leak repair
Questions & Answers
What is the first thing I should do if I spot a leak?
Shut off the main water supply to stop damage. Dry the area and inspect obvious sources. If you can't locate the source, follow the diagnostic flow for a systematic path to repair.
First shut off the water and inspect the area. If you can’t find the source, use the diagnostic flow for a safe path to repair.
How can I tell where a leak is coming from inside a wall?
Look for damp patches, unusual odors, or sounds of running water. Use dye tests near fixtures and monitor changes in the surrounding area. In ambiguous cases, a professional assessment is recommended.
Look for damp spots or sounds behind the wall and consider a professional test if unsure.
Are minor drips a big deal?
Yes, even small leaks waste water and can cause mold or structural damage if ignored. Address minor drips promptly and monitor for changes.
Even tiny drips matter; fix them to prevent bigger problems.
When should I call a plumber for a leak?
If the leak is behind walls, in ceilings, or involves gas lines, or if you cannot identify the source after basic checks, contact a licensed plumber.
Call a plumber if you can’t locate the leak or if it involves hidden areas.
What safety precautions should I take?
Turn off power to nearby outlets if water is present. Avoid using electrical devices near standing water and wear protective gloves.
Stay safe and avoid electricity near water; turn off power if needed.
Can a leak be prevented with maintenance?
Yes, regular inspections, replacing worn washers, and winterizing pipes reduce leak risk and protect the home.
Regular checks and maintenance reduce leaks.
Watch Video
Main Points
- Identify the likely leak source quickly and start with the simplest fix
- Shut off water before inspecting to minimize damage
- Use dye tests to locate concealed leaks safely
- Document findings for future reference and maintenance
- Call a pro when leaks involve concealed pipes or safety risks