How to Make Leak Detection Fluid: DIY Guide
Learn safe, practical methods to craft leak detection fluid at home using soap solutions or UV-dye, with step-by-step testing tips and storage guidance.

This guide teaches you how to make leak detection fluid using two reliable formulas: a soap-based bubble test and a UV-dye test. You’ll gather simple, non-toxic ingredients and learn safe testing steps to identify leaks in plumbing or appliances. Use this quick workflow to prepare solutions, test joints, and document results.
What is leak detection fluid and why you might need it
Leak detection fluid is a practical, non-toxic liquid used to visually reveal leaks in plumbing, appliances, and ductwork. For homeowners and DIY enthusiasts, homemade leak detection fluid can save time and money by highlighting problem areas before they become big leaks. According to Leak Diagnosis, understanding how to make and apply leak detection fluid empowers you to verify seals, joints, and fittings without heavy or specialized equipment. The basic concept is simple: the liquid creates visible bubbles or fluorescence where gas or liquid is escaping, allowing you to pinpoint the exact location of a leak. This blocks discusses two primary approaches—soap-based bubble tests and UV-dye tests—and explains when each method is most effective. It also covers safety, storage, and disposal considerations so you can test confidently and responsibly.
Essential ingredients and two reliable formulations
To cover the most common leak-detection needs, you’ll typically use two formulations: a soap-based bubble solution and a UV-dye solution. The soap solution is quick, inexpensive, and safe for most household testing. The UV-dye approach adds fluorescence under a UV light, helping reveal tiny leaks that are hard to see with bubbles alone. For the soap solution, you generally mix a small amount of dish soap with clean water to create suds that form bubbles at leak points. For the UV-dye option, choose a non-toxic, food-grade dye or a UV-reactive dye that is labeled safe for household use. Always start with small volumes and label your mixtures clearly. If you’re testing near electrical components, isolate power and wear protective gloves. Per guidelines from Leak Diagnosis, avoid mixing cleaners with reactive chemicals and never use solutions near heat sources or open flames.
How to make a basic soap-based leak detector
A soap-based leak detector relies on surface tension reduction to form visible bubbles where escaping air or liquid meets the solution. Begin by filling a clean container with warm water. Add 1–2 teaspoons of plain dish soap per quart (about 1 liter) of water and stir gently until you see a light, stable foam. Transfer the solution to a spray bottle for easy application on suspected joints. Shake gently before use to re-suspend any suds. When you apply the solution to joints or seams, watch for continuous bubbles forming at the connection—these indicate a leak. Remember to test multiple angles and joints, since leaks can be directional and may only appear under pressure. After testing, rinse the area with clean water and dry it to avoid residue attracting dirt.
Using UV-reactive dye to locate tiny leaks
UV-dye testing adds fluorescence to the testing fluid, making faint leaks easier to spot under ultraviolet light. Start with a small amount of dye, such as 1–2 drops per liter of water, and mix thoroughly to ensure an even distribution. For more intense fluorescence, use a higher concentration within safe limits and avoid staining nearby surfaces. Apply the solution to the area around the suspected leak while the system is under pressure. Turn off ambient lighting and inspect with a UV flashlight to reveal glowing traces that indicate a leak path. Note that some dyes can stain porous materials or fabrics, so protect nearby surfaces with plastic or disposable coverings. The UV-dye method works well on metal and plastic seams where bubbles may be less visible, especially in tight spaces.
Testing technique and best practices
Effective leak testing relies on stable test conditions. Ensure the system is at normal operating pressure and that you have cleared the area of debris that could obscure bubbles or fluorescence. Apply the liquid to joints, valves, gaskets, and seam lines, then observe for bubbling or glow under UV light. Document the exact location, time, water temperature, and pressure during each test—these details help when communicating findings to a plumber or appliance technician. Use warm water for soaps to encourage better bubble formation, but avoid scalding temperatures that could harm seals. If bubbles disappear after cleaning or drying, re-test to confirm persistence. Leak Detection’s guidance emphasizes repeating tests to confirm leaks and avoiding rushed conclusions.
Safety, storage, and disposal considerations
Store all solutions in clearly labeled containers with child-safe caps. Keep soap solutions away from eyes and skin; wear gloves if you have sensitive skin or long testing sessions. Do not mix soap solutions with ammonia-based cleaners or harsh solvents, as chemical reactions can create hazardous vapors. UV-dye solutions should be handled in well-ventilated areas and disposed of following local regulations for household chemicals. When testing is complete, rinse the tested areas with clean water and wash the containers to prevent residue buildup. For extended testing or repeated use, prepare fresh soap solution daily and refrigerate dye solutions if recommended by the product instructions. The Leak Diagnosis team recommends prioritizing safety and documentation as you test.
Practical testing scenarios: faucets, hoses, and appliances
Commonly tested points include kitchen and bathroom faucets, supply lines, dishwasher connections, washing machine hoses, and appliance drain seams. Apply the soap solution around joints and watch for persistent bubbles under typical household pressures. For hidden leaks behind cabinets, spray the area from multiple angles and inspect with a flashlight or UV light if using dye. When testing gas appliances or fuel lines, do not rely on soap alone; use manufacturer-approved leak detectors and follow safety protocols. Always test one area at a time to isolate the leak source and reduce confusion. If you discover a leak, shut off the affected supply, document the location, and consider calling a licensed professional for repair.
Alternatives and when to choose commercially prepared fluids
If you need repeatable results or testing in professional contexts, consider commercially prepared leak-detection fluids designed for specific systems (gas, hot water lines, or HVAC). These products typically come with safety data sheets (SDS) and usage instructions that account for pressure, material compatibility, and environmental factors. For DIY testing on a budget, soap-and-water remains reliable for many domestic leaks, while UV-dye fluids are great for pinpointing faint leaks in dark spaces. Always assess the system’s material compatibility and the presence of any sensitivities to dyes before choosing a method. The best approach blends cost, safety, and accuracy for your particular leak scenario.
Troubleshooting and common mistakes
Common mistakes include over-diluting soap solutions (which reduces bubble visibility), using stained or scented detergents (which can mask leaks), and failing to test under realistic pressure conditions. If you don’t see bubbles, check that you’re applying the liquid properly and that the surface is clean. For UV-dye testing, ensure the dye is fully mixed and use a proper UV light to detect fluorescence. If you observe leaks only after long exposure, re-check connections and consider sealing with appropriate non-permanent sealants for temporary troubleshooting. Finally, document every test and its outcome to guide any future repairs or professional consultations.
Tools & Materials
- Water (warm, not hot)(Distilled water preferred for consistency; avoid mineral-rich water that can leave residues)
- Plain dish soap(Clear, non-antibacterial soap works best to form bubbles)
- Measuring spoons(1-2 tsp per liter; have a dedicated set for testing)
- Clean spray bottle(For even application on joints and seams)
- Mixing container(Non-reactive container (glass or BPA-free plastic))
- UV dye or food-grade fluorescent dye(Use only safe, non-toxic dyes; optional for fluorescence testing)
- UV flashlight (black light)(Needed if using UV-dye method; otherwise skip)
- Gloves(Protect hands during testing and handling dyes)
- Safety goggles(Eye protection if splashes are possible)
- Labels and marker(Label each bottle with formula and date of preparation)
- Trash bags or disposal containers(For safe cleanup and disposal of used solution)
Steps
Estimated time: Approximately 25-45 minutes
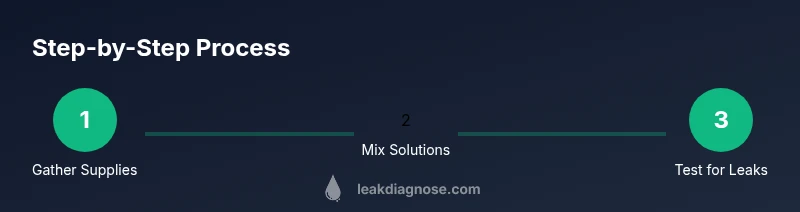
- 1
Gather supplies and prepare workspace
Collect all ingredients and tools in a clean, well-ventilated area. Lay out protective coverings on surfaces to prevent staining. This prepares you for efficient testing and minimizes cleanup time.
Tip: Set up a dedicated testing station to avoid cross-contamination with household cleaners. - 2
Mix soap-based leak detector
Combine warm water with 1–2 teaspoons of dish soap per liter of water. Gently mix to avoid creating excess foam that could obscure leaks. Pour into a spray bottle for easy application.
Tip: Label the bottle with the dilution ratio so you can reproduce the test later. - 3
Prepare UV-dye solution (optional)
If you’re using UV dye, add 1–2 drops per liter of water and mix thoroughly. Keep this container separate from the soap solution and clearly labeled.
Tip: Use non-toxic, food-grade dye and follow product instructions for safety data. - 4
Test a known, safe area first
Apply the soap solution to a control joint to confirm bubbles form as expected before testing critical connections. This validates that your test setup works properly.
Tip: Starting with a control helps you calibrate expectations and avoid false positives. - 5
Apply test solution to suspected leaks
Spray or brush the solution onto joints, seams, valves, and appliance connections. Observe for continuous bubbles indicating a leak under normal pressure.
Tip: Test from multiple angles to catch leaks that may only appear in certain orientations. - 6
If using UV dye, inspect under UV light
In a dark area, use a UV flashlight to scan for fluorescence. Trace any glowing paths to identify the leak’s route.
Tip: Move slowly and cover each suspect area methodically to avoid missing faint leaks. - 7
Record results and plan next steps
Document location, time, condition, and system pressure. Note whether the issue requires a simple seal, a gasket replacement, or professional service.
Tip: Take photos or notes to share with a plumber or appliance technician. - 8
Cleanup and storage
Rinse tested areas with clean water and dry them. Wash testing tools, label containers, and store liquids in a safe place away from children and pets.
Tip: Dispose of dye-containing wastewater according to local regulations.
Questions & Answers
What is leak detection fluid used for?
Leak detection fluid is used to visually reveal leaks in plumbing and appliances by creating bubbles or fluorescence at the leak point. It helps homeowners locate leaks without specialized equipment.
Leak detection fluid helps you spot leaks by showing bubbles or glow at the leak point, making hidden issues visible.
Can I reuse the fluid after testing?
Soap solutions can be reused for a short period if kept clean and free from debris, but dye-containing fluids should be replaced after testing to avoid staining and inaccurate results.
You can reuse the soap solution briefly if it stays clean; avoid reusing dye solutions for accuracy and staining concerns.
Is homemade leak detection fluid safe for all pipes?
Most soap and dye mixtures are safe for common plumbing materials, but avoid harsh concentrations on delicate finishes or sensitive metals. Always test on inconspicuous areas first.
Generally safe for typical pipes, but test a small area first and avoid strong concentrations on delicate materials.
What are signs of a successful leak test?
Persistent bubbling at a joint under system pressure or a glowing path under UV light indicates a leak. Absence of bubbles suggests no leak at the tested point.
If you see continuous bubbles or glow under UV light at a joint, that’s a leak. No bubbles usually means no leak there.
How long does the soap solution stay active on surfaces?
Soap bubbles can persist as long as the surface remains wet and bubbles aren’t disturbed. Re-apply if the surface dries before you finish testing.
Bubbles last while the surface is wet; reapply if it dries and you still need to test.
Should I consult a plumber for large leaks?
Yes. For major leaks, gas, or structural damage, consult a licensed professional. Leak detection fluid is a diagnostic aid, not a substitute for professional repair.
For large or dangerous leaks, call a licensed plumber. Fluid testing helps locate the issue, but professional repair is essential for big problems.
Watch Video
Main Points
- Prepare safe, labeled test solutions before testing.
- Soap solution quickly reveals leaks via bubbles at joints.
- UV-dye testing helps detect tiny leaks in dark spaces.
- Always test under normal operating conditions and document results.
- Follow local safety rules for disposal and cleanup.