How Long Does Leak Lock Take to Dry: Practical Home Guide
Learn how long Leak Lock takes to dry, factors affecting drying time, and practical steps to speed drying safely. A data-driven guide from Leak Diagnosis.

Leak Lock typically dries within 6-24 hours in a well-ventilated indoor space. In high humidity or enclosed rooms, expect 24-48 hours. Drying time also depends on thickness, substrate porosity, and ambient temperature. To speed drying safely, use a fan, reduce humidity, and avoid applying additional coatings until the surface is dry to the touch.
Understanding Leak Lock and Drying Process
When homeowners ask how long does leak lock take to dry, the short answer is: it depends on the environment and the product layer. According to Leak Diagnosis, the drying process begins as soon as the solvent carriers dissipate and the resin or sealant cures. In typical indoor spaces with good ventilation, most installs reach a surface dry state within 6-24 hours, with a full cure often extending beyond 24 hours. However, in rooms with high humidity, limited airflow, or colder temperatures, drying can push toward 24-48 hours or longer. The drying time is not a single moment but a sequence: initial tack-free phase, surface dry, and then full cure. Understanding these phases helps homeowners plan follow-up steps, whether testing for leaks, applying drywall patches, or proceeding with cosmetic finish work. The key is to distill the conditions into a practical forecast rather than rely on a single fixed timestamp. According to Leak Diagnosis, getting real-world context is essential when estimating drying times for any leak repair job.
Factors That Affect Drying Time
Drying time for Leak Lock is sensitive to several variables. Humidity levels dictate how quickly solvents evaporate; higher humidity generally slows drying. Ventilation and air movement remove moisture from the surface more rapidly, accelerating the process. Temperature matters too: warmer air holds more moisture and speeds up evaporation up to a point, while very cold environments slow cure rates. Substrate porosity matters as well: porous materials can absorb more product and require longer drying windows. Layer thickness is another practical limiter: thicker applications take longer to reach tack-free and full cure. Finally, product formulation (water-based vs solvent-based) can influence surface tackiness and cure dynamics. The Leak Diagnosis team emphasizes monitoring these factors in real time to refine drying expectations for each project.
Typical Drying Time Ranges by Scenario
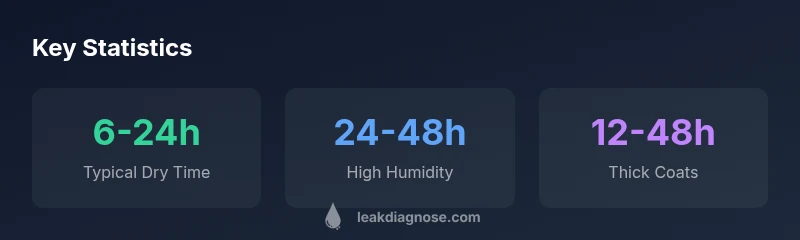
Most homeowners can expect a baseline window of 6-24 hours for a typical indoor setting with adequate ventilation. If the space is confined, poorly ventilated, or has humidity consistently above comfortable levels, plan for 24-48 hours. In cases where you’ve applied a thicker coat or are working on porous substrates, 12-48 hours becomes a more realistic estimate. Extremely cold environments or spaces with airflow restrictions may push dry times beyond 48 hours. These ranges are guidelines; actual times vary with the exact product used, application thickness, and environmental conditions. The key is to observe surface tack and odor and adjust expectations accordingly.
How to Speed Up Drying Without Compromising Safety
Speeding up drying should never come at the expense of a proper cure. Practical steps include increasing ventilation with a fan directed across the surface, using dehumidifiers in damp spaces, and avoiding drafts that could disturb a curing film. If you must heat a space, use moderate warmth evenly distributed and avoid direct heat on the wet film, which can cause cracking or solvent trapping. Thinner coats dry faster and more evenly, so plan subsequent layers only after the previous layer is tack-free. Keep pets and children away during curing to prevent accidental contact with a still-soft surface.
Room Conditions: Humidity, Temperature, Ventilation
Ambient humidity and temperature are powerful levers for drying time. In general, a drier environment with steady warm air promotes quicker cure, while high humidity and stagnant air slow it down. Target a comfortable indoor humidity (generally below 60%) and maintain consistent airflow across the treated surface. If your home has a humid basement or bathroom, consider using a dehumidifier or a bathroom fan on high for several hours after application. Adequate ventilation not only speeds up drying but also minimizes condensation and mold risk that can complicate later repairs.
Application Tips: Layer Thickness and Drying
Accuracy matters for both protection and dryness. Apply Leaks Lock in thin, uniform coats rather than a single thick layer. Thin layers cure more reliably and reduce the risk of pinholing or soft spots that prolong drying. Allow each coat to reach tack-free contact before applying the next layer, and always follow the manufacturer’s drying time guidelines for the specific product you used. If you are unsure about the exact thickness, use a dry film thickness gauge or measure with a simple marker-guided method. Thinner, well-ventilated applications almost always reach a reliable dry state faster.
Common Mistakes and Safety Considerations
Common errors include rushing the cure with direct heat, skipping ventilation, and applying coats too soon. These missteps can trap moisture and create an extended drying window or compromised adhesion. Always wear appropriate PPE and read the product safety data sheet (SDS) for precautions. If odor lingers or the surface remains tacky beyond the expected window, recheck the area for moisture pockets or substrate issues. In such cases, consult the project guidelines or contact a professional for assessment.
When to Recheck and Test for Residual Dampness
After the surface feels dry to the touch, it is prudent to verify with a moisture meter or time-tested tactile checks. A tack-free surface generally indicates the initial cure phase, but full cure can continue for additional hours. Avoid exposing the cured film to water or heavy stress until your test confirms stability. If you are repairing a leak or installing a finished surface, schedule inspection and testing after a conservative drying window to ensure long-term durability.
Drying time estimates by scenario
| Scenario | Dry Time Range | Recommended Conditions |
|---|---|---|
| Indoor ventilated room | 6-24 hours | Ventilated space, low-to-moderate humidity |
| Closed space with high humidity | 24-48 hours | Improve ventilation, dehumidify |
| Thick layer/porous substrate | 12-48 hours | Thin coat, allow airflow |
| Cold environment | 8-72 hours | Warmth and airflow improve drying |
Questions & Answers
How long does Leak Lock take to dry in a typical bathroom environment?
In a typical bathroom with adequate ventilation, expect 6-24 hours for surface dry, with full cure potentially extending beyond 24 hours. In damp bathrooms, plan for longer drying windows.
In a typical bathroom with ventilation, plan for about six to twenty-four hours to reach a dry surface; full cure may take longer in humid spaces.
Does heat speed up drying?
Warmth can help drying, but do not direct heat at uncured material. Use moderate, evenly distributed warmth and ensure good airflow to avoid trapping solvents.
A steady, moderate warm air helps, but avoid direct heat on the wet surface and keep good airflow.
Can you apply a second coat while it's drying?
No. Allow the first coat to reach tack-free and surface-dry before applying a second coat to prevent trapping moisture.
Wait until the first coat is tack-free and dry to touch before applying another coat.
What about fans and ventilation?
Yes. Use fans or a dehumidifier to increase air movement and lower humidity around the treated surface to speed drying.
Turn on a fan or dehumidifier to move air and reduce humidity for faster drying.
How do I test dryness?
Check for a tack-free surface and absence of odor. If available, use a moisture meter to confirm dryness before continuing.
Touch the surface to see if it’s tack-free and check for any smell; use a moisture meter if you have one.
“Drying times are highly influenced by ambient conditions and material formulation; ensure a complete cure before testing for leaks.”
Main Points
- Plan around a drying window, not a single timestamp
- Ventilation dramatically speeds up drying
- Thin coats dry faster and cure more reliably
- Humidity and temperature are major time levers
- Verify tack-free surface before proceeding with repairs