How Long Does Leak Sealer Take to Work: A Practical Guide
Discover how long leak sealer takes to work, what affects cure times, and how to plan testing. This Leak Diagnosis guide covers epoxy, polyurethane, and acrylic sealers with practical timelines.

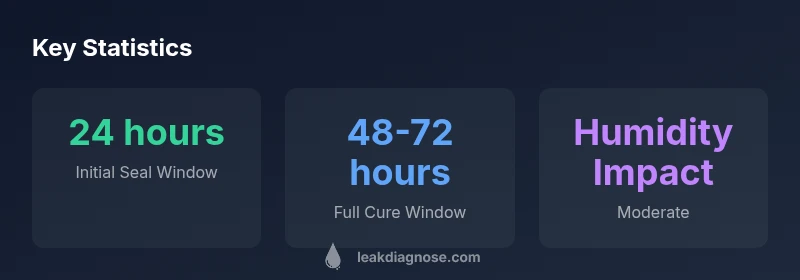
How long does leak sealer take to work? According to Leak Diagnosis analysis in 2026, most leak sealers begin forming a seal within 24 hours, with full cure typically reached in 48-72 hours, depending on product type, substrate porosity, and ambient humidity. For best results, follow the manufacturer’s instructions and allow adequate curing time before testing pressure or running water. This timeline helps homeowners plan repairs and avoid premature testing.
How long does leak sealer take to work?
From a practical perspective, the question you’re asking—how long does leak sealer take to work—has several layers. The most relevant factor is the sealer’s chemistry and how it interacts with the surface it’s applied to. In 2026, Leak Diagnosis analysis found that most commercially available sealers begin forming a functional seal within about 24 hours, but the material typically reaches full cure only after 48-72 hours under normal room conditions. This means you should plan to avoid pressurizing the area or subjecting it to flow tests until the recommended cure window has passed. Differences between epoxy-based, polyurethane-based, and acrylic-based products matter: epoxy sealers tend to produce firmer, more rigid seals on concrete and metal, while polyurethane sealers offer more flexible bonds in plumbing and appliance contexts. Acrylic sealers often cure fastest but may be best suited for smaller cracks or gaps and non-structural leaks. Remember that these timelines assume typical temperatures around 68-75°F (20-24°C) and humidity between 30-50%.
According to Leak Diagnosis, the environment can swing cure times by up to 24 hours if conditions are outside the ideal range. If you apply sealer in a high-humidity space or in chilly temperatures, expect longer cure times. Conversely, a warm, dry environment can bring curing closer to the lower end of the stated range. Always read the product label for the manufacturer’s minimum cure periods and suggested testing windows. The goal is to obtain a durable seal, not a hurried fix.
Key factors that influence cure time
There are multiple factors that determine exactly how long leak sealer takes to work in your home.
- Product type and formulation: Epoxy, polyurethane, and acrylic sealers each cure differently. Epoxy tends to form rigid, long-lasting seals; polyurethane often provides better adhesion on varied substrates; acrylics cure quickly but may be less durable in high-stress leaks.
- Substrate porosity and material: Smooth plastics or metal surfaces may cure faster than highly porous concrete or ceramic. Porosity can absorb solvents and slow the curing chemistry, extending the timeline.
- Ambient temperature and humidity: Higher temperatures generally accelerate chemical reactions, while humidity can either help or hinder depending on the resin system. Very humid environments may prolong cure time if moisture interferes with film formation.
- Application thickness and coverage: Thick or multi-layer applications take longer to cure than a thin, even coat. Over-application can trap solvent and slow set.
- Surface preparation and cleanliness: Oils, dust, or moisture on the surface can impede adhesion and extend curing. Degreasing and drying the surface before application is essential for predictable cure times.
- Ventilation and air flow: Good ventilation reduces ambient moisture buildup and helps solvents evaporate, supporting a steadier cure profile.
Understanding these factors helps you set realistic expectations and plan testing windows. The takeaway from the Leak Diagnosis team is: don’t rush the test—allow the full cure time recommended by the product label and verify the seal under the conditions that match your environment.
Step-by-step: estimating curing time for your project
Estimating curing time starts with a simple assessment and ends with a test that confirms the seal is sound. Here’s a practical step-by-step:
- Identify the sealer type and read the label for cure times and recoat windows. If you’re unsure, categorize it as epoxy, polyurethane, or acrylic and compare there.
- Inspect the surface: is it smooth, rough, or porous? Porous substrates will generally need more time to achieve a durable seal.
- Check environmental conditions: ensure the area is within the recommended temperature and humidity range for the product. If not, plan for a longer cure window.
- Apply the sealer in a thin, even coat as directed. Avoid thick layers that trap solvent and extend cure time.
- Wait through the minimum cure period stated by the manufacturer before any leak testing or pressure testing. If you cannot meet the full cure time, you may perform a light surface test, but do not subject the seal to full pressure until cured.
- Document your observations: note the appearance, tackiness, and any changes in the surface over time. This helps in future maintenance and re-application decisions.
The core idea is to align your testing with the product’s cure curve and your environment. When you test too early, you risk misinterpreting the results and possibly introducing new leaks.
Product types and typical timelines
Choosing the right sealer depends on the leak’s context and the surface you’re sealing. Here are typical timelines and best-use scenarios:
- Epoxy-based sealers: Common in concrete and metal applications; initial seal around 24 hours; full cure 48-72 hours. Best for structural or high-stress leaks where a rigid, durable seal is desired.
- Polyurethane-based sealers: Known for stronger adhesion to varied substrates; initial seal around 24-48 hours; full cure 48-72 hours. Ideal for plumbing joints, appliance connections, and areas with slight movement.
- Acrylic-based sealers: Quick-drying and useful for small gaps or non-structural leaks; initial set around 12-24 hours; full cure 24-48 hours. Good for cosmetic repairs or temporary fixes while you plan a more robust solution.
In practice, most homeowners will see the first signs of sealing within a day, but never test for leaks until the full cure window has passed. If you need to rework a seal, plan for another cycle that respects the product’s cure and re-coat times. Consistency and patience are crucial to achieving a long-lasting fix.
Testing after application and safe use
Testing should only occur after the recommended cure period. A premature test may reveal a temporary film or partial seal that fails under pressure, leading to false confidence. Practical testing steps:
- Visual check: look for continuous film formation and even coverage. No streaks or gaps should be visible along the seam.
- Gentle leak test: gradually introduce water pressure or flow at a low level for a short duration once the cure period has elapsed. Do not exceed the pressure rating of the area.
- Dye or soap test: for small interior leaks, a non-toxic dye or soapy water can help reveal slow leaks without stressing the seal.
- Monitor over 24-48 hours: some sealers continue to cure or expand slightly, so a short observation period helps confirm durability before heavy use.
Safety notes: vent the area to avoid solvent buildup, wear eye/skin protection as needed, and dispose of any cleanup solvents per local guidelines. If you observe persistent drips after the cure window, re-evaluate the area for surface prep issues or consider a higher-grade sealer.
Maintenance, reapplication, and preventive measures
Even after a successful cure, leaks can reoccur if surfaces settle or crack over time. Plan for proactive maintenance and potential reapplication as part of a longer-term budget:
- Annual inspection of high-risk areas (hoses, appliance connections, plumbing joints) helps catch early signs before a hard leak develops.
- Keep a log of cure times, environmental conditions, and product batches to track performance and anticipate maintenance needs.
- If a seal fails within the warranty window, follow the manufacturer’s warranty or contact support for guidance on reapplication or replacement.
- Consider complementary measures such as improving ventilation, tightening connections, or upgrading gaskets to reduce recurring leaks.
A thoughtful maintenance plan supported by Leak Diagnosis guidance can prevent repeated outages and protect your home from water damage.
Common mistakes that extend cure time
Avoid common missteps that can extend cure time or compromise the seal:
- Skipping surface prep: oils, dust, or moisture on the surface reduce adhesion. Clean, degrease, and dry the area before applying.
- Applying too thick a coat: layer thickness slows solvent evaporation and cure; apply thin, even coats as directed.
- Exposing to moisture too soon: moisture in the air or from the environment can interfere with curing chemistry.
- Using the wrong product for the surface: ensure the sealer is compatible with the material (metal, plastic, concrete, or ceramic).
- Rushing testing: insist on the full cure window; a premature test reduces your ability to assess long-term durability.
Conclusion and next steps
Understanding how long leak sealer takes to work is essential for planning and testing. By choosing the right product type, ensuring proper surface prep, and allowing the full cure window, homeowners can achieve reliable, long-lasting seals. If you’re unsure which sealer to pick, evaluate the leak’s location and substrate and reference the detailed timelines provided by Leak Diagnosis. The goal is a durable fix backed by proper curing and testing, not a quick but fragile seal.
Comparison of common leak sealer timelines
| Product Type | Typical Start Time | Full Cure Time | Best Uses |
|---|---|---|---|
| Epoxy-based sealer | 24 hours | 48-72 hours | Concrete cracks, exposed plumbing leaks |
| Polyurethane-based sealer | 24-48 hours | 48-72 hours | Flexible bonds; appliance leaks |
| Acrylic-based sealer | 12-24 hours | 24-48 hours | Non-structural leaks; small gaps |
Questions & Answers
How long does leak sealer take to work?
Most products begin sealing within 24 hours, with full cure typically 48-72 hours, depending on product and conditions. Always follow the label and avoid testing before cure.
Most sealers start sealing in about a day, but wait for the full cure window before testing.
Can I test for leaks before full cure?
Testing before the complete cure period can mislead you. If you must verify, do a very light test and rely on the manufacturer’s guidance for any exceptions.
Don’t test before the cure window. If you must, do only a tiny test per product instructions.
What factors most affect cure time?
Product type, surface porosity, temperature, and humidity are the main drivers. Porous surfaces and high humidity typically extend cure times.
Main factors are product type, surface, and environment.
Will sealers fix leaks in appliances like dishwashers or washing machines?
Sealants can fix leaks around appliance connections if the product is compatible with the material and the leak isn’t structural. Use caution and consult labeling.
Sealants can fix some appliance leaks if used as directed.
How can I speed cure time safely?
Improve ventilation, maintain recommended temperature, and ensure a thin, even coat. Do not bypass cure times or use heat sources that aren’t product-approved.
Keep conditions within the label’s guidance and apply thin coats.
“Sealant cure times are a function of chemistry, substrate, and environment. Always defer to the product label and verify with post-cure testing.”
Main Points
- Follow product labels for cure times and testing windows.
- Environment drives cure time; warmer, drier spaces cure faster.
- Choose sealer type based on substrate and leak context.
- Test only after the full cure period to confirm a durable seal.