Water Leak Around the Garbage Disposal: Quick Troubleshooter
Urgent guide to diagnose and fix a water leak around your garbage disposal. Learn common causes, at home checks, step by step repairs, safety tips, and prevention to protect your kitchen.

If you notice water under the sink near the garbage disposal, start with safety checks: unplug the disposal, shut off the water supply, and inspect the mounting flange and dishwasher hose for tightness. The most common fixes are resecuring fittings, replacing worn gaskets, and cleaning the seal. If you still see a drip after these steps, proceed with the diagnostic flow for deeper checks.
Quick problem overview for water leak around the garbage disposal
Leaks around a garbage disposal are a frequent issue in busy kitchens. In many homes, a slow drip becomes a flood only after a load of dishes or after running the disposal for a period of time. According to Leak Diagnosis, addressing water leak problems around the garbage disposal quickly can prevent water damage and mold growth under the sink. The most common culprits are loose connections, worn gaskets, and aging seals. By understanding the typical failure points and keeping safety first, you can often stop the leak without expensive repairs. A careful inspection will reveal whether the leak is coming from the sink flange, the dishwasher inlet, the discharge pipe, or the disposer itself. Maintaining clear access and using a towel or bucket during work helps you monitor the leak more accurately as you test fixes.
Safety first: power and water control before you touch anything
Before you touch the disposal, power must be off. Unplug the unit from the outlet under the sink and switch off the circuit breaker if accessible. If you smell gas or notice a strong electrical smell, stop immediately and call a professional. With the power off, place a bucket and towels under the area to catch drips. If the leak is consistent when you run water, note whether it starts only when the disposal runs or if it drips when water is ongoing but without power. This distinction helps narrow down the likely source and keeps you safe while diagnosing.
- Always wear eye protection and gloves when handling plumbing components.
- Do not use the disposal with water running or with hands under the unit when powered.
Common leak sources around garbage disposals and how they behave
Leaks around garbage disposals typically originate from one of four areas: the sink flange seal where the disposer connects to the sink, the dishwasher inlet hose connection, the discharge pipe or trap, or the disposer gasket inside the unit. Loose fittings often cause slow drips that worsen with use; worn seals may produce a steady drip even when the unit is idle. Visual signs include white crusty mineral deposits around fittings, dampness along the metal housing, or small pools of water near the cabinet floor. It is useful to wipe down the area, run water, and observe where the water pattern begins to form.
- A slow drip along the sink flange suggests a seal or mounting issue.
- A hiss of water near the dishwasher inlet often points to a loose or cracked inlet hose.
- A puddle at the base can indicate a corroded seal or cracked housing inside the disposal.
At-home checks you can perform safely (non-destructive) to narrow the issue
- Inspect the mounting screws: securely tightened loose screws can let water seep between the disposal and the sink.
- Examine the dishwasher drain hose and its clamp: a loose clamp is a frequent leak source; replace or tighten as needed.
- Check the discharge pipe and P-trap for cracks or loose connections and reseal with plumber's tape or new gasket where applicable.
- Run cold water while the unit is off to observe if water appears at the base or along joints when reconnected.
If you can’t locate the leak after these checks, read on for the diagnostic flow to determine the precise fault and repair path.
Next steps if the leak persists or you are unsure
Persistent leaks after basic tightening often require disassembly of the disposer or replacement of gaskets and seals. If you notice the unit is unusually hot, has rust, or you detect a strong odor indicating a compromised seal, stop and call a licensed plumber. Quick, cautious DIY fixes can often slow or stop leaks, but some issues require tools, replacement parts, or professional calibration to restore a watertight seal and maintain safe operation.
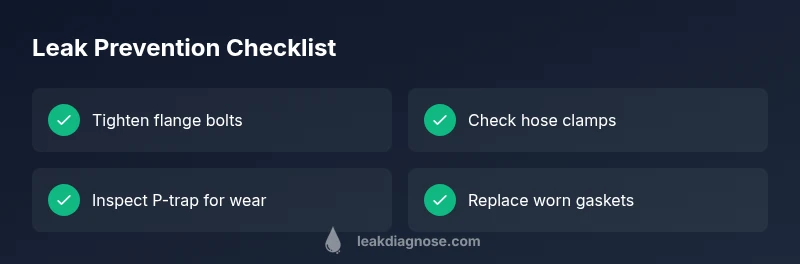
Prevention and maintenance to reduce future leaks
- Regularly tighten and inspect all clamps, fittings, and screws as part of a seasonal kitchen maintenance routine.
- Use a magnet or seal-safe plumber's putty when resealing the sink flange; avoid over-sealing which can trap moisture behind the flange.
- Replace aging gaskets and consider upgrading to a disposer with a better water seal if you frequently experience leaks in older models.
- Keep the area under your sink dry after any repair; dry cabinets prevent mold and wood damage and help you spot future leaks early.
Steps
Estimated time: 45-90 minutes
- 1
Power down and secure area
Unplug the garbage disposal and switch off the circuit at the breaker. Clear items from under the sink and place towels or a bucket to catch any drips. This creates a safe workspace and prevents accidental shock or water damage.
Tip: Double-check the outlet is indeed switched off by testing the unit with a small flashlight and attempting to run a quick test after replugging later. - 2
Inspect mounting flange and sink seal
Visually inspect the mounting bolts around the disposal and the rubber gasket between the unit and the sink. Tighten any loose bolts with a socket wrench and reseal if the gasket appears cracked or deformed.
Tip: Only tighten to snug; overtightening can crush the gasket and worsen leaks. - 3
Check dishwasher inlet hose and clamp
Follow the hose from the disposal to the back of the dishwasher or disposal; ensure the hose is secure and the clamp is intact. Replace the clamp if it shows rust or corrosion, and replace the hose if there are any visible cracks.
Tip: Disconnect power before handling hoses and avoid kinking the line during reassembly. - 4
Inspect the discharge pipe and P-trap
Look for cracks, loose connections, or worn gaskets at the discharge side and trap. Tighten fittings and replace aged gaskets as needed to form a watertight seal.
Tip: Use plumber's tape on threaded joints and check for any pooling water after tightening. - 5
Test for leaks after reassembly
Reconnect power, run cold water, and operate the disposal briefly. Watch for any new drips and note their location. If leaks persist, stop and re-check the problematic joint.
Tip: Do not run hot water with a garbage disposal to avoid warping seals. - 6
Decide on next steps if the leak remains
If the leak is contained to a single gasket, you may be able to replace that gasket and reseal. If corrosion or cracks are evident in the unit, plan for replacement or consult a licensed plumber for an accurate diagnosis.
Tip: Document the issue and keep receipts for warranty or insurance claims if applicable.
Diagnosis: Water leaking from under-sink area around garbage disposal after running or during use
Possible Causes
- highLoose or damaged sink flange seal
- mediumCracked dishwasher inlet hose or loose clamp
- mediumCracked discharge pipe or loose trap connection
- lowInternal disposer gasket failure or worn seal
Fixes
- easyTighten sink flange mounting screws and reseal with appropriate gasket material
- easyTighten or replace dishwasher inlet hose clamp
- mediumTighten discharge pipe/trap connections and replace worn gaskets
- hardReplace internal disposer gasket or replace the unit if corrosion is present
Questions & Answers
What are the most common causes of a water leak around a garbage disposal?
Most leaks stem from loose fittings, worn gaskets, or a cracked dishwasher inlet hose. Inspect each of these areas first, then proceed to more involved repairs if the leak continues.
Common causes are loose fittings, worn gaskets, or a cracked dishwasher hose. Inspect these areas first, then consider deeper repairs.
Can a leaking garbage disposal be fixed without a professional?
Yes, many leaks can be fixed with simple at-home steps like tightening connections, replacing gaskets, or resealing the sink flange. However, if the disposal is damaged or the leak persists, a licensed plumber is recommended.
Yes, many leaks can be fixed at home, but if it persists or the unit is damaged, hire a professional.
Is it safe to operate the disposal after a leak is repaired?
After repairing, run cold water and operate the disposal briefly to confirm the leak is gone. If you still see water, stop and recheck the joints or call a pro to assess internal seals.
Yes, test with cold water after repair to confirm the leak is fixed. If it leaks again, recheck or seek professional help.
What maintenance prevents future garbage disposal leaks?
Regularly inspect seals, clamps, and hoses, tighten fittings as needed, and replace aging gaskets. Keep the area dry to observe early signs of moisture and address promptly.
Inspect seals and hoses regularly, tighten fittings, and replace aging gaskets to prevent leaks.
When should I replace my garbage disposal?
Consider replacement if the unit frequently leaks after repairs, shows rust, or lacks adequate power to grind effectively. A newer unit with a better seal can prevent repeated leaks.
Replace the unit if leaks persist after fixes or if efficiency drops; newer models offer improved seals.
Watch Video
Main Points
- Identify the leak source with safe checks before disassembly
- Tighten and reseal common leak points around the disposal
- Replace worn gaskets or hoses to restore a watertight seal
- If persistent, consult a professional to avoid water damage
- Maintain a preventive routine to reduce future leaks