Slab Leak Repair Near Me: A Practical Guide
Learn how to locate, assess, and address slab leaks near you with practical steps, safety tips, cost considerations, and guidance on when to hire a licensed plumber for under-slab repairs.

To address a slab leak near you, first confirm the leak, estimate its scope, and choose an appropriate fix path. For minor, shallow leaks, temporary measures and monitoring may suffice; for most slab leaks, book a professional assessment. Prepare safety gear, access equipment, and a licensed plumber, especially for under-slab repairs that require excavation or re-piping.
Understanding slab leaks and why they matter
A slab leak occurs when water lines beneath your concrete slab lose integrity, allowing water to flow where it shouldn't. For homeowners, recognizing the signs early can prevent structural damage and wasted water. According to Leak Diagnosis, proactive slab leak detection saves homeowners time and money by catching issues before they escalate. This guide helps you locate, assess, and start safe repairs near you, with a clear path to professional help when required.
Key elements to check include unusual damp patches, warm floor areas, consistently rising water bills, and sounds of running water with no visible source. In many homes, subterranean leaks originate from corroded copper or aging PVC under the slab and may require access through impacted concrete.
Signs you likely have a slab leak
Detecting a slab leak early can save thousands in damage. Look for persistent damp spots on floors or walls, warm spots on flooring, sulfur-like odors from the slab, unexplained increases in water usage, repeated patching of the same area, or a sudden drop in water pressure. If you notice these indicators, start a formal inspection and avoid delaying professional assessment, especially if you rent or have high-water bills.
Tip: Use a moisture meter and infrared camera if you have access to them; these tools can reveal hidden moisture behind concrete without destructive digging.
DIY versus professional: making the right call
A slab leak often lives below the concrete where access is expensive and risky. Small, non-structural leaks may be temporarily managed with shut-off valves and monitoring, but most under-slab leaks require licensed plumbing and equipment. The Leak Diagnosis approach favors safety and long-term reliability: prioritize professional evaluation when water is actively leaking, when you smell gas, or when the leak involves main supply lines. DIY attempts without proper equipment can worsen damage and void warranties.
Before making a decision, obtain multiple quotes, verify licensing, and check local permits.
Common repair approaches and when they fit
There are several routes to fix slab leaks, each with pros and cons:
- Emergency fixes: temporary shut-offs or patching to stop immediate water loss; not a permanent solution.
- Epoxy or polyurethane injections: good for small, pinhole leaks but not for large breaches.
- Sleeving or rerouting: temporary or permanent, rerouting water lines above the slab to new runs in the crawl space or walls.
- Under-slab replacement: trenching, removing concrete, replacing damaged pipe; this is the most invasive and expensive option but often necessary.
Choosing the right method depends on the pipe type, location, access, and the extent of damage. A professional assessment will usually determine whether a repair can be done without breaking the slab, or if full replacement is required.
The step-by-step process a pro might follow (high-level)
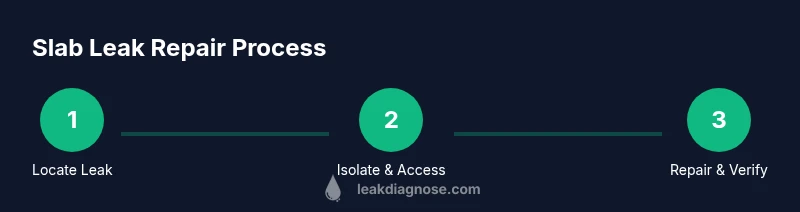
Since under-slab work requires permits and heavy equipment, here is a high-level sequence commonly used by licensed plumbers:
- Locate the leak with non-destructive tests and acoustic sensors.
- Isolate the affected line by shutting off main water and drain valves.
- Lift or create access to the slab; maintain containment to minimize mess.
- Excavate the area to reach the pipe and assess damage.
- Repair or replace the broken section; re-test for leaks.
- Patch concrete and restore flooring; run tests to verify no residual moisture.
Note: Do not attempt excavation yourself; this step can affect structural integrity and utility lines.
What to expect during a professional inspection near you
A typical slab-leak inspection includes a visual survey of suspect areas, moisture measurements, thermal imaging, and pressure/flow testing. Plumbers will explain the likely cause, possible repair options, and costs. They may suggest ongoing leak monitoring after repair and provide guidance on preventing future leaks through water-pressure management and pipe insulation. As you shop, request a written scope and a warranty for the work performed.
A coordinated approach with your water utility can sometimes help with bill analysis and leak detection support.
Cost considerations and budgeting tips
Costs for slab-leak repair vary based on access, extent, and work scope. Homeowners should expect differences between temporary fixes and permanent solutions. Budget for core activities such as diagnostic testing, trenching or drilling, pipe replacement, concrete patching, and post-repair testing. Ask contractors for a written estimate that itemizes each phase, and confirm any guarantee or warranty coverage. In some cases, insurance coverage may apply if the leak caused water damage.
Trust, timelines, and permitting can influence total cost as much as the raw repair price.
Prevention and maintenance after repair
After a repair, implement preventive steps to reduce recurrence:
- Install pressure-reducing valves to stabilize water pressure.
- Insulate exposed pipes and use protective sleeves under concrete where possible.
- Schedule regular inspections or moisture tests, especially in older homes.
- Fix leaks early in any plumbing zone to avoid cascading failures.
Regular maintenance and proactive detection can extend the life of pipes and reduce the chance of future slab leaks.
Authoritative sources and safety notes
For safety and best practices, consult reputable sources and follow local codes. Always prioritize personal safety and environmental protection when working around water. This guide references standards and recommendations from reliable organizations and Leak Diagnosis's own best-practice guidelines. See the following resources for broader context:
- https://www.epa.gov/watersense
- https://www.osha.gov/
- https://www.cdc.gov/healthywater/hygiene/water-leaks.html
If you are unsure about any step, contact a licensed plumber or a licensed contractor in your area who can assess and plan the repair safely.
What to tell a contractor when you call
When reaching out to a slab-leak specialist, provide a concise history: when signs appeared, observed water loss, and any prior repairs. Share photos or videos of damp spots, and be ready to describe the pattern of moisture around floors and walls. Ask about credentials, licensing, insurance, the estimate process, and the timeline. Clear communication helps ensure accurate estimates and smoother project management.
Quick-start homeowner checklist
- Stop water supply to the affected zone if safe and accessible.
- Photograph leaks and damp areas for records.
- Call at least two licensed plumbers for quotes.
- Avoid DIY under-slab repairs unless you have professional support and permits.
- Review warranties, permits, and post-repair testing plans.
Following this checklist helps you move from detection to a durable repair with confidence.
Tools & Materials
- Non-contact infrared camera or thermal imaging device(Use to detect temperature anomalies that indicate moisture under concrete)
- Moisture meter(Essential for confirming elevated moisture in concrete or flooring)
- Acoustic leak detector or listening device(Helpful for locating leaks beneath slab without invasive digging)
- Water shut-off wrench or valve key(Needed to safely isolate supply lines when a leak is suspected)
- Personal protective equipment (PPE)(Gloves, goggles, and sturdy boots for safety during inspection)
- Plastic sheeting and containment materials(Containment during access to minimize mess)
- Concrete patch materials (epoxy or cement-based patch)(For finishing after minor slab access or repair, not a substitute for structural repairs)
Steps
Estimated time: 2-12 hours
- 1
Identify the leak source
Begin with visual checks around damp areas and running water signs. Use moisture meters and thermal imaging to locate anomalies under the slab without destructive digging. Document findings to share with professionals.
Tip: Take photos of damp zones and note dates of changes. - 2
Shut off the main water supply
To prevent further damage, locate and shut off the main water supply if it is safe to do so. This reduces water intrusion while you assess the situation and prepare for professional involvement.
Tip: Only shut off the main if you can do so without risking pressure-related issues in other zones. - 3
Create a safe work area
Set up a contained zone around the suspected area to avoid spreading water and debris. Use plastic sheeting to minimize mess and protect surrounding finishes.
Tip: Wear PPE and ensure electric lines are de-energized in the area. - 4
Access and inspect the slab
Carefully create access to the suspected pipe segment using non-destructive methods first. Inspect pipe material, age, and signs of corrosion or damage before any cutting or digging.
Tip: Avoid unnecessary drilling; non-destructive tests can reveal most issues. - 5
Decide on the repair path
Consult with a licensed plumber to determine if epoxy injections, rerouting, or under-slab replacement is appropriate given pipe type and location.
Tip: Get a written plan with options, costs, and warranties before proceeding. - 6
Implement the repair
Proceed with the chosen repair method under professional supervision. Ensure proper sealing, pressure testing, and containment during the process.
Tip: Do not attempt large-scale under-slab work without permits and a contractor. - 7
Verify with pressure test
After repair, perform a slow, controlled pressure test to ensure the leak is resolved. Check all connections and seals for integrity.
Tip: Document test results for warranty or insurance purposes. - 8
Patch and restore the slab
Fill the trench or access hole with appropriate concrete patch material. Allow sufficient curing time before resuming normal use.
Tip: Use a patch compatible with your floor finish to minimize future cracking. - 9
Return utilities and monitor
Gradually restore water supply and monitor for any recurrence in the days following repair. Check moisture levels and signs of dampness.
Tip: Keep a log of water usage and moisture readings for the first week. - 10
Document and plan prevention
Record the repair details, warranties, and recommended maintenance. Consider adding protective measures like insulating pipes and installing a pressure regulator.
Tip: Schedule a follow-up inspection if you notice new damp spots.
Questions & Answers
What is a slab leak and how can I tell if I have one?
A slab leak is a water leak that occurs beneath the concrete slab of a building. Signs include damp spots on floors, warm or wet areas on the floor, unexplained high water bills, and sounds of running water. If you notice these indicators, seek a professional inspection.
A slab leak happens under the concrete slab and shows as damp floors or warm spots. If you notice unusual water use, contact a licensed plumber for an inspection.
Can I fix a slab leak myself?
Most slab leaks require specialized equipment and access under the slab. DIY repairs are not recommended for major leaks due to safety risks and potential damage. Hire a licensed plumber for accurate diagnostics and safe remediation.
Major slab leaks are risky to DIY. It’s best to hire a licensed plumber for accurate diagnosis and safe repair.
What are common repair options for slab leaks?
Common options include epoxy injections for small leaks, rerouting pipes above the slab, or full under-slab replacement. The right choice depends on pipe material, leak size, location, and structural considerations.
Epoxy injections can fix small leaks, but larger or structural issues may require rerouting or replacement. A professional will decide.
How long does slab-leak repair take and how much does it cost?
Repair time and cost vary with scope. Small repairs may take a few hours; extensive under-slab work can take days and cost more. Get written quotes and understand warranty terms before starting.
Costs vary with scope; quotes and warranties are important. Expect longer timelines for under-slab work.
What should I ask a contractor before starting?
Ask about licensing, insurance, warranty, scope of work, estimated timeline, and a detailed written estimate. Check references and confirm permits if required by local codes.
Get licensed, insured, and request a detailed written estimate with timeline and warranty.
Watch Video
Main Points
- Identify leaks early to reduce damage.
- Prioritize professional assessment for under-slab issues.
- Choose repair methods based on pipe type, access, and extent.
- Get written estimates, warranties, and post-repair testing.