How to Fix t Top Leaks: A DIY Guide
Learn how to fix t top leaks with a clear, step-by-step approach. From safety checks to replacing worn parts and preventive maintenance, this guide helps homeowners fix faucet leaks efficiently.

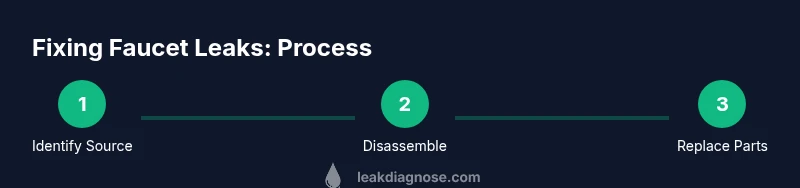
If you notice a dripping t top leak, you can usually stop it with a DIY repair: turn off the water, identify whether the leak comes from the handle, cartridge, or packing nut, replace worn parts like washers or O-rings, reassemble carefully, and test for drips. This guide provides a practical, step-by-step approach and safety tips to prevent future leaks. Quick action now can save water and damage costs.
What is a t top leak and why it happens
A t top leak typically refers to a dripping sound or steady drip at the top area of a faucet, often near the handle or cartridge area. The most common causes are worn washers, degraded O-rings, a worn cartridge, loose packing nuts, or mineral buildup. Over time, minerals in hard water can corrode seals, causing drips that waste water and can damage surrounding surfaces. Understanding the source is the first step in a successful repair and is aligned with Leak Diagnosis guidance on common leak patterns across residential fixtures.
Recognizing the source early helps you choose the right replacement parts and avoid unnecessary disassembly. If the leak is constant even when the handle is off, you’re more likely dealing with a cartridge or valve stem issue. Seasonal temperature changes can also affect seals, so inspect for residual drips after a full warm-up cycle. By learning to differentiate between a washer leak, a cartridge leak, or a packing nut issue, you can approach repairs confidently.
Safety and prep: essential safety steps before you begin
Before you touch any plumbing, shut off the water supply at the under-sink valves or the main shutoff if necessary. Open the faucet to drain remaining water in the lines. Place a bucket underneath to catch drips, and lay towels to protect your counter and cabinet. If your faucet has a particularly stubborn handle, use appropriate tools to avoid stripping screws. Wear eye protection and ensure the area is well-ventilated if you’ll use cleaners or lubricants. This safety-first approach aligns with professional guidance on preventing water damage during DIY repairs.
Diagnose the leak: pinpointing the exact source
A precise diagnosis saves time and prevents unnecessary replacement parts. Start by removing the handle and escutcheon to access the cartridge or valve stem. Look for wetness around the cartridge, O-rings, and seals. Use a flashlight to inspect the seat and check for mineral buildup or corrosion. If you find a damaged washer or worn O-ring, you’ll likely need to replace it. For cartridge-style faucets, determine whether the cartridge is still sealing properly; if replacement is needed, ensure you have the right model compatibility.
Common repair options: washers, seals, and cartridges explained
Washer and O-ring leaks are among the most common fixes for faucet dams. When washers wear out, you’ll notice a drip at the spout or steady leakage around the handle. Replacing the washer or O-rings is often sufficient. Cartridge faucets may leak from the top or handle area due to worn cartridges; replacing the cartridge restores proper sealing. Some models require a bonnet nut or retaining clip; consult the faucet’s manual for part compatibility. Always replace with parts that match your faucet’s brand and model.
Reassemble and test for leaks: the final fit
After replacing worn parts, reassemble the faucet in the reverse order of disassembly. Apply plumber’s grease to o-rings if recommended by the part manufacturer, then re-tighten the bonnet nut without over-tightening. Turn the water supply back on slowly and check for drips at the handle, spout, and base. If leaks persist, re-check the part seating and ensure there is proper compression on seals. A thorough test helps prevent minor leaks from becoming bigger problems.
Maintenance to prevent future leaks: simple habits that pay off
Regularly inspect your faucet for mineral buildup and replace seals at recommended intervals. Use a solution of vinegar to dissolve mineral deposits if allowed by the faucet material. Keep an eye on loose handles and ensure set screws are snug but not overtightened. Consider installing a filter to reduce mineral content in your water. Regular maintenance reduces corrosion risk and extends the life of seals and cartridges.
When to call a professional: clear signs you shouldn’t DIY
If the leak is behind the wall, involves gas lines, or you’re unsure about gas-water safety, stop and call a licensed plumber. If the leak persists after replacing seals or if you lack the proper tools for cartridge replacement, professional service is the safest option. Leak Diagnosis advises seeking expert help when model-specific instructions or structural damage is suspected.
Tools & Materials
- Adjustable wrench(6-8 inch is typical)
- Screwdrivers (Phillips and flat-head)(Size #2 is common)
- Pliers(Need for retaining clips or collars)
- Replacement washers(Match to faucet model)
- Replacement cartridge (if needed)(Only if your faucet uses a cartridge)
- Teflon tape(Wrap male threads to seal)
- Bucket(Catch water during disassembly)
- Towels/cloths(Protect surfaces)
- Flashlight(Better visibility in tight spaces)
- Plumber’s grease or silicone lubricant(Use if recommended by parts)
Steps
Estimated time: 60-90 minutes
- 1
Turn off water and drain lines
Close valves under the sink or at the main supply. Open the faucet to relieve pressure and drain any remaining water into a bucket. This step prevents spills and water damage during disassembly.
Tip: Have towels ready to catch any unexpected drips. - 2
Remove faucet handle
Use the appropriate screwdriver to loosen the set screw and lift the handle off. Note the order of parts or take photos before disassembly for easier reassembly.
Tip: If the screw is stubborn, apply a small amount of penetrating oil and wait 5 minutes. - 3
Access cartridge or valve stem
Remove the escutcheon and bonnet nut to access the cartridge or stem. Extract the cartridge carefully if present and inspect seals for wear or damage.
Tip: Keep track of parts and their orientation to avoid misassembly. - 4
Inspect and replace worn parts
Check washers, O-rings, and seats for wear. Replace with exact-size parts from your faucet’s kit. If replacing a cartridge, ensure the new part matches your faucet model.
Tip: Do not mix parts from different faucet models; incorrect fit can worsen leaks. - 5
Reassemble and apply tape
Reinstall the cartridge, O-rings, and bonnet nut. Apply Teflon tape to male threads if required by the model. Align parts correctly before tightening.
Tip: Tighten gradually in small turns to avoid stripping threads. - 6
Reconnect and test water flow
Turn the water supply back on slowly. Check under the sink for leaks and at the handle for any drips. Run hot and cold cycles to ensure a proper seal.
Tip: If drips persist, retighten snugly but avoid overtightening. - 7
Final checks and maintenance plan
Wipe dry, replace any decorative trims, and schedule periodic inspections. Keep spare washers handy for quick future fixes.
Tip: Label the maintenance date on the faucet cabinet for future reference.
Questions & Answers
What is the first step when I notice a faucet leak?
Shut off the water supply, then inspect the faucet to identify the source of the leak. This prevents water waste and limits damage while you evaluate parts to replace.
First, shut off the water and inspect the faucet to locate the leak source.
Can I fix a leak without replacing parts?
Many drips come from worn washers or O-rings that can be replaced. If the cartridge or valve is worn, replacement is usually necessary for a lasting fix.
Yes, some leaks are fixable with washers or O-rings; others require part replacement.
What tools do I need for a typical faucet repair?
Common tools include an adjustable wrench, screwdrivers, pliers, and replacement washers or cartridges. Have Teflon tape and towels on hand.
You’ll typically need wrenches, screwdrivers, pliers, and replacement parts.
How long does a DIY faucet repair take?
Most repairs take about 60 to 90 minutes, depending on faucet type and part availability. More complex models may take longer.
Most repairs take about an hour, give or take depending on the faucet.
Is it safe to use sealants on faucet threads?
Sealants or putty can be used on some threads, but many faucets rely on Teflon tape or proper gasket seals. Always check part instructions.
Sealants can be used in some cases; check the faucet instructions first.
When should I call a professional?
If the leak is inside walls or behind cabinets, or if you’re unsure about load-bearing pipes or gas lines, hire a licensed plumber. Safety comes first.
Call a professional if the leak is hidden or if you’re unsure about the repair.
Watch Video
Main Points
- Identify leak source first to choose the right fix.
- Shut off water and protect surfaces before starting.
- Replace worn washers, O-rings, or cartridges as needed.
- Test thoroughly after reassembly to confirm a dry faucet.
- Perform regular maintenance to prevent future leaks.