How to Fix a Bathtub Spout Leak: A DIY Guide
Learn to stop a bathtub spout leak with a practical DIY approach. This guide covers common causes, essential tools, and a clear, step-by-step method to fix leaks and prevent recurrences. Leak Diagnosis shares homeowner-friendly tips for a safe, cost-effective repair.

You’ll learn to identify whether a bathtub spout leak comes from worn packing, a loose connection, or a faulty cartridge, and perform a safe DIY repair. The guide covers how to determine your spout type, the exact tools needed, and step-by-step actions to stop the drip and prevent future leaks. It’s designed for homeowners and DIY enthusiasts seeking a practical, low-risk fix.
What causes a bathtub spout leak?
A bathtub spout leak is rarely a sign of a damaged tub itself. Most leaks originate in the faucet assembly, where seals, packing nuts, and fittings wear out over time. According to Leak Diagnosis, most bathtub spout leaks originate from worn packing in compression spouts or degraded gaskets, not a crack in the tub. When the spout is used, the moving washer and the cartridge experience friction, which can degrade rubber gaskets and O-rings. Mineral buildup can also hide a slow drip by obscuring the source until pressure rises. Understanding the source helps choose the right repair, avoids unnecessary spout replacement, and minimizes cost. In this guide you’ll learn how to identify whether your leak stems from a compression spout, a cartridge spout, or a threaded spout, and how to approach safe, effective fixes.
Types of bathtub spouts and how they fail
There are several common spout designs, and each has its failure modes. Compression spouts rely on a packing nut to seal water behind the escutcheon; over time the packing wears and leaks occur. Cartridge spouts house a replaceable cartridge with O-rings; leaks typically come from worn seals or a damaged cartridge. Threaded or slip-on spouts can loosen at the connection if the mounting hardware degrades. Leak Diagnosis analysis shows cartridge leaks are often due to worn O-rings or a deteriorating cartridge; knowing your type guides the right repair and avoids unnecessary spout replacement. Regular maintenance and correct part matching extend the life of the fixture and reduce water damage risk.
Safety first: turn off water and relieve pressure
Before you touch any fixtures, shut off the bathroom shutoff valve or the main house valve to stop water flow. Open the spout and an adjacent faucet to relieve residual pressure, then dry the work area. This step protects you from splash injuries and minimizes water damage while you inspect the components. The Leak Diagnosis team emphasizes safety: never work with live water lines or electrical outlets nearby. Keep a bucket handy for any residual moisture and wear safety glasses during disassembly.
Tools and materials you’ll need
Prepare a basic plumbing toolkit and the specific replacement parts for your spout. A clean workspace and good lighting help you see small screws and gasket details. See the Tools & Materials block for a complete list your repair requires. Having the right items on hand reduces the need for mid-project trips to the hardware store and lowers the risk of using incompatible parts.
Diagnosing the right repair: packing vs cartridge
If your spout uses a compression packing, the leak usually comes from worn packing nut or packing material. A cartridge spout leaks at the cartridge seals or the stem; replacing the cartridge is often the most effective fix. To determine which path to take, remove the escutcheon and inspect the visible parts. If you see a cartridge inside, you’ll know to replace the cartridge; if there’s a visible packing nut and no cartridge, focus on the packing.
Step-by-step diagnosis and prep
This section outlines the hands-on approach to diagnosing and prepping the repair. Start by turning off the water, then remove the escutcheon and spout, inspect the nuts and seals, and prepare replacement parts. Keep the screws and components organized to ensure correct reassembly. A clear plan reduces confusion and speeds up the repair, while photos taken before dismantling help restore orientation.
Replacement options: packing nut, washers, cartridges
Choose the replacement parts that match your spout type. If you have a compression spout, replace the packing and possibly the washer. If you have a cartridge spout, install a new cartridge and O-rings. Use plumber’s tape on threaded connections and lubricate O-rings lightly with silicone grease to improve seal longevity. Avoid mixing brands or parts that don’t fit your exact model, as incorrect parts are a common source of renewed leaks.
Reassembly and leak testing
Reinstall the spout and escutcheon, then tighten set screws or nuts to the manufacturer’s recommended torque. Gradually turn the water back on and test hot and cold cycles, watching for any drips at the spout or around the escutcheon. If leaks persist, recheck alignment, reseat the cartridge, and confirm you didn’t overtighten components. A proper test after a repair confirms a durable seal and prevents a second round of disassembly.
Maintenance and prevention tips
Regular inspection of the spout area can catch wear before it becomes a leak. Clean mineral deposits that may hide integrity issues and replace aging seals proactively. If your home has hard water, consider a water-softening solution to reduce mineral buildup on fittings. The Leak Diagnosis team recommends documenting the date of repair and keeping spare parts on hand for quick future fixes.
When to call a professional
If the leak is behind the wall, involves multiple fixtures, or you’re unsure of the spout type, it’s prudent to contact a licensed plumber. Complex issues like corroded supply lines or hidden water damage require professional assessment to prevent mold and structural damage. When in doubt, getting a professional opinion can save time and reduce risk.
Tools & Materials
- Adjustable wrench(To loosen spout fittings and packing nuts)
- Nut driver set(For set screws and accessory nuts)
- Screwdrivers (Phillips & flathead)(For removing escutcheon plates and screws)
- Replacement spout packing kit or cartridge(Match your spout type (compression or cartridge))
- Replacement gaskets/O-rings(Only if worn)
- Plumber's tape (Teflon tape)(Seal threaded connections)
- Plumber's grease or silicone grease(Lubricate seals)
- Silicone sealant (optional)(If mounting requires sealant)
- Bucket or towel(Contain water during removal)
- Flashlight or headlamp(Improve visibility in tight spaces)
- Safety glasses(Protect eyes from splashes)
Steps
Estimated time: 60-90 minutes
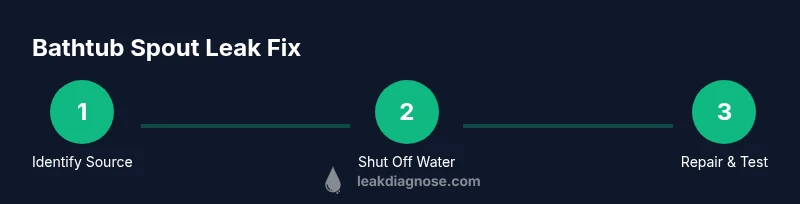
- 1
Shut off water and relieve pressure
Close the bathroom shutoff valve (or main) to stop water flow. Open the tub faucet and an adjacent tap to drain residual water. This prevents spray and makes inspection safer.
Tip: Double-check both hot and cold supplies are off before touching fittings. - 2
Remove the tub spout
Loosen the set screw with the appropriate hex/key or remove the retaining nut if present. Gently pull the spout away from the wall to access the packing or cartridge.
Tip: Keep track of orientation so you reinstall the spout correctly. - 3
Inspect packing nut, gasket, and cartridge
Look for worn packing, damaged gaskets, or a deteriorating cartridge. If a cartridge is present, identify its brand and model for a correct replacement.
Tip: Take photos before removing parts to help reassembly. - 4
Replace worn components
Install new packing, gasket, or cartridge. Apply plumber’s tape to threaded connections and lightly grease O-rings.
Tip: Do not overtighten; snug is enough to seal without cracking. - 5
Reinstall spout and trim
Reattach the spout, secure screws, and replace the escutcheon plate. Ensure the spout sits flush against the wall.
Tip: Avoid cross-threading; align components before tightening. - 6
Test for leaks and final checks
Turn water back on gradually. Run hot and cold cycles and observe the spout area for drips. If leaking persists, recheck seals or consider a cartridge replacement.
Tip: Document the repair date and monitor the area for 24–48 hours after testing.
Questions & Answers
What commonly causes bathtub spout leaks?
Most leaks come from worn packing, deteriorating gaskets, or a failing cartridge rather than a cracked tub. Identifying the source guides the correct repair path.
Most leaks come from worn packing, gaskets, or a faulty cartridge; start by identifying the source to choose the right fix.
Do I need to replace the entire spout to fix a leak?
Not always. If the leak is from the packing or gasket, you may only need to replace those parts. Cartridge leaks may require replacing the cartridge itself.
Often you don’t need to replace the whole spout—just the packing or cartridge depending on the source.
Can I fix a tub spout leak without professional help?
Many leaks can be repaired with basic tools and replacement parts. If the issue involves behind-wall plumbing or persistent leaks, consider a professional.
Yes, many fixes are doable at home, but if the leak persists or is behind the wall, call a professional.
What tools do I need for a tub spout repair?
You’ll typically need an adjustable wrench, screwdrivers, a replacement cartridge or packing kit, plumber’s tape, and a few rags for cleanup.
Essential tools include wrenches and screwdrivers, plus the right replacement parts and tape.
How long does a tub spout repair take?
A straightforward repair often takes about 1 hour, plus time to test. More complex cases can run longer if parts are hard to source.
Most repairs take around an hour, with extra time if parts need ordering.
Is it safe to use teflon tape on tub spout threads?
Yes, using plumber’s tape on threaded connections helps seal. Avoid over-taping and ensure threads are clean before applying.
Yes, teflon tape helps seal threaded connections when applied correctly.
Watch Video
Main Points
- Identify the leak origin before replacing parts.
- Shut off water and drain to prevent splashes.
- Replace worn packing or cartridge with the correct part.
- Recheck for leaks after testing.
- Regular maintenance helps prevent future leaks.