Bathroom Exhaust Fan Water Leak Troubleshooting Guide
Urgent guide to diagnose and fix a bathroom exhaust fan water leak. Learn common causes, follow a safe diagnostic flow, and prevent mold and structural damage with practical fixes.

If you notice water around or dripping from your bathroom exhaust fan, the most common causes are condensation, a blocked or misaligned duct, or a roof/vent cap leak. Start by turning off power, drying the area, and inspecting the fan housing and duct for moisture. If unsure, contact a licensed pro.
Why moisture around a bathroom exhaust fan matters
Water and humidity are not just uncomfortable; they are a signal that something in your bathroom ventilation system is not performing as designed. When a bathroom exhaust fan loses its ability to move moist air away efficiently, condensation can collect on the fan housing, inside the ceiling cavities, or around the wiring. Over time, this moisture can promote mold growth, degrade insulation, and damage ceiling materials. In many homes, a ceiling-mounted exhaust fan will trap humidity against drywall, leading to staining and a hidden leak that only becomes obvious after a heavy shower or a rainstorm. The Leak Diagnosis team emphasizes that moisture in the wrong place is not something to ignore. A water leak around the fan is often a symptom of a larger issue—perhaps a clogged duct, a misplaced vent cap, or a slow roof leak that feeds water into the attic, which then travels to the bathroom through the ceiling.
For homeowners, the first sign is usually a damp ceiling around the fan or a puddle on the bathroom floor after a hot shower. Do not assume this will dry itself. Left unaddressed, the problem can worsen, causing wood damage, paint bubbling, or even electrical shock hazards if water reaches the fan’s electrical components. This guide walks you through a practical diagnostic approach and simple fixes you can perform safely to stop the leak and restore proper ventilation. According to Leak Diagnosis, acting quickly can reduce mold exposure and keep repair costs down.
Common causes of a bathroom exhaust fan water leak
There are several common culprits behind water around a bathroom exhaust fan. Condensation from steam is one possibility, especially in humid bathrooms without adequate air exchange. However, condensation alone usually forms at the vent cap and on metal surfaces, not inside the drywall; persistent condensation can indicate a duct that runs too long, makes too many bends, or lacks proper insulation. A blocked or damp duct can cause moisture to back up and accumulate around the ceiling housing. Leaks may also originate from the vent’s exterior components: a damaged roof vent cap, cracked flashing, or worn sealant around the exhaust opening can let rainwater travel down the duct and into the bathroom. A loose mounting or cracked fan housing can also let water drip, especially if there is significant condensation on the fan blades.
In some homes, leaks originate not from the vent but from adjacent plumbing or from a ceiling or attic crack that allows water to reach the fan housing. If the bathroom shares a drainage line with a shower or tub, a high water pressure event can drive moisture toward the ceiling path. Finally, improper renovation or aging components—like a silicone seal that has dried out—can create pathways for water. If you notice peeling paint or staining in the ceiling above the fan, it's a hint that moisture has been present for some time.
Diagnostic checklist: where to start
A systematic, low-risk diagnostic flow helps you pinpoint the source without unnecessary risk. Start with safety: switch off power to the fan at the wall switch and, if you are comfortable, at the circuit breaker. Dry the ceiling area with towels or a blower to reveal active leaks. Visually inspect the fan housing for signs of moisture, corrosion, or mold. If you can reach the attic, peek at the area above the bathroom ceiling around the fan housing. Look for damp insulation, water stains, or a dark ring around the fan box. Check the exterior vent cover on the roof or wall for cracks, displaced flashing, or blocked drainage. Make sure the duct runs straight and is properly sloped—any sagging duct can collect condensate and leak back.
Document what you find with photos and measurements. If the area around the fan remains damp after drying, perform a controlled test: run the fan briefly, then observe where the moisture appears. If water leaks only when the fan is on, the issue is likely within the fan housing or duct. If water appears after a rainstorm, the problem is more likely a roof- or vent-related leak. In all cases, consider air sealing and vapor barriers to reduce future condensation. Leak Diagnosis notes that even small early signs can prevent major repairs later.
Step-by-step guide to fix the most common cause: condensation and duct problems
This section covers the most frequent scenario: a humid bathroom with a long, poorly insulated duct that allows condensation to collect and seep into the ceiling. Follow these steps in order:
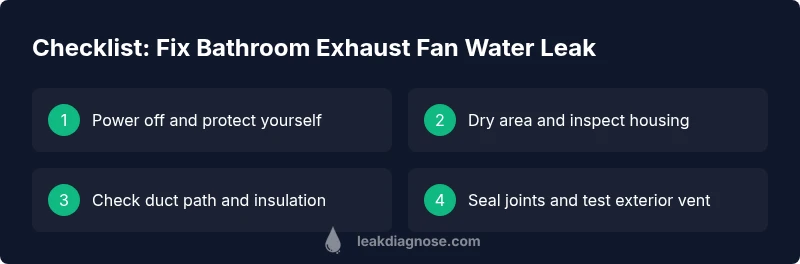
- Power down and protect yourself. Turn off the fan’s breaker and wear gloves and eye protection.
- Dry and inspect. Wipe the area dry and inspect the fan housing for corrosion or moisture intrusion.
- Inspect the ductwork. Disconnect the duct from the fan if needed and check for kinks, sag, or crushed sections. Clean any lint or moisture pockets and ensure the duct is properly insulated along its length.
- Reconnect and seal. Reattach the duct firmly, seal all joints with metal foil tape, and wrap insulated duct wrap along exposed lengths.
- Vent cap check. Ensure the exterior vent cap is unobstructed and that the flashing is intact; replace any damaged parts.
- Run and monitor. Power up the system, run the fan, and monitor for any signs of moisture intrusion for 24–48 hours. If moisture persists, the leak may be at the roof line or behind the ceiling and will require more invasive work.
Pro tip: use a moisture meter to quantify humidity and verify that levels drop after running the fan. A common mistake is over-tightening duct connections, which can pinch airflow and create more condensation.
Prevention and safety tips to avoid future leaks
Prevention begins with robust ventilation and proper installation. Verify that the bathroom has enough exhaust capacity for the size of the space; a fan that is underpowered will remove moisture slowly, increasing condensation. Use a dry vent with rigid ducting rather than flexible foil; ensure duct has a clean path with minimal bends. Seal any gaps around the fan housing with fire-rated caulk or silicone, and install a vapor barrier if the ceiling is exposed to steam. Regular maintenance matters: wipe down the fan face, clean lint from the grille, and inspect the exterior vent cap and flashing at least twice a year. Consider upgrading to a fan with a built-in humidity sensor if your bathroom experiences high humidity. If your home has multiple showers or long duct runs, you may need a booster fan.
Safety cannot be overlooked: always shut off power before servicing, never touch electrical components when wet, and wear eye protection. Mold growth is a serious risk; if you notice a musty odor or visible mold, address it promptly and consult a professional if you cannot locate the source quickly. Molds thrive in damp environments, so quick action reduces long-term damage. Regular maintenance and timely repairs will save you time, money, and headaches.
When to call a professional and what to expect
While many bathroom exhaust fan water leaks can be resolved by a careful DIY approach, some scenarios require professional intervention. If you observe persistent moisture after completing the diagnostic flow, if the attic shows mold or extensive water staining, or if you detect a roof or flashing issue, contact a licensed contractor or a plumber with ventilation experience. A pro will typically inspect the entire drainage path, test for air leaks, and verify that the roof flashing, vent cap, and duct connections are watertight. Expect a written assessment, an estimated repair plan, and a warranty on parts and workmanship. For safety, ensure the electrician inspects the fan wiring when moisture is involved to prevent electrical hazards. The Leak Diagnosis team notes that timely professional help can prevent mold growth and structural damage, especially in older homes.
Steps
Estimated time: 2-3 hours
- 1
Power down and prep safely
Turn off the bathroom fan at the switch and breaker; verify the area is dry before touching any components. Gather protective gear and a flashlight for inspection.
Tip: Lock out the circuit if you’re working near water or wiring. - 2
Dry the area and inspect visually
Use towels or a blower to dry the ceiling and fan housing. Look for staining, corrosion, and any damp seams around the fan shell.
Tip: Take photos to document moisture origins for your records. - 3
Check the duct path for obstructions
Trace the duct from the fan to the exterior. Look for kinks, sagging, or crushed sections that trap moisture and block airflow.
Tip: If you must disconnect, do so only after powering down and wearing protective gear. - 4
Seal and secure ductwork
Reattach the duct firmly and seal joints with metal foil tape. Add insulation along exposed ducts to minimize condensation.
Tip: Avoid using duct tape alone; it degrades with heat and humidity. - 5
Inspect exterior vent and flashing
Check the exterior vent cap for debris and ensure flashing is intact and sealed against water entry.
Tip: Replace damaged caps or flashing to prevent future leaks. - 6
Test operation and monitor
Power the system and run the fan for 24–48 hours while keeping an eye on the ceiling for any signs of moisture.
Tip: If moisture returns, the leak is likely roof- or attic-related and may require a pro.
Diagnosis: Water dripping or pooling around the bathroom exhaust fan or ceiling
Possible Causes
- highCondensation from high humidity or steam
- highBlocked, damp, or poorly insulated duct
- mediumDamaged roof vent cap or flashing allowing roof water intrusion
- lowCracked fan housing or loose mounting
Fixes
- easyDry the area and reseal joints; inspect fan housing for moisture intrusion
- easyClean and insulate/replace ductwork; secure all duct joints with foil tape
- mediumInspect roof vent cap and flashing; seal or replace as needed
- hardIf structural leaks are suspected, consult a professional for attic and roof assessment
Questions & Answers
What are common causes of water leaking from a bathroom exhaust fan?
Most leaks come from condensation, damp or blocked ducts, or damaged vent components. The issue may also stem from a roof leak or a faulty fan seal. Start with a safety check and inspect the duct path first.
Common causes include condensation, blocked ducts, and damaged vent parts. Start by shutting off power and checking the duct path.
Is a water leak from the exhaust fan dangerous?
Yes. Water plus electrical components creates shock risk and mold growth if left untreated. Shut off power and address the moisture promptly. If you’re unsure, seek professional help.
Yes, it can be dangerous. Turn off power and get help if needed.
How can I tell if the leak is from the roof or from within the bathroom?
If moisture appears after rain, the leak is likely roof or attic-related. If moisture happens during or after a shower, the duct or fan housing is the likely source. Check both paths methodically.
Leaks after rain suggest roof issues; leaks during showers point to duct or fan housing problems.
When should I replace the fan rather than repair?
If the fan is old, has damaged wiring, or the duct system requires extensive replacement, replacement is often more cost-effective and reliable than piecemeal repairs.
If the fan is old or wiring is compromised, replacement may be best.
Can I prevent leaks with maintenance?
Regular cleaning, checking for sealant wear, and ensuring proper duct insulation significantly reduce leakage risk. Pair maintenance with annual roof and vent inspections for best results.
Yes—regular maintenance and inspections cut leak risk over time.
Watch Video
Main Points
- Shut off power before inspecting any electrical components around moisture.
- Inspect ductwork and vent cap for blockages, leaks, or improper insulation.
- Dry the area and monitor after fixes to confirm the leak is resolved.
- Address roof or attic issues promptly to prevent recurring leaks.
- When in doubt, call a professional to assess plumbing, roofing, or electrical risks.