5 17 Leak Troubleshooting Guide
Urgent guide to diagnose and fix a 5 17 leak in home plumbing. Learn safe steps, diagnostic flow, and when to call a pro to prevent water damage.

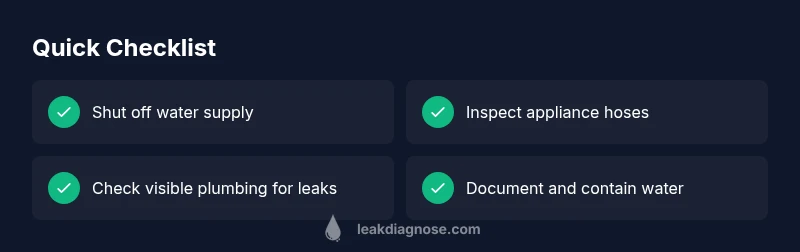
The 5 17 leak is most often caused by a loose water supply line or a worn appliance hose near the kitchen or laundry area. Start by shutting off the main water valve to stop more damage, then inspect visible hoses and fittings for moisture or drips. If you can't locate or halt the leak quickly, move to safety and call a licensed plumber.
Understanding the 5 17 Leak: Why It Demands Urgent Action
A 5 17 leak refers to a significant water escape within a home that can rapidly cause water damage if not addressed immediately. In many cases, the culprit is a loose or deteriorated water supply line, or a worn hose on an appliance such as a washing machine or dishwasher. The proximity to kitchens, bathrooms, and utility rooms makes these leaks especially risky because moisture can spread quickly to cabinets, flooring, and electrical outlets. The moment you notice damp spots, a musty smell, or a sudden spike in your water bill, treat it as an emergency. Early action limits damage, reduces repair costs, and minimizes mold growth potential. According to Leak Diagnosis, home systems tend to fail at joints or connections first, so focused inspection of hose connections and supply lines should be your first line of defense. The key is to stay safe and methodical, using the 5 17 leak as a clear signal to step through a defined troubleshooting process rather than panic.
Quick Safety Checks You Can Do Now
Begin with safety: locate the main water shut-off valve for the affected area or the whole house and turn it off to halt the flow. If water contacts electrical outlets or devices, avoid touching those areas until power is confirmed off at the breaker box. Gather towels or a mop to manage standing water while you assess. Never attempt repairs if you cannot clearly identify the source or if working near energized components. If water is actively spraying, evacuate the area and call emergency services or a plumber immediately. These precautions help protect your family and prevent accidental electrocution or structural damage. The goal is to create a safe scene so you can inspect calmly and locate the source of the leak.
Common Sources and Signs to Look For
Typical sources include loose hose connections on washing machines, dishwashers, or fridge ice makers; deteriorated appliance supply lines; and connections to under-sink faucets. Signs of trouble include persistent dampness under cabinets, water puddles near appliances, mineral buildup at joints, and unusual sounds like dripping or hissing from pipes. In many homes, the leak originates at a connection behind a wall or inside a cabinet, which makes detection challenging without removing panels or accessing crawl spaces. Document suspicious spots with notes and photos to help guide a professional later if needed. Leaks can occur slowly, so even moisture that appears minor should be investigated to prevent long-term damage.
Diagnostic-Flow Overview: Symptom → Diagnosis → Solutions
This section maps symptoms to probable causes and practical fixes in a logical sequence. Start with the most visible signs, then move to neighbor outlets and fittings. A dripping hose or a damp cabinet is usually high-priority, while odor or mold in a hidden area indicates secondary issues. The diagnostic flow helps you decide when a temporary fix is appropriate and when you should escalate to a professional. Leak Diagnosis emphasizes documenting every step so repairs are accurate and trackable for warranties or insurance claims.
Step-By-Step Fix for the Most Common Cause
First, tighten any loose hose connections behind the affected appliance or under the sink. If the hose appears cracked or bulging, replace it with a compatible part. Next, inspect the shut-off valve and supply lines for corrosion or wear, and replace damaged segments. After the basic checks, run a controlled water test by slowly turning the water back on and watching for leaks at joints. If leakage persists, the problem may lie deeper in the wall or at a hidden joint, requiring professional access and tools. Always clean up moisture promptly to prevent mold and wood rot.
Safety, Prevention, and Common Mistakes
Always power down electrical devices before doing any plumbing work in wet areas. Wear gloves and eye protection when handling leaks or cleaning up contaminated water. Avoid using sealants or temporary patches as a long-term fix; these do not address the root cause and can trap moisture. Regularly inspect hoses for bulges, cracks, or stiffness and replace every 5–7 years as part of preventive maintenance. Many homeowners delay repairs until the problem worsens; a proactive approach reduces risk and costs over time.
Longer-Term Prevention and Maintenance
Establish a routine to inspect fixtures and hoses monthly, especially in kitchens and laundry rooms where leaks are common. Install low-cost leak detectors near washing machines, under sinks, and around water heaters to alert you early. Label shut-off valves for quick access during emergencies and test them annually. Consider upgrading to reinforced stainless-steel hoses for high-demand appliances, as they resist bursting better than standard rubber lines. A proactive maintenance mindset minimizes surprise leaks and shields your home from water-related damage.
When to Involve Professionals and Warranty Considerations
Some leaks are straightforward, but others hide behind walls or within concealed plumbing. If you cannot confidently locate or stop the leak, or if water damage has affected walls or insulation, contact a licensed plumber promptly. Keep records of repairs, parts used, and dates to warranty future work and support insurance claims. Early professional assessment can prevent expensive failures and preserve your home’s value.
Steps
Estimated time: 60-90 minutes
- 1
Shut off water and power safely
Locate the main water shut-off valve for the house and turn it clockwise until it stops. If water is present near electrical outlets, switch off the circuit breaker that serves the affected area before touching anything. This prevents electrocution and minimizes further damage while you investigate.
Tip: Keep a wrench handy in case the valve is hard to reach or stiff. - 2
Identify the most likely area
Starting with visible hoses behind appliances or under sinks, visually inspect for moisture, sheen, or staining. Check near the water heater, dishwasher, washing machine, and refrigerator ice-maker lines. Move slowly and use a flashlight to spot subtle leaks that might hide behind panels.
Tip: Take photos to document moisture progression over time. - 3
Perform a careful visual inspection
Look for loose fittings, hairline cracks, and worn hoses. Gently wiggle hose connections to test for looseness. Inspect P-traps and drain lines for leaks that only appear when water flows. Avoid forcing fittings beyond their design; stop if you encounter resistance.
Tip: Use a towel to catch any drips so you can see fresh moisture clearly. - 4
Contain and clean up existing water
Place towels or a dry absorbent mat to trap water and prevent floor damage. If water is spreading to adjacent rooms, consider moving furniture and placing plastic sheeting to limit exposure. Do not mix cleaning chemicals with standing water, especially near electrical areas.
Tip: Document the extent of water exposure for insurance purposes. - 5
Decide on next steps
If a quick tightening or hose replacement fixes the issue, monitor for 24–48 hours. If the leak persists or you suspect concealed plumbing issues, contact a licensed plumber for a thorough inspection and permanent repair.
Tip: Keep a log of observations and any parts replaced for warranties.
Diagnosis: Moisture or water pooling near an appliance or under a fixture without obvious cause
Possible Causes
- highWater supply line leak
- mediumDeteriorated appliance hose
- mediumP-trap or drain connection failure
- lowOverflow or overflow pan issue
Fixes
- easyShut off the main water supply to stop ongoing flow
- easyCheck visible hoses and tighten connections on appliances
- mediumInspect exposed plumbing for loose fittings and signs of corrosion
- hardIf the source remains unidentified or access is difficult, contact a licensed plumber
Questions & Answers
What is a 5 17 leak, and why does it require urgent action?
A 5 17 leak denotes a significant home water leak that can cause rapid damage. It most often originates from supply lines or appliance connections and requires immediate assessment and containment.
A 5 17 leak is a major home water leak that needs quick action to prevent further damage.
Can I fix a leak myself, and when should I call a pro?
Simple drips from hose connections can sometimes be fixed by tightening or replacing a hose. If water continues to flow, or if the source is behind a wall, call a licensed plumber.
You can handle small hose fixes, but persistent leaks or hidden sources should be handled by a professional.
What tools do I need for a basic diagnosis?
A flashlight, towels, a container to catch water, a wrench, and a moisture meter (optional) help you locate and verify leaks safely.
Grab a flashlight and towels, then check hoses and connections to find the leak.
When is it unsafe to proceed without a pro?
If you cannot confidently locate or stop the leak, if water is pooling extensively, or if structural materials are damp, seek professional help.
If you can’t find the leak or it keeps leaking, call a plumber.
Can leaks cause mold or structural damage?
Yes. Ongoing leaks create moisture that can lead to mold growth and damage to walls, ceilings, and floors if not repaired.
Yes, leaks can lead to mold and structural damage if not fixed.
How can I prevent future leaks?
Regularly inspect hoses and fittings, replace aging hoses, install leak detectors, and schedule annual plumbing maintenance to catch issues early.
Regular checks and leak detectors help prevent future leaks.
Watch Video
Main Points
- Act quickly on any moisture signal.
- Shut off water before inspecting further.
- Tighten or replace worn hoses first.
- Document the process for warranties/claims.
- Call a professional if the source remains elusive.