How to Make Gas Leak Detection Solution: A Safe Soap Test
Learn to make a simple gas leak detection solution using soap and water. This educational DIY guide covers safety, mixing, testing joints, interpreting bubbles, and exactly what to do if you detect a leak—ideal for homeowners and DIY enthusiasts.

You can create a basic gas leak detection solution with plain dish soap and water to perform a bubble test on gas joints, connections, and appliances. This DIY approach is a quick, low-cost way to spot obvious leaks between professional inspections. Always prioritize safety and follow local codes; this is not a replacement for licensed testing.
Why you might need a gas leak detection solution
Gas leaks pose a real safety risk in homes, especially in older houses or apartments with aging piping and fittings. A gas leak detection solution—most commonly a soap-and-water mix—lets homeowners perform a quick, visual check for leaks at joints, valves, and appliance connections. It’s a practical, low-cost DIY method that complements professional testing rather than replacing it. The Bubble Test works by forming bubbles at any point where gas is escaping; those bubbles indicate a leak that should be addressed immediately. According to Leak Diagnosis, using a simple, repeatable test can help you stay proactive about gas safety and catch leaks early before they become serious problems. Note that this method should never be used in place of proper detectors, gas company guidance, or local safety regulations.
Safety first: when to use a soap test and when not to
Safety is the foundation of any gas-leak check. Do not conduct a soap test if you can smell a strong gas odor or hear a hissing sound; in those cases, evacuate the area immediately and call your gas utility or emergency services. A soap solution is best used for routine inspections, after repairs, or when you’re installing or moving appliances. Keep sources of ignition away from the testing area, and ensure good ventilation before you begin. If you have small children or pets, isolate the testing space to avoid accidental contact with the solution. Remember, bubbles indicate leaks at specific points; absence of bubbles at tested points does not guarantee there are no leaks elsewhere in the system. This nuance is why professional testing remains essential for comprehensive safety.
Ingredients and safety basics
The most common gas leak detection solution is a simple mixture of plain dish soap and water. Use a spray bottle or a small brush to apply the solution to joints and fittings. Avoid using harsh cleaners or chemicals that could corrode metal or plastic components; plain soap is gentle and effective for this purpose. Wear basic protection like gloves and eye protection if you’re working around exposed piping. Label any containers clearly and store them away from heat or open flames. Quick, careful preparation goes a long way toward accurate results, and keeping records of test points helps you track issues over time as fittings settle or age.
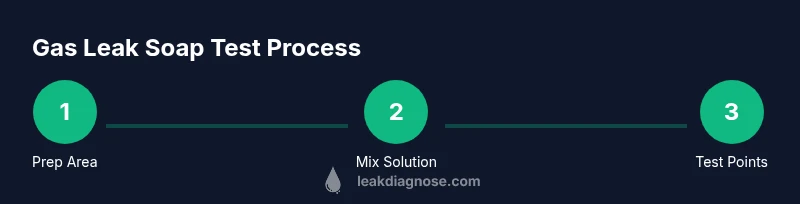
Step-by-step overview (high-level)
This section gives a high-level sense of the flow you’ll follow with the detailed steps in the dedicated STEP-BY-STEP block. Begin by preparing the testing area, gathering supplies, and ensuring good ventilation. Mix your soap solution until you see consistent suds, then apply it to likely leak points: joints, connections, and appliance valves. Watch for bubbles that form instantly or within a short wait time. If bubbles appear, document the location, shut off gas carefully as advised by a professional, and contact your utility or a licensed technician for repairs. After testing, clean the area, rinse any residue, and safely store supplies for future checks. This approach makes routine inspections more tangible and helps you stay proactive about gas safety.
How to interpret bubbles and what they mean
Bubbles at a joint or connector indicate escaping gas at that point, which requires immediate attention. The size and persistence of bubbles can help gauge the leak’s severity, but even small bubbles warrant action. If you see bubbles, do not try to seal the leak yourself with improvised methods; instead, shut off the gas supply if you can do so safely and call a licensed professional. If you test and no bubbles appear, it suggests the areas you tested are sealed at that moment, though you should repeat tests after any maintenance or relocation of appliances. Always perform tests in a ventilated area and stay alert for any odor or hissing sounds.
What to do if you detect a leak
If a bubble test reveals a leak, respond quickly and safely. Do not operate electrical switches or create sparks near the test area. If you can, shut off the gas supply at the main valve and evacuate occupants from the space. Call your gas utility’s emergency number or a licensed gas fitter from a safe location. Do not attempt to repair gas lines yourself unless you are a trained professional. Document the leak location and time of detection so technicians can diagnose the root cause efficiently. After professionals confirm repairs, periodically recheck the area to ensure the issue is resolved and that no new leaks have formed.
Common mistakes and best practices
Common mistakes include testing with inadequate ventilation, using harsh cleaners that could damage joints, and neglecting to test all critical points such as appliance connections, regulators, and shut-off valves. Always test after maintenance or when replacing fittings, and avoid relying on a single spot test to declare the whole system safe. Best practices include using fresh soapy solution for each test, applying the solution slowly along joints, documenting findings, and maintaining a regular testing schedule. Recording the results helps you track the system’s integrity over time and identify trends that could indicate aging components.
Maintaining safety and when to call a professional
Soap tests are a great first line of defense for homeowners, but they are not a substitute for professional gas detection equipment or licensed inspections. If you suspect a leak beyond your ability to safely manage—especially in high-pressure lines, near fuel sources, or if you’re unsure about the cause—call a licensed gas fitter. In many jurisdictions, regulations require periodic inspections of gas appliances and piping, particularly in rental properties. Practice ongoing maintenance: replace aging regulators, inspect connections after home renovations, and schedule periodic checks with a qualified technician. The goal is to minimize risk and preserve home safety through informed, conservative action.
Quick maintenance reminders and documentation
Keep a dedicated log of test dates, locations, and results. Replace test solutions regularly and dispose of soapy water safely. If you relocate appliances or modify gas lines, recheck joints and connections. Use your notes to schedule professional inspections at intervals recommended by your local utility or building codes. By combining a DIY bubble test with professional assessments, you maximize safety while keeping costs sensible for a homeowner-focused maintenance plan.
Tools & Materials
- Dish soap (plain, unscented)(Regular dish soap works; avoid degreasers)
- Water(Tap or distilled; use fresh water for each test)
- Spray bottle(Fill with the soap solution for easy application)
- Brush or sponge(For applying at awkward joints)
- Gloves(Protect hands from soap and any residues)
- Safety goggles(Eye protection for splash risk)
- Towel or rag(Dry areas and wipe away excess solution)
- Marker or tape(Label test points for later documentation)
- Ventilated area(Ensure good airflow before testing)
Steps
Estimated time: 25-40 minutes
- 1
Prepare area and materials
Clear the testing area, open windows for ventilation, and lay out all supplies within easy reach. This reduces distractions and helps you work steadily without forgetting a step.
Tip: Double-check that there are no open flames or ignition sources nearby before you begin. - 2
Turn on testing area safety checks
Verify that you can access the gas shut-off valve if needed and confirm that the space is free from active flames or sparks. If you suspect a major leak, evacuate immediately.
Tip: If you smell gas, do not test—evacuate and call emergency services. - 3
Mix the soap solution
Combine plain dish soap with water in the spray bottle until you see steady suds form when you agitate the bottle. Avoid mixing with other cleaners that could cause unexpected reactions.
Tip: Use a gentle squirt to avoid over-spraying and diluting the solution too much. - 4
Apply to test points
Spray or brush the solution onto joints, fittings, valves, and appliance connections you want to inspect. Focus on areas that might be prone to loosening over time.
Tip: Do not spray directly into electrical components; keep the application targeted to metal and plastic joints. - 5
Observe for bubble formation
Watch each joint for the appearance of bubbles within a short window after application. Bubble formation indicates a leak at that point.
Tip: If bubbles appear quickly, mark the location and proceed to inspect nearby fittings as well. - 6
Document and assess findings
Note the exact location of any bubbles, the observed severity, and any accompanying odor or sounds. Photograph or mark the area for reference.
Tip: Keep your notes organized to aid the professional technician’s assessment. - 7
Take immediate safety actions if needed
If a leak is detected, shut off the gas at a safe valve if you can do so without risk, ventilate the area, and contact your gas utility or a licensed gas fitter promptly.
Tip: Do not attempt DIY repairs on gas lines beyond basic shut-off steps. - 8
Clean up and store
Wipe away soap residue, rinse the area if appropriate, and store testing materials in a cool, dry place. Re-test only after professional guidance or a scheduled maintenance window.
Tip: Label the testing log with date and test point for future reference.
Questions & Answers
What soap should I use for gas leak testing?
Use plain dish soap with water. Avoid powerful cleaners or solvents that could damage equipment.
Plain dish soap with water works best for a basic bubble test; avoid harsh cleaners.
Can I test all gas lines with this method?
Soap tests are a helpful quick check, but they do not replace professional diagnostic equipment or inspections for complex systems.
Bubble tests help, but they don’t replace professional inspections for complex gas systems.
What should I do if I see bubbles?
Shut off the gas if you can do so safely, then contact a licensed gas fitter or your utility's emergency line to repair and inspect the affected area.
If bubbles appear, shut off gas if safe and call a licensed professional immediately.
Is this method safe for rental properties?
Yes, as a routine check, but ensure you have permission from the property owner and coordinate with the gas utility for safe testing practices.
It’s okay for rentals with permission, but coordinate with the gas utility for safe testing.
How often should I perform a soap test?
Schedule tests after major renovations, appliance changes, or on a routine basis per local codes—often annually or semi-annually depending on the property.
Test after major changes or on a regular maintenance schedule per local codes.
Watch Video
Main Points
- Learn to mix a safe soap solution with water for leak testing
- Identify leaks by bubble formation on joints and connectors
- Always prioritize safety and call professionals for repairs
- Document findings to support future maintenance
- Use DIY testing to complement, not replace, professional gas detection