What If Coolant Is Leaking? A DIY Troubleshooting Guide
Urgent, practical steps to diagnose and fix a coolant leak in your vehicle. Learn signs, safety, diagnostic flow, and a clear step-by-step fix with prevention tips from Leak Diagnosis.

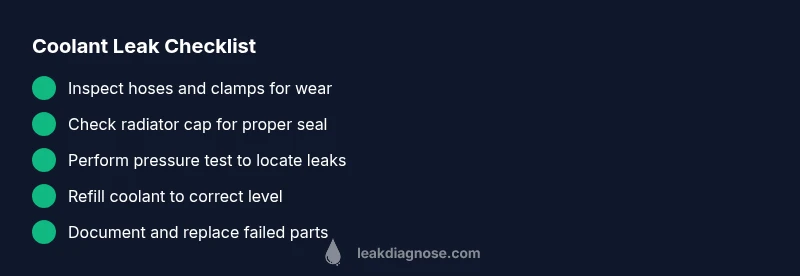
Steps to tackle a coolant leak begin with safety and quick checks: confirm there’s a leak, avoid driving long distances, and inspect hoses, radiator cap, and clamps. If you see puddles, take note of color and smell, then perform a basic pressure test and prepare for a hose or cap replacement. If the leak is severe, seek professional help immediately.
what if coolant is leaking: what it means and why it demands urgent attention
A coolant leak can quickly escalate into engine overheating, warped components, and costly damage. The exact meaning of the phrase what if coolant is leaking centers on risk—antifreeze is toxic, and a small leak can turn into a big problem if ignored. In this guide from Leak Diagnosis, we cover how to recognize the signs, what to check first, and how to move from warning signs to effective fixes without unnecessary delay. The sooner you identify a leak, the better your chances of avoiding expensive repairs. If you notice a sweet odor, green/yellow/orange fluid, or steam from the engine bay, treat it as an urgent issue and begin the diagnostic flow.
what if coolant is leaking: signs you’ve got a problem
Look for puddles under the front of the vehicle, especially after a drive. Coloured coolant (green, orange, pink, or turquoise) is a telltale sign. Watch for overheating gauge spikes, steam, or a drop in coolant level in the reservoir. If you find a damp hose or a damp radiator seam, that’s a common leak source. Little leaks may not immediately overheat the engine but can lead to significant damage if left unattended. Safety note: never open a hot cooling system cap; allow it to cool before inspecting.
what to do immediately when you suspect a leak
First, park on a level surface and turn off the engine. If you must drive, keep speeds moderate and avoid climbs or heavy acceleration. Place a catch pan under the vehicle to collect drips and keep children and pets away from the spill. Document the color and smell of the fluid and check the coolant level in the reservoir. A quick visual check helps you communicate concerns to a mechanic or online support without guessing.
diagnosing common causes: the first checks you should perform
The most frequent coolant leaks come from worn hoses, loose clamps, a faulty radiator cap, or corrosion in the radiator. Start with exterior inspections: hoses for cracks or bulges, clamps for looseness, and the radiator cap for proper sealing. If you can’t find a visible source, a pressure test reveals whether the system holds pressure and where it leaks. Remember to inspect the water pump and heater core if a smell or heat symptom accompanies the leak.
a practical diagnostic flow you can follow
Symbol → Diagnosis → Solutions: If you see a puddle, check for hose damage and clamps (high likelihood). If you don’t find external leaks, perform a pressure test to locate internal seals (medium likelihood). If the cap shows wear or fails to hold pressure, replace it (high likelihood). If you still can’t locate the leak after testing, consult a professional to inspect the radiator core or water pump (low likelihood but high consequence).
step-by-step fixes for the most common causes
- Replace worn hoses and tighten clamps: use a repair manual and the correct hose clamps; run the engine after refilling to verify. 2) Replace radiator cap and verify pressure: ensure you’re using the correct cap rating and reseal the reservoir. 3) If the radiator is cracked or corroded, replace the radiator or have it professionally repaired. 4) Flush and refill the cooling system only if you notice rust or debris. 5) Recheck for leaks after completing repairs and perform a slow test drive to confirm.
safety, disposal, and prevention
Antifreeze is toxic; store it in a sealed container away from children. Clean up spills with absorbent material and dispose of antifreeze at an appropriate facility. To prevent future leaks, replace aging hoses on a routine schedule, inspect the cooling system every season, and use the manufacturer-recommended coolant type. Regular coolant level checks reduce the risk of overheating and costly repairs.
Steps
Estimated time: 60-90 minutes
- 1
Ensure safety and prepare
Park on level ground, engine cool, wear gloves and eye protection. Place a catch pan and have rags ready. Gather tools, a flashlight, and a coolant-safe container for refills.
Tip: Never open a hot radiator cap; allow the system to cool completely. - 2
Check visible components
Inspect hoses for cracks, bulges, or signs of wear. Tighten clamps if they're loose and look for damp spots around joints.
Tip: A bright flashlight helps reveal small leaks along hose seams. - 3
Test radiator cap and pressure system
With the engine cool, remove and inspect the radiator cap for signs of wear or damage. Replace it if necessary and perform a pressure test if you have the tool.
Tip: Use the cap rating specified by the manufacturer. - 4
Run a cooling system pressure test
Attach a pressure tester to the radiator neck or reservoir and pressurize the system. Observe for droplets or steady leaks at seams, hoses, or the radiator itself.
Tip: A steady pressure that holds under test indicates no external leaks. - 5
Address the most common fixes
Replace any degraded hoses, tighten or replace clamps, and install a new radiator cap if needed. Refill coolant to the correct level using the manufacturer’s mix ratio.
Tip: Do not mix old coolant with new; flush if uncertain about contamination. - 6
Check for residual leaks
Run the engine to operating temp and recheck for leaks after a short drive. Look for fresh drips or dampness near hoses and radiator seams.
Tip: Take photos of any leaks for reference when talking to a mechanic. - 7
Finalize and test drive
Top off coolant and drive gently for 15-20 minutes, avoiding heavy loads. Monitor temperature gauges and coolant level again after cooling down.
Tip: If overheating recurs, stop driving and seek professional service.
Diagnosis: Engine overheating, coolant puddle under the engine bay, or a sweet-smelling liquid under the car.
Possible Causes
- highDamaged radiator hose or clamps
- mediumFaulty radiator cap or pressure cap
- lowCracked radiator core or heater core
Fixes
- easyReplace damaged hose or clamps and refill coolant; test for leaks after repair
- easyReplace radiator cap and confirm proper sealing with a pressure test
- hardRepair or replace radiator or heater core if cracked; consult a shop for core replacement
- mediumFlush cooling system to remove rust/debris if contamination is suspected
Questions & Answers
What are the most common causes of a coolant leak?
Most leaks come from worn hoses, loose clamps, or a faulty radiator cap. Cracked radiators or heater cores are less common but serious. Regular inspections help catch these early.
The most common causes are worn hoses, loose clamps, or a bad radiator cap. Cracked radiators or heater cores are less common but require professional help.
Is a small coolant leak dangerous to drive with?
Even small leaks can lead to overheating and severe engine damage. If you notice any leak, plan repairs promptly and avoid long trips until fixed.
Small leaks can still cause overheating, so address them promptly and avoid long trips until fixed.
Can I use stop-leak products as a temporary fix?
Stop-leak products are not a long-term solution and can clog cooling passages. They may provide a temporary stop, but a proper fix is recommended.
Stop-leak products aren’t a reliable fix long-term; use them only as a last resort and seek proper repair.
What safety gear should I use when handling antifreeze?
Wear gloves and eye protection. Antifreeze is toxic; keep it away from children and pets and clean up spills immediately.
Wear gloves and eye protection; antifreeze is toxic and should be cleaned up carefully.
When should I replace the radiator?
Replace the radiator if it’s cracked, corroded, or repeatedly leaking after fixes. A professional assessment helps determine if core replacement is needed.
If the radiator is cracked or keeps leaking after fixes, you’ll likely need a replacement after a pro assessment.
Do I need a full cooling system flush?
A flush is advised if coolant is contaminated or the system contains rust. It’s less urgent for simple hose or cap leaks but can improve long-term reliability.
A cooling system flush is for contamination or rust; not always needed for simple leaks, but can protect longevity.
Watch Video
Main Points
- Identify leak sources early to prevent engine damage.
- Prioritize safety and proper coolant handling.
- Use a pressure test to locate hidden leaks.
- Replace hoses, clamps, or caps as the first-line fixes.
- Consult a professional for radiator or core issues.