What Does Boost Leak Sound Like? A Quick Troubleshooting Guide
Learn what a boost leak sounds like and how to diagnose it quickly. This urgent guide from Leak Diagnosis walks you through common noises, quick checks, a structured diagnostic flow, and clear steps to fix boost leaks safely in turbocharged engines.

Boost leaks typically produce a sharp hiss or whoosh as air escapes before reaching the intake. You may notice reduced power, lag, or a fluttering sound under boost. Inspect hoses, clamps, intercooler, and turbo lines first, then follow our step-by-step flow to confirm and fix. Unaddressed leaks trigger diagnostic trouble codes and decreased fuel efficiency.
What does boost leak sound like and why it matters
A boost leak in a turbocharged engine changes the way air is delivered to the combustion chamber. The most noticeable clue is a loud, sharp hiss or a whoosh when you lift your foot off the accelerator or push the throttle under load. In some cases, you’ll also hear a fluttering noise that resembles a metal flap catching air in the intake tract. The presence of these sounds, plus a measurable drop in boost pressure, can indicate a leak rather than the turbo failing. According to Leak Diagnosis Analysis, 2026, recognizing these noises early helps prevent further damage and reduces repair costs. If you hear noises that don’t clearly point to a leak, you should still treat them as urgent and inspect related components. This guide helps homeowners and DIY enthusiasts identify likely sources and take safe, structured action.
Common locations for boost leaks in turbo systems
Boost leaks can originate from several points in the intake and intercooler path. The most frequent culprits include:
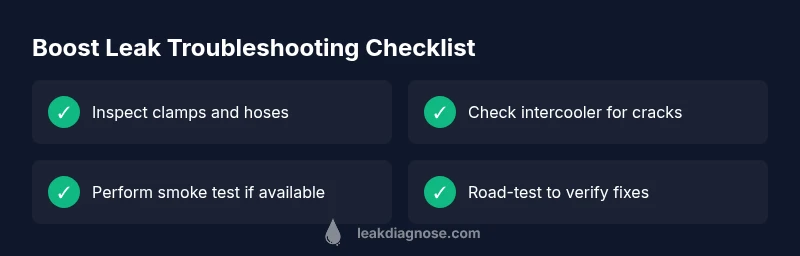
- Loose or damaged intercooler clamps and hoses along the piping from the turbo to the throttle body.
- Cracks or wear in intercooler tubes, especially at connector joints or where the hose belts meet the pipe.
- Leaking vacuum lines or diverter valve plumbing that feeds the turbo system.
- Worn or degraded turbo seals that allow air to bypass the intended path.
- An aging or damaged intercooler itself that develops small leaks under boost.
Inspect these areas carefully, even if the engine runs smoothly at idle. A leak may become more pronounced under load. For safety, work in a well-ventilated area and avoid placing hands near hot parts.
Quick checks you can safely perform on your own
Before diving into complex tests, start with these simple checks:
- Visually inspect all clamps and hose couplings for looseness or corrosion. Tighten clamps to the manufacturer’s specified torque if you have the right tool.
- Look for oil residue or soot around hose connections – this can indicate a leak or boost loss.
- Gently wiggle hoses and connectors to identify any soft spots or missing clips.
- If you have access to soapy water, spray connections while the engine is running to spot bubbles at the leak point.
- Check the intercooler for obvious cracks or damage; a brief pressure test (if you have the kit) can reveal hidden leaks.
Note: Do not run the engine aggressively while leaks are being checked if you’re unsure about safety or the test setup. If any leak is suspected near high-heat zones, stop and seek professional help.
How to interpret boost-related noises: diagnostic cues
Not all hiss sounds come from a leak, so use a systematic approach:
- A hiss that worsens under boost strongly suggests a leak in the intake path.
- A flutter or chuffing noise may point toward a diverter valve issue or a leak feeding the turbo.
- If the sound diminishes with higher gear and speed, look for a loose clamp that only under-load shows the problem.
- If the engine management light or a fault code appears, perform a more formal diagnostic with a pressure test and smoke test recommended by the vehicle manufacturer.
Remember: accuracy matters. A misdiagnosis can waste time and risk turbo damage. This guide emphasizes safe, practical checks for homeowners and DIYers.
Maintenance and prevention to avoid future leaks
Prevention saves time and cost:
- Regularly inspect hose clamps and intercooler piping during routine maintenance. Replace aging hoses before cracks form.
- Use the correct vacuum hoses for your model and replace any that show signs of wear.
- Keep the turbo area clean and free of oil buildup, which can mask leaks and create dangerous conditions under boost.
- When replacing components, apply the proper torque and re-check connections after a few heat cycles.
- Consider a smoke test as part of annual maintenance in high-mileage engines to detect small leaks before they become large failures.
When to seek professional help
If you’re unsure about safety, lack the tools for a robust pressure/ smoke test, or observe oil leaks near the turbo, stop and call a qualified technician. Boost systems operate under high pressure; improper testing can injure you or cause further engine damage. A professional will perform a controlled pressure test, diagnose with precision, and verify fixes with a road test.
Safety notes and common mistakes
- Never use sealants not intended for automotive boost systems.
- Do not attempt a high-boost test without the proper equipment and PPE.
- Avoid crimping or forcing clamps beyond their design range; replace damaged clamps rather than improvising.
- Confirm you’re working with the correct parts for your vehicle’s make/year.
Final checks after repair
After performing any repair, reassemble, start the engine, and recheck for leaks with the same quick tests. A proper road test should confirm that boost levels return to spec and noises are eliminated. If the noise persists, revisit suspected areas or consult a professional right away.
Steps
Estimated time: 60-90 minutes
- 1
Prepare and safety-check the vehicle
Park on a flat surface, engage the parking brake, and ensure the engine is cool before touching anything around the turbo. Gather gloves, eye protection, and the right tools. Label any hoses you disconnect to help reassembly.
Tip: Take photos before disconnecting any parts to aid reassembly. - 2
Inspect hoses and clamps at the turbo-to-intercooler path
Visually inspect for cracks, tears, or signs of oil at joints. Ensure clamps are tight to the specified torque and that hoses seat fully on their fittings.
Tip: Use a flashlight and mirror to inspect hard-to-see areas. - 3
Check the intercooler and piping for damage
Look for bent, cracked, or oil-soaked sections. Wiggle connections to feel for looseness. If you find damage, replace affected sections rather than patching.
Tip: A damaged intercooler can silently leak under boost. - 4
Test vacuum lines and the diverter valve
Check for cracks or disconnections in vacuum hoses feeding the turbo and diverter valve. A faulty diverter valve can mimic a boost leak.
Tip: Replace aging hoses to prevent future issues. - 5
Perform a safe pressure or smoke test (if equipped)
Using the proper automotive test kit, pressurize the intake system or introduce a smoke test to visibly locate leaks. Do not exceed manufacturer's recommended limits.
Tip: If you’re unsure how to perform these tests, skip to professional help. - 6
Reassemble and clean up
Secure all clamps, hoses, and connections. Reinstall any components you removed, ensuring everything seats properly. Wipe away any residue and dispose of old parts appropriately.
Tip: Double-check that no tools are left in the engine bay. - 7
Road-test to verify fixes
Drive under light to moderate boost to confirm noise is gone and boost pressure returns to spec. Listen for new or recurring sounds.
Tip: If boost behavior remains abnormal, stop and revisit suspected sources. - 8
Document and schedule maintenance
Note the components replaced and the dates of service. Schedule a follow-up inspection after a few hundred miles to ensure system stability.
Tip: Preventive maintenance reduces repeated calls. - 9
Know when to escalate
If you detect oil leaks around the turbo or see continuing abnormal noises after repairs, escalate to a qualified technician immediately.
Tip: Avoid driving long distances with a suspected turbo leak.
Diagnosis: Car exhibits reduced boost, hissing, fluttering under acceleration
Possible Causes
- highLoose or damaged intercooler clamps/hoses
- mediumFailed intercooler or piping crack
- lowVacuum leak in turbo intake system
Fixes
- easyTighten or replace clamps and hoses in the intercooler piping, check for cracks
- mediumInspect intercooler and pipes for leaks and repair/replace damaged sections; use sealant only if manufacturer-approved
- hardCheck turbo seals and related fittings; avoid driving with suspected seal failure and seek professional help
Questions & Answers
What does boost leak sound like and how can I tell it apart from normal turbo whistle?
A boost leak usually produces a sharp hiss or whoosh that worsens under acceleration. A normal turbo whistle is steady and higher-pitched. If the sound changes with load or speed and is accompanied by power loss, inspect for leaks.
A boost leak sounds like a sharp hiss that grows under boost and is often paired with less power.
Can a boost leak damage the turbo or engine?
Yes. Prolonged boost leaks can cause running lean conditions, misfires, and extra strain on the turbo seals, potentially leading to bearing wear. Prompt diagnosis helps prevent costly turbo repair.
Boost leaks can stress the turbo and engine if ignored; address them quickly.
Is a charging system leak different from a boost leak?
A charging (air intake) leak refers to air leaks before the engine intake, while a boost leak occurs in the turbo system under boost. Both reduce performance, but boost leaks are specifically within the turbo/intercooler path.
Boost leaks happen in the turbo system, different from pre-engine intake leaks.
What tools are essential to diagnose a boost leak at home?
A basic set includes a flashlight, worm clamps, spare hoses, a pressure tester or smoke machine, and a diagnostic scanner to read codes. A service manual for your model helps ensure correct procedures.
Essential tools are a flashlight, extra clamps, a pressure tester, and a smoke machine if available.
Does a boost leak always trigger the check engine light?
Not always. Some leaks may not trigger codes immediately, but performance loss is a clear sign to inspect. Use a scanner to check for related codes if available.
Sometimes there’s no check engine light, but you’ll still notice reduced boost.
How much does it cost to fix a boost leak?
Costs vary by location and parts needed. Replacing hoses and clamps is typically less than replacing intercooler components. A professional diagnosis with a quoted repair is recommended for accurate pricing.
Costs vary; a pro can quote after diagnosing the exact leak.
Watch Video
Main Points
- Identify boost leak noises early to avoid turbo damage
- Check clamps, hoses, and intercooler piping first
- Use a structured diagnostic flow before disassembling more complex parts
- Call a professional if you detect oil leaks or if safety becomes a concern