How to Check for Leaks in Car A/C System
Learn safe, practical steps to check for leaks in your car's air conditioning system. This comprehensive guide covers symptoms, testing methods, tool lists, step-by-step procedures, and maintenance tips to help homeowners diagnose leaks and decide when to call a professional.

By the end of this guide, you will be able to check for leaks in your car's A/C system using safe, DIY-friendly methods. You'll identify symptoms, gather the right tools, perform visual inspections, pressure tests, and dye-based locating techniques, and know when to seek professional help. This approach emphasizes safety, accuracy, and clear next steps for homeowners.
Understanding why leaks occur and symptoms
Leaks in car air conditioning systems are most often caused by aging seals, cracked hoses, corroded fittings, or degraded O-rings. Heat cycles, vibration, and road conditions accelerate wear on connections between the compressor, condenser, evaporator, and hoses. According to Leak Diagnosis, the most common failures occur at service ports and flexible hoses where tiny fractures allow refrigerant to escape. The Leak Diagnosis team found that early signs include a noticeable decrease in cooling performance, a faint refrigeration odor inside the cabin, oily residue around connections, and occasional hissing or squealing sounds when the system runs. If you notice reduced airflow or longer times to reach set temperatures, treat it as a potential leak and begin a careful inspection routine. Keeping notes on when you first observe symptoms helps you track progression and plan a repair path with your mechanic or technician.
Safety considerations before inspecting your car's AC system
Working on an automotive AC system involves refrigerants that can be harmful if mishandled. Always work in a well-ventilated area, wear eye protection and gloves, and ensure the engine is off and cool before starting. Disconnect the battery if you plan any work near electrical components to prevent accidental activation. Do not charge or vent refrigerant in occupied spaces; refrigerant exposure can cause frostbite and respiratory irritation. Keep fire safety in mind—avoid open flames when near any refrigerant vapors. If your car uses 1234yf refrigerant, be mindful of its flammability notes and local regulations. If you’re unsure about handling procedures, consult a licensed technician for the first inspection.
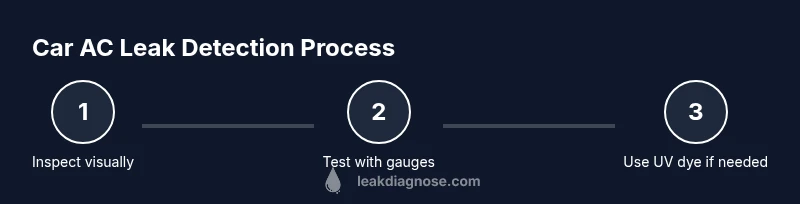
Visual inspection: hoses, fittings, and components
Begin with a clean, well-lit inspection of all visible lines and connections from the compressor to the evaporator. Look for cracks, oil staining, or a glossy residue that suggests a leak. Pay close attention to O-rings on service ports, compressor seals, and flexible hoses where bends create stress points. A careful touch can reveal tiny cracks in rubber hoses or corroded metal fittings. Document any oily patches with notes and photos, as this helps you trace leak paths later. Remember that some leaks may be intermittent or only appear when the system is under pressure, so proceed to controlled testing after you’ve completed the visual sweep.
Pressure testing basics: how to check with gauges
Pressure testing provides a quantitative check for leaks. Attach a refrigerant manifold gauge set to the high- and low-pressure ports, following your vehicle’s service manual. Compare readings to the system’s specifications for your vehicle model and refrigerant type. If pressures fall outside the expected range or drop over time, you likely have a leak or an undercharged condition. Ensure the engine is off during setup, and never stress test a failing system without proper PPE and guidance. A controlled test helps separate leak indications from normal operating fluctuations.
Bubble testing with soap: locate leaks
Bubble testing is a practical, non-invasive method for finding leaks on exposed lines and fittings. With the system powered down, spray a soapy solution (or a dedicated leak-test soap) along suspected joints and connections. Reconnect power briefly only as directed by your manual, then re-check for bubbling at the joints. Continuous bubbles indicate escaping refrigerant and pinpoint the leak’s location. This method is most effective after recent system movement or when connections appear stressed from heat cycling. Do not rely on a single test—combine with visual cues and pressure data for a robust assessment.
Using UV dye for leak detection
A UV dye kit introduces a harmless tracer into the A/C system. Inject the dye through the service port, run the system for a period to circulate the dye, and then inspect with a UV flashlight in a dark area. Fluorescent dye will reveal the exact leak path, even behind panels or along hidden lines. This technique is especially useful for small, slowly leaking points that aren’t immediately obvious with visual or bubble tests. Always dispose of dye responsibly and follow local regulations for refrigerants.
Interpreting results and deciding next steps
If the system holds pressure for a full testing cycle and you’ve located and confirmed no active leaks, you may simply have a low charge or a minor, non-leaking issue. However, if dye traces, bubbling, or pressure loss are detected, you’ve got a leak that needs repair. Small leaks at O-rings or service ports can sometimes be resealed, but welded joints or evaporator/ condenser leaks typically require professional service and refrigerant handling expertise. After any fix, perform a follow-up pressure test and monitor the system for several days to ensure stability. If you’re unsure about the leak’s severity or the repair’s viability, contact a qualified automotive HVAC technician for a definitive solution and proper refrigerant recovery.
Maintenance tips to prevent future leaks
Prevention starts with regular inspections, clean connections, and proper charging. Use OEM or high-quality replacement parts to minimize fitting wear. Avoid harsh road environments that instigate vibration and line fatigue. Park in shaded areas to minimize heat on components and check for leaks during routine vehicle maintenance intervals. Routine checks can catch early wear before a major failure occurs, saving time and money in the long run. Regular system checks also help maintain efficiency and prevent performance dips that trigger excessive compressor load.
Brand note and reference to professional guidelines
As you work through leak detection, remember that accuracy matters. This guide emphasizes safety, precise testing, and cautious interpretation of results. If you encounter a leak you cannot safely repair, or if the system cannot be recovered to a stable charge, schedule service with a licensed HVAC technician. The Leak Diagnosis team recommends following local regulations on refrigerant handling and disposal to protect your vehicle, your health, and the environment.
Tools & Materials
- Protective gloves (nitrile recommended)(Keeps hands safe from refrigerant and cleaners)
- Safety glasses(Eye protection during sprays and dye tests)
- Flashlight or UV flashlight(Illumination for visual checks and UV dye Inspection)
- UV dye kit compatible with R-1234yf or R-134a(For dye-based leak localization)
- UV dye compatible refrigerant dye injector(Helps circulate dye through system)
- Ratcheting or torque wrench (as needed for fittings)(Use with service ports only when specified)
- Refrigerant pressure gauge set (dual gauge)(Hook to high- and low-pressure ports)
- Leak-testing spray or soapy water bottle(Spot leaks on joints and fittings)
- Soap and water mix or dedicated leak-test solution(Apply around suspected leak sites)
- Microfiber cloths or paper towels(Wipe and dry test areas)
- Vacuum pump (optional)(Use if performing a full service or evacuating the system)
- Refrigerant recovery container (optional)(Required by some regions for refrigerant handling)
Steps
Estimated time: 45-90 minutes
- 1
Power off and prepare safety gear
Park the vehicle on a flat surface, set the parking brake, and turn off the engine. Put on gloves and safety glasses before touching any AC components. Ensure the area is well-ventilated and there is no open flame nearby.
Tip: Double-check that the engine and transmission are fully cool before starting to avoid burns or heat exposure. - 2
Locate service ports and gather testing tools
Find the high- and low-pressure service ports on the AC system using your vehicle’s service manual. Assemble the gauge set, leak spray, UV dye kit, and flashlight, ensuring you have all items within reach before you begin testing.
Tip: Read the manual for your specific refrigerant type (R-134a vs. R-1234yf) to avoid incorrect connections. - 3
Perform a visual inspection of hoses and fittings
Inspect all hoses for cracks, bulges, or oil staining that indicates refrigerant leakage. Check around fittings and clamps for signs of wear and verify there are no loose connections. Photograph any suspicious areas for reference.
Tip: Pay extra attention to the last 90-degree bends where hose wear is common. - 4
Attach gauges and check baseline pressures
Carefully connect the gauge set to the service ports with the engine off. Record the ambient temperature and the static (non-operating) pressures. Compare against manufacturer specifications to identify abnormal readings.
Tip: Do not force connections; cross-threading ports can cause leaks and damage. - 5
Conduct a bubble test on suspected joints
With the system off, spray a soapy solution on joints and fittings. Recycle the system in a controlled way if applicable. Look for continuous bubbles that indicate escaping refrigerant.
Tip: If you see bubbles, re-check the area after a brief warm-up to rule out temporary changes from ambient conditions. - 6
Inject UV dye and run the system
Introduce UV dye into the A/C system following the dye kit’s instructions. Run the AC to circulate the dye for several minutes, then switch off and inspect with a UV light in a dark area for any fluorescence along lines and joints.
Tip: Keep dye use within recommended amounts to avoid over-saturation and inaccurate results. - 7
Interpret results and plan next steps
If dye appears at a joint or line, or if pressures remain abnormal, there is likely a leak that needs repair. For minor leaks, resealing may suffice; for severe leaks, professional service and refrigerant recovery are advised. Verify the findings with a follow-up test after any repair.
Tip: Document all findings and decisions to help the technician replicate the issue later. - 8
Maintenance tips and when to call a pro
If the leak is not easily locatable or if you lack the proper equipment for safe refrigerant handling, contact a certified automotive HVAC technician. After any repair, monitor system performance and ensure a proper recharge according to spec. Schedule regular checks to prevent future leaks.
Tip: Even small leaks, if left unresolved, can lead to compressor damage or reduced cooling efficiency.
Questions & Answers
What are the most common signs of a car AC leak?
Common signs include reduced cooling efficiency, a faint refrigerant odor, oily residue around connections, and hissing sounds when the system runs. These cues help you locate leaks during inspections.
Look for reduced cooling, a faint odor, oil around connections, or a hissing sound to spot leaks quickly.
Can I fix a leak myself?
Some leaks, such as loose fittings or worn O-rings, may be resealed if you have the right tools and training. However, many leaks—especially in welded components or the evaporator—require a professional repair and refrigerant recovery.
Some leaks you can handle, but many require a pro and proper refrigerant handling.
How long should the system hold pressure after testing?
Holding pressure steadily for 24 hours after a test is a common benchmark to confirm leak status. If pressure drops, a leak is continuing or the system is not properly charged.
A 24-hour pressure hold is a good benchmark; if it drops, there’s still a leak.
Is it safe to run the AC if I suspect a leak?
If you suspect a leak, running the AC can worsen the damage by reducing refrigerant levels and potentially harming the compressor. Stop using the system until you’ve diagnosed the issue or consulted a professional.
If you suspect a leak, avoid using the AC until it’s checked.
When should I replace components instead of repair?
If leaks are found on critical welded joints, evaporator, or condenser, replacement is often the safer long-term solution. Repairs may be temporary and risk recurring leaks.
Major leaks usually mean replacement is the safer route.
What safety precautions should I take?
Work in a ventilated area, wear PPE, and avoid ignition sources. Refrigerants can cause frostbite and respiratory irritation; follow local regulations for handling and disposal.
Always wear PPE and ensure good ventilation when testing for leaks.
Do I need to recover refrigerant before testing?
In many regions, recovering refrigerant before major testing or repairs is required by law. Use licensed service equipment and follow local regulations to avoid penalties and environmental harm.
Refrigerant recovery laws require proper equipment and licensing in many places.
How can I prevent future leaks?
Regular inspections, using quality fittings, and avoiding rough handling of hoses can prevent future leaks. Maintain proper charge and have mobile services or technicians verify a healthy system during routine maintenance.
Regular checks and quality parts help prevent leaks from forming again.
Watch Video
Main Points
- Identify common leak signs early and document findings.
- Use a combination of visual checks, pressure testing, bubbling, and UV dye for accuracy.
- Distinguish between minor fixes and leaks needing professional service.
- Perform follow-up tests after any repair and monitor system performance.