Do Exhaust Leaks Get Worse? A DIY Troubleshooting Guide
Urgent guide to diagnosing exhaust leaks, understanding progression, and safe fixes for homeowners. Learn warning signs, quick checks, and when to call a pro to protect health and avoid costly repairs.

Exhaust leaks typically worsen from loose clamps, degraded gaskets, or rust creating holes. Start with a visual check of clamps and joints, inspect gaskets for cracks, and note any holes along the pipe. If you smell exhaust indoors or hear a loud hiss, stop driving and seek professional help. According to Leak Diagnosis, early checks save money and protect health.
Do Exhaust Leaks Get Worse? What Homeowners Should Know
Exhaust leaks can start small and become more dangerous over time if left unchecked. Do exhaust leaks get worse? Yes, especially when holes expand due to vibration, corrosion, and heat cycling. According to Leak Diagnosis, many leaks begin at worn clamps or degraded gaskets and worsen as the system heats and cools. Early, homeowner-friendly checks can catch a growing leak before costly repairs are needed. This guide helps you assess risk, locate the leak, and decide when a professional is required. By understanding progression, you can act quickly to protect your health and vehicle performance.
Common Causes of Exhaust Leaks
Exhaust leaks occur for several reasons, and knowing them helps you focus repairs. The top culprits are loose or damaged exhaust clamps, cracked or degraded gaskets at the manifold or pipe joints, and corrosion that creates holes in pipes, mufflers, or the catalytic converter area. A broken exhaust hanger can also shift components enough to stress joints. In newer vehicles, rust is slower but not impossible on exposed sections. Regular inspection helps catch wear before it becomes a leak that travels into your cabin.
Do Exhaust Leaks Get Worse Over Time? Signs You Shouldn't Ignore
Common signs include a loud ticking or tapping when the engine warms up, a noticeable exhaust smell inside the cabin, reduced engine performance, and a drop in fuel efficiency. Early leaks often produce a distinct hissing or fluttering sound near joints. The longer you drive, the more the leak can expand, especially in areas exposed to heat and road debris. Leak Diagnosis analyses in 2026 emphasize early detection to minimize cost and risk.
Safety Risks and Immediate Actions
Exhaust leaks pose health risks from carbon monoxide exposure. Do not breathe fumes, especially in closed spaces. If you suspect a leak in a parked vehicle, ventilate the area, move to fresh air, and avoid running the engine in a garage. If you feel dizzy, lightheaded, or nauseated, seek medical attention. For potential backdraft into your home, open doors/windows and turn on fans, but do not operate the vehicle indoors. If you’re driving when you notice a leak, pull over safely and call for roadside assistance if needed. The Leak Diagnosis team emphasizes stopping use of the vehicle until the leak is fixed.
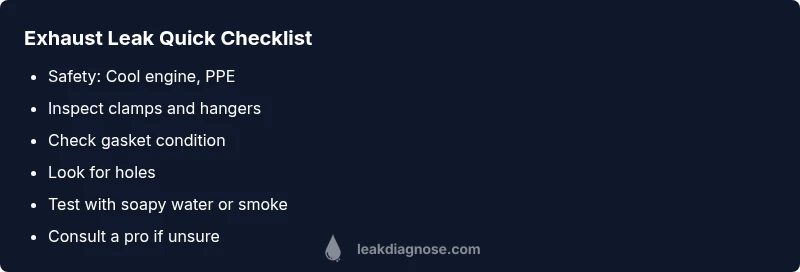
Quick Checks You Can Do Tonight
- Park on a flat surface and ensure the exhaust is cool.
- Visually inspect clamps and joints for looseness or missing bolts; wiggle joints gently to feel for movement.
- Check for soot or black staining around joints, which indicates a leak.
- Apply a soapy water test to joints while the engine is running (careful with hot surfaces) to see bubbles where air escapes.
- If you can access underneath safely, listen for hissing near joints with the engine idling.
- Note: a temporary sealant can be used only as a temporary fix and should be replaced by a gasket or pipe replacement.
Diagnostic Flow Overview
Use a simple progression to triage a suspected exhaust leak: note the symptom, perform quick checks (clamps, gaskets, joints), confirm with a visual or soapy-water test, implement a fix, and recheck. Start with the easiest checks and escalate if signs persist. Record symptoms (noise, smell, performance) and use a smoke test or soapy-water test to visualize leaks. If the leak is near the manifold, catalytic converter, or radiator area, seek professional assistance. This flow aligns with common diagnostic practices used by technicians.
Step-by-Step Preview: Fixing Common Leaks
This section previews the concrete steps you’ll perform in the full fix. It covers tightening fasteners, replacing a damaged gasket, and safe pipe replacement strategies. You’ll learn how to secure hangers, check for exhaust system alignment, and verify the repair with a leak test. The aim is to give you confidence to proceed safely and know when to stop and call a pro.
Prevention Tips to Avoid Exhaust Leaks in the Future
Regular maintenance is your best defense against creeping exhaust leaks. Schedule periodic inspections of clamps, hangers, manifolds, and joints, especially after road debris or harsh winters. Keep the exhaust heat shield intact to prevent vibration damage, and replace rusted segments proactively. Proper torque specifications for clamps and flanges prevent future looseness. The Leak Diagnosis team recommends proactive maintenance to minimize risk and cost.
Steps
Estimated time: 60-120 minutes
- 1
Park and prepare safely
Park on a level surface and let the exhaust cool completely. Engage wheel chocks and wear eye protection and gloves before touching any metal or clamps.
Tip: Never work under a hot exhaust; use jack stands if you must lift the vehicle. - 2
Locate the leak
Inspect from the engine bay forward and along the undercarriage. Look for wetness, soot, or bubbling when you apply soapy water to suspected joints with the engine idling.
Tip: Have a helper run the engine briefly while you observe suspected joints from behind a barrier. - 3
Tighten or reseat clamps
Tighten any loose clamps or hangers. If movement is observed at a joint, reseat the gasket or pipe and re-tighten to the manufacturer’s torque spec.
Tip: Use a torque wrench to avoid overtightening and damaging components. - 4
Replace damaged parts
Install a new gasket or pipe section where warranted. Clean mating surfaces and apply appropriate high-temp sealant only if specified by part instructions.
Tip: Do not exceed recommended sealant use; some joints cannot be sealed externally. - 5
Test for leaks again
Re-run the engine and apply soapy water to joints or use a smoke tester to confirm the leak is resolved. Look for any new bubbles or hiss at joints.
Tip: If you still hear hissing, stop and re-check the area; some leaks require professional service. - 6
Finalize and monitor
Secure all components, clear tools, and drive slowly for a short test. If symptoms return, schedule professional service for a full assessment.
Tip: Document signs and keep receipts for potential warranty claims.
Diagnosis: Exhaust system leak signs such as visible soot, hissing near joints, or exhaust smell inside the vehicle.
Possible Causes
- highLoose exhaust clamps or hangers
- highDamaged manifold or pipe gasket
- mediumCorrosion creating holes in pipe or muffler
- mediumBroken or cracked exhaust pipe section
- lowWorn rubber exhaust hanger causing joint stress
Fixes
- easyTighten clamps and replace missing bolts; reseat joints
- mediumReplace damaged gasket or pipe section; reseal joint with high-temp sealant if approved
- hardRepair or replace rusted sections; consider full exhaust replacement for severe corrosion
- easyReplace torn hangers and realign exhaust path
Questions & Answers
Can exhaust leaks cause carbon monoxide poisoning?
Yes. Exhaust leaks can allow CO to enter your vehicle cabin or home. Symptoms include headache, dizziness, and nausea. If you suspect a leak, evacuate to fresh air and seek professional evaluation immediately.
Yes. Exhaust leaks can let carbon monoxide into your space, so leave the area and get help right away.
Is it safe to drive with an exhaust leak?
No. Driving with a known exhaust leak increases health risks and can cause long-term damage. If a leak is suspected, limit driving and arrange roadside assistance or a tow to a repair shop.
Not safe to drive with a leak. Get it checked as soon as possible.
What tools do I need to fix a simple exhaust leak?
A basic kit may include screwdrivers, a wrench set, replacement gaskets, clamps, and high-temperature sealant. For stubborn leaks near the manifold, you may need professional-grade tools and parts.
You'll typically need wrenches, a gasket, clamps, and heat-safe sealant; some leaks require professional parts.
How long does a typical exhaust leak repair take?
Time varies by leak location and access. Simple clamp tightenings can take under an hour, while manifold or pipe replacement may take several hours and may require a lift.
It can range from under an hour to a few hours based on the leak location.
Should I replace the whole exhaust system for a small leak?
Often not necessary for a small leak. A targeted gasket or pipe replacement is common. A full replacement is usually reserved for widespread corrosion or frequent recurring leaks.
Usually not needed; many leaks are fixed with a gasket or pipe replacement.
What are warning signs a leak is becoming serious?
New or expanding holes, louder exhaust noise, strong fumes indoors, or sudden drop in fuel efficiency indicate a worsening issue. Stop driving and seek professional help.
Watch for louder noises, fumes, or reduced performance and get a professional check.
Watch Video
Main Points
- Inspect clamps and gaskets regularly
- Early detection reduces repair cost
- Do not drive long with a suspected leak
- Safety first: venting and CO risks
- Consult a pro for hard-to-reach areas