Fix Refrigerant Leaks in AC Units: A Home Guide 2026
Learn how to safely detect and respond to a refrigerant leak in your AC unit. This step-by-step guide covers safety, detection methods, when to call a pro, and prevention tips for homeowners.

You will learn how to safely identify a refrigerant leak in an AC unit, understand when to call a licensed HVAC technician, and gather the essential tools for detection and basic containment. This guide emphasizes safety, environmental considerations, proper disposal, and steps homeowners can take to minimize damage while awaiting professional service. It also clarifies legal responsibilities and how to document evidence for service requests.
What is a refrigerant leak and why it matters
Refrigerant leaks occur when the lines carrying R-410A, R-22, or other refrigerants develop holes, cracks, or loose connections. While refrigerant itself is not consumed like fuel, escaping gas can reduce cooling efficiency, raise energy bills, and harm the environment. According to Leak Diagnosis, understanding refrigerant leaks is essential for safety, equipment longevity, and regulatory compliance. A leaking system can cause frost on coils, chilled airflow drop, and in some cases trigger the unit's safety protections to shut down. Recognizing signs early helps limit repair costs and environmental impact. Homeowners should not ignore hissing sounds, oily residues around service ports, ice buildup on copper lines, or unusually warm air from vents. The following sections guide you through detection methods, safety precautions, and decisions about professional service.
Beyond the immediate discomfort of warm air, refrigerant leaks can affect humidity control, indoor air quality, and the overall efficiency of the cooling system. Small leaks may go unnoticed for weeks, gradually decreasing performance and increasing electricity usage. Large leaks pose greater environmental and safety concerns and require prompt professional assessment. This article balances practical detection steps with clear safety boundaries to help homeowners act responsibly without attempting dangerous repairs.
Safety first: risks of refrigerant exposure and improper handling
Exposure to refrigerant can cause dizziness, headaches, or frostbite if it contacts skin or eyes. Higher-risk situations include leaks in confined spaces or when dye tracers are used without proper PPE. Improper handling can release refrigerant into the environment, contravene local regulations, and void warranties. Always wear appropriate PPE, ventilate the area, and avoid ignition sources near refrigerant lines. Do not attempt to weld, braze, or seal refrigerant lines yourself; such actions require professional certification. This section emphasizes why safety and legal compliance matter as much as minimizing damage to your equipment. Leakage events should be treated as maintenance issues with regulatory implications, not casual repairs. For most households, the priority is containment and professional evaluation rather than DIY repair. The Leak Diagnosis team stresses prudent decision-making to protect health, property, and the environment.
How to tell if your AC has a leak (signs and quick checks)
Various signs point to a refrigerant leak. You might notice reduced cooling performance, longer run times, or vents delivering warmer air than usual. Ice or frost forming on copper refrigerant lines is another strong indicator, as is a hissing or bubbling sound near service ports. You may also observe oily residues around connections or a noticeable drop in system pressure. If any of these signs appear, avoid forcing extra cooling cycles and start documenting symptoms. The goal is to establish a pattern of symptoms rather than rely on a single noisy symptom. This helps a technician diagnose the leak more quickly and determine whether the issue lies with the evaporator, condenser, or service valves.
Tools and materials for detection and containment
A homeowner-friendly detection kit typically includes a refrigerant leak detector (electronic or infrared), a UV dye kit compatible with your refrigerant type, and a soap bubble solution for quick external tests. PPE such as nitrile gloves and safety goggles are essential, along with a respirator if dye is used in enclosed spaces. Have a digital camera or smartphone ready to photograph signs and locations. Keep a clean rag or towels for minor drips, and ensure good ventilation in the space being serviced. Document the unit model, refrigerant type, and age of the system to speed up professional estimates. These tools help you gather reliable evidence without attempting dangerous repairs.
What you can and cannot do yourself
You can safely perform non-invasive detection steps and document evidence for a service visit. However, most refrigerant leak repairs require licensed HVAC technicians who can recover refrigerant, seal leaks, and recharge the system with the correct refrigerant. Do not attempt to seal leaks with tape, epoxy, or improvised patches. Those methods can fail and may release more refrigerant or cause system damage. The safest approach is to isolate the unit, control heat sources, and contact a professional with all diagnostic notes and photos ready.
Understanding refrigerant safety: environment, codes, and disposal
Refrigerants are regulated substances with environmental impact and legal rules on handling and disposal. Never vent refrigerant to the atmosphere, and follow local regulations regarding refrigerant recovery and disposal. If you suspect a leak, collect evidence such as location, signs, and approximate rate of loss to inform the technician. Proper disposal of old or unusable refrigerant involves certified reclaimer services, not household waste. This section reinforces the idea that protecting the environment and complying with laws is an integral part of maintaining an air conditioning system.
Preventing future leaks: maintenance and best practices
Regular maintenance helps prevent leaks and extends the life of the AC unit. Schedule filter changes, coil cleaning, and condenser fan checks. Inspect service ports for tightness and signs of corrosion, and address odd noises promptly. Use a good warranty and service plan to ensure access to qualified technicians when leaks occur. Keeping your system in good condition reduces the likelihood of refrigerant loss and improves energy efficiency over time.
Tools & Materials
- Refrigerant leak detector (electronic/infrared)(Choose a model compatible with your refrigerant type (R-410A, R-22, etc.).)
- UV dye kit(Ensure dye is compatible with your refrigerant and system.)
- Soap bubble solution(Use on exposed joints and fittings to reveal leaks.)
- Safety gloves (nitrile or neoprene)(Chemical-resistant; keep hands protected.)
- Safety goggles(Protect eyes from dye and refrigerant exposure.)
- Respirator or protective mask(Use when working with dyes or in poorly ventilated spaces.)
- Digital camera or smartphone(Document signs, locations, and measurements.)
- Leak containment towels(Use for small drips; not a repair method.)
- Owner’s manual and system documentation(Useful for identifying refrigerant type and service history.)
Steps
Estimated time: 2-4 hours
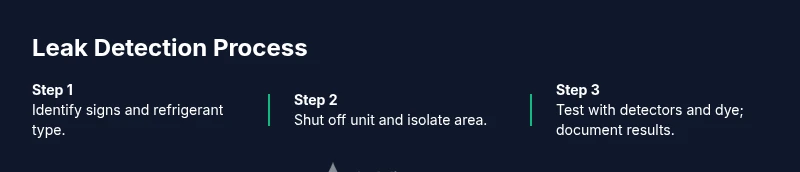
- 1
Identify signs and confirm refrigerant type
Review symptoms such as reduced cooling, ice on lines, or unusual noises. Check the exterior unit for hissing or oily residues near service ports. Refer to the owner’s manual to confirm the refrigerant type and system model before proceeding with any tests.
Tip: Document exact signs and locations with photos for the technician. - 2
Shut off the system and ensure safety
Power down the air handler or outdoor unit to minimize the risk of further leakage and protect anyone nearby. If the unit is already hot or emitting strong fumes, ventilate the area and step away.
Tip: If you smell strong chemical odors, leave the area and contact a professional immediately. - 3
Apply non-invasive detection methods
Use a refrigerant leak detector to scan joints and service valves. If using UV dye, apply according to the kit instructions and allow the dye to circulate for the recommended time before inspection.
Tip: Never attempt to seal leaks with tape or improvised patches. - 4
Perform a soap bubble test on exposed joints
Dampen joints and fittings with soap solution; bubbling indicates a leak. Photograph any bubbling spots and note their exact locations for the technician.
Tip: Only test externally accessible components; do not pressure test the sealed system themselves. - 5
Document evidence and assign priority
Create a brief report noting when signs were first observed, the observed rate of leakage, and any dye results. Store photos and measurements in a single folder for easy sharing with the pro.
Tip: Include the unit model, serial number, refrigerant type, and age of the system. - 6
Contact a licensed HVAC technician
Explain what you observed, share your documentation, and request a service visit. Do not attempt to recover or recharge refrigerant yourself unless you are a licensed technician in your jurisdiction.
Tip: Ask for an written estimate and warranty terms for the repair work.
Questions & Answers
Is it safe to run the AC if I suspect a refrigerant leak?
No. If you suspect a refrigerant leak, stop using the unit and turn off the power to minimize exposure and loss. Start documenting signs and call a licensed technician for evaluation.
If you suspect a refrigerant leak, turn off the system and call a licensed technician for evaluation.
Can I fix a refrigerant leak myself?
Repairing refrigerant leaks safely requires specialized training and certification. DIY fixes can release refrigerant into the environment and may violate local laws. Always rely on a licensed HVAC professional.
Repairing a refrigerant leak yourself isn’t advised; call a licensed HVAC professional.
What are common signs of a refrigerant leak?
Look for reduced cooling performance, longer cycle times, ice on refrigerant lines, hissing sounds near joints, and oily residues around service ports. These indicators warrant a professional inspection.
Common signs include poor cooling and ice on lines; if you see these, call a pro.
How much does it cost to fix a refrigerant leak?
Costs vary widely based on location, system type, and leak severity. A licensed tech can quote after diagnosing the source and required refrigerant, with options for repair and recharge.
Costs vary; a pro will quote after diagnosis and talk through repair and recharge options.
What should I tell the technician when they arrive?
Share observed signs, dates of onset, dye test results, photos, unit model and serial number, refrigerant type, and any prior service notes. The more information you provide, the faster they can diagnose.
Tell the technician what you observed, when it started, and provide photos and model details.
Watch Video
Main Points
- Identify signs early to reduce damage and costs
- Do not attempt to repair refrigerant leaks yourself
- Prioritize safety and regulatory compliance
- Document symptoms, locations, and dye test results for the technician
- Engage a licensed HVAC professional for repair and recharge