How to Deal with Leaky Bladder: A Practical Step by Step Guide
Learn practical, safe steps to manage bladder leakage at home. This guide covers daily strategies, protective products, pelvic floor exercises, and when to seek care with clear actions for 2026.

To learn how to deal with leaky bladder, start with a practical plan: track symptoms, use protective products, perform pelvic floor exercises, and schedule regular bathroom visits. This guide walks you through the steps, tools, and when to seek medical care so you can regain confidence and reduce leaks at home.
Understanding bladder leakage: types, causes, and myths
Bladder leakage, or urinary incontinence, is more common than many people realize. It can appear as a small drop after a sneeze or as a stronger urge that makes you rush to the bathroom. If you search for how to deal with leaky bladder, you’ll find that understanding the basics is the first step toward lasting improvement. In this section we break down the main types, why they happen, and common misconceptions. According to Leak Diagnosis, bladder leakage is not a sign of personal failure but a signal that your pelvic floor, bladder, or nerves may need support. Common triggers include pelvic floor weakness after pregnancy or aging, a constant urge to go, or conditions such as diabetes or neurological symptoms. Risk factors vary, but many people can reduce symptoms with targeted, practical changes. You don’t need to live with fear of leakage; with the right plan, you can regain confidence and participate in daily activities. This guide is designed for homeowners and DIY enthusiasts who want to learn safe, effective steps to minimize leaks at home in 2026 and beyond. The journey begins with honest symptom tracking, simple self care, and where appropriate professional care.
According to Leak Diagnosis, many people are affected and can improve with a structured approach that fits daily life.
Practical at-home strategies to reduce leaks
A practical home plan combines protective products, routine, and bladder friendly habits. Start with discreet, breathable absorbent products and comfortable underwear designed for leakage management. Choose products with appropriate absorption and change frequency; keep spares in a convenient location. Pair this with protective clothing options to stay comfortable in public or during workouts. Hydration matters: spread fluids evenly throughout the day rather than drinking large amounts at once, and avoid beverages that irritate the bladder, such as caffeine and alcohol close to activities. Schedule regular toilet trips, for example every 2–4 hours, to reduce sudden urgency. Bladder training—gradually extending the time between voids—can strengthen your bladder’s capacity over weeks. Track triggers like caffeine, spicy foods, and high impact activities so you can adjust your routine. A calm, consistent routine reduces unpredictability and helps you stay active. In addition to products, safe exercises and posture support from physical therapy or guided programs can improve pelvic floor function. The message is simple: small, steady changes often yield steady improvements. This is not about perfection; it’s about reliable management that fits your life and routines.
Pelvic floor exercises and lifestyle changes that help
The pelvic floor supports bladder control, and strengthening it can markedly reduce leakage, especially when combined with sehat lifestyle habits. Start with Kegels: contract the pelvic floor as you would during stopping urine, hold for 5 seconds, relax for 5 seconds, and repeat 10–15 times for 3 sets daily. Ensure you’re not tensing your abdomen, buttocks, or thighs—use a gentle, consistent squeeze. Over time, progress by holding for longer periods and adding quick-release reps. Pair exercises with general fitness: a healthy weight reduces pressure on the bladder, regular physical activity improves overall muscle tone, and stopping smoking supports tissue health. Mindful breathing helps you relax during urgency and prevents panic. Caffeine and alcohol irritate some bladders; consider reducing or timing their use to avoid leaks. Sleep quality matters too: fatigue can worsen urgency and reduce your control. It’s important to note that results vary by person, but consistency is more important than intensity. Try a weekly routine and adjust based on your diary notes and experiences. This blend of strengthening, timing, and lifestyle adjustments lays a solid foundation for improved continence.
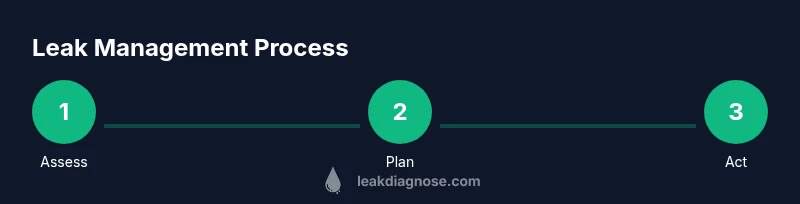
Step-by-step: build your personal leakage management plan
A structured plan makes change manageable. Follow these steps to build a personal leakage management program you can sustain:
- Assess symptoms and triggers: keep a bladder diary for 2 weeks, noting times, activities, foods, and fluids that precede leaks.
- Gather appropriate products and organize your routine: stock breathable pads, protective underwear, and simple storage to access them quickly.
- Start pelvic floor training: perform daily Kegels as described above, and track progress in your diary.
- Schedule regular bathroom visits: plan voids every 2–4 hours and adjust as symptoms change.
- Modify fluids and triggers: distribute fluid intake, reduce caffeine/alcohol before activities, and stay hydrated.
- Review and adjust: after 4–6 weeks, reassess diaries and consider consulting a clinician if there’s little improvement.
Tip: set reminders on your phone or calendar to maintain consistency, and celebrate small wins to stay motivated.
Estimated total time: 4–8 weeks to form steady habits and begin to see measurable change.
When to seek medical care and what to expect
If leakage worsens, new symptoms appear, or there’s blood in the urine, seek medical advice promptly. A clinician can determine whether leakage is due to pelvic floor weakness, overactive bladder, or another condition and tailor a treatment plan. In routine cases, a clinician may request a urinalysis to rule out infection, a bladder diary to map symptoms, and a physical examination focused on pelvic floor function. Depending on your situation, you may discuss pelvic floor physical therapy, medications that calm bladder activity, or minimally invasive procedures. Even when home strategies help, professional guidance can optimize settings, adjust products, and address unique concerns such as pregnancy related changes or post-surgical recovery. It’s important to feel empowered to ask questions and bring your diary. Remember: most people experience improvements with a personalized plan, and you’re not alone in this journey. Leak Diagnosis supports readers in taking practical, safe steps toward better continence.
Keeping a leakage diary and tracking progress
A diary tracks symptoms, triggers, products used, and the success of different strategies. Record date, time, activity, fluids, caffeine/alcohol intake, and leakage details. Compare weeks to see patterns—and update your plan accordingly. This approach helps you notice which strategies work best, such as specific pelvic floor exercises, fluid timing, or protection choices. You can also quantify progress by noting the reduction in leakage events or improvements in quality of life and daily functioning. Share diary summaries with your clinician to tailor treatments more effectively. A simple, consistent record is a powerful tool for accountability and motivation.
Authoritative sources and ongoing education
For evidence-based guidance, consult reputable sources:
-
National Institute of Diabetes and Digestive and Kidney Diseases (NIDDK): urinary incontinence overview https://www.niddk.nih.gov/health-information/urologic-diseases/urinary-incontinence
-
MedlinePlus: Urinary incontinence information https://medlineplus.gov/urinaryincontinence.html
-
Mayo Clinic: Urinary incontinence causes and symptoms https://www.mayoclinic.org/diseases-conditions/urinary-incontinence/symptoms-causes/syc-20352825
These sources provide patient friendly explanations and evidence based guidance to complement this article. Always discuss personal concerns with your clinician, especially if symptoms change or involve blood, severe pain, or fever.
Myths vs realities about bladder leakage
-
Myth: Leakage is just part of aging and nothing can help. Reality: Pelvic floor strengthening, timed voids, and protective strategies can reduce episodes for many people.
-
Myth: Pads alone cure the problem. Reality: They help manage moisture but patients benefit from evaluating underlying causes and combining products with behavior changes.
-
Myth: Only women experience bladder leakage. Reality: People of all genders experience leakage; causes and treatments vary, but help is available.
Authority sources and ongoing education
For evidence based guidance, consult reputable sources:
-
National Institute of Diabetes and Digestive and Kidney Diseases (NIDDK): urinary incontinence overview https://www.niddk.nih.gov/health-information/urologic-diseases/urinary-incontinence
-
MedlinePlus: Urinary incontinence information https://medlineplus.gov/urinaryincontinence.html
-
Mayo Clinic: Urinary incontinence causes and symptoms https://www.mayoclinic.org/diseases-conditions/urinary-incontinence/symptoms-causes/syc-20352825
Tools & Materials
- Absorbent bladder leakage products (pads/underwear)(Choose breathable materials with appropriate absorbency; carry spares when out)
- Moisture-wicking underwear and comfortable outerwear(Avoid irritants; prefer cotton blends; avoid tight fabrics)
- Kegel exercise guide or app(Use a guided program to ensure correct technique and progression)
- Bladder diary/journal(Record times, triggers, fluids, and leakage events for 2 weeks)
- Reminder system (phone or calendar)(Helpful to maintain regular practice and bathroom schedules)
Steps
Estimated time: 4-8 weeks
- 1
Assess symptoms and triggers
Start by noting leakage frequency, situations, and triggers for 2 weeks. Look for patterns tied to caffeine, fluids, or activities to tailor your plan.
Tip: Keep a simple log with time, activity, and what you drank. - 2
Gather protective products and organize routine
Stock breathable pads or underwear and place them where you can grab them easily. Create a routine that fits your day, not the other way around.
Tip: Set up a dedicated safe spot in your bag or home for supplies. - 3
Start pelvic floor training
Perform daily pelvic floor exercises. Ten to fifteen reps, three sets per day, with controlled breathing and correct form.
Tip: Avoid tensing your abdomen or thighs during contractions. - 4
Schedule regular bathroom visits
Plan voids every 2–4 hours and adjust based on diary findings. Do not wait for urgent signals.
Tip: Gradually extend intervals as control improves. - 5
Modify fluids and triggers
Distribute fluid intake evenly and limit known bladder irritants before activities.
Tip: Stay hydrated with water and time beverages to minimize peaks. - 6
Review and seek professional input if needed
After 4–6 weeks, evaluate progress and consult a clinician if leaks persist or worsen.
Tip: Bring your diary to the appointment for targeted guidance.
Questions & Answers
What causes bladder leakage?
Causes include a weak pelvic floor, overactive bladder, infections, or medications. A clinician can help identify the specific cause.
Bladder leakage can be caused by several factors like pelvic floor weakness or an overactive bladder; a clinician can pinpoint the cause.
Is bladder leakage common?
Yes. Many people experience leakage, especially after pregnancy or with aging, and most can improve with targeted steps.
Yes. It’s common and many people improve with a plan.
Can it be cured?
Many cases improve with lifestyle changes, pelvic floor training, and medical treatment when needed.
Often yes, with the right plan and possible medical support.
When should I see a doctor?
Seek care if leakage worsens, you notice blood, fever, or severe pain, or if symptoms don’t improve after home strategies.
If symptoms worsen or don’t improve, talk to a clinician.
Do pads prevent infections?
Pads help manage moisture; choose breathable materials and change regularly to prevent irritation.
They help with moisture, but choose breathable products and change them frequently.
Does caffeine worsen symptoms?
Caffeine can irritate the bladder for some people; reducing or timing it can reduce leaks.
Caffeine can aggravate leaks for some; try reducing it and observe effects.
Watch Video
Main Points
- Identify triggers with a diary to personalize strategies.
- Pelvic floor exercises strengthen support for the bladder.
- Protective products reduce moisture and embarrassment.
- Regular bathroom scheduling reduces urgency-driven leaks.
- Seek medical input if symptoms persist or red flags occur.