Lego Leak Troubleshooting: Quick Fixes for Home Water Issues
Urgent guide to diagnose and fix a lego leak near toy areas, with a practical flow, step-by-step fixes, safety tips, and prevention to protect your home.

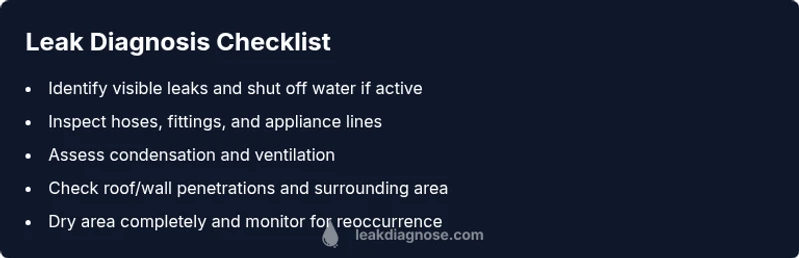
A lego leak usually means a water issue nearby a LEGO play area, not the bricks themselves. The quickest fix is to shut off the water supply to the nearest affected fixture if active, dry the area thoroughly, and run through a simple check: inspect hoses and fittings, look for damp cabinets or ceilings, and monitor for fresh drips. If a leak persists, follow the diagnostic flow to identify the root cause.
What homeowners mean by a lego leak and common scenarios
When caregivers search for a lego leak, they often mean a water issue occurring near a LEGO play table or storage bin. The term captures anything from a slow damp spot to a sudden geyser behind a cabinet where LEGO bricks are kept. These events are worriesome because moisture can damage toys, wood floors, and fabric over time. According to Leak Diagnosis, lego leak incidents typically start as a small wet patch near toy storage and can escalate if ignored. The most frequent culprits are nearby plumbing connections, condensation from humid rooms, or roof leaks that send water along studs and joists toward the play area. Understanding the layout of your space helps you pinpoint the source faster and reduce risk to your LEGO collection.
This article keeps the focus on home troubleshooting for lego leak scenarios, with practical steps a homeowner can take before calling a pro.
Quick checks you can do this moment
- Look for obvious drips under sinks and along supply lines near the play area. A loose compression fitting or a worn hose is a common lego leak trigger.
- Inspect the ceiling or wall above the Lego zone for staining or damp patches that could indicate a roof or plumbing leak traveling along a joist.
- Check appliances nearby, like a dishwasher or washing machine, whose hoses or pumps can leak toward the play corner if the area is adjacent.
- Examine condensate lines from HVAC equipment or dehumidifiers in the room. Cold lines can drip when humidity is high, creating a lego leak-like damp spot.
- Dry the area thoroughly using towels or a wet-dry vac, then recheck after an hour to see if moisture reappears. Keeping a moisture meter handy helps you gauge hidden moisture behind walls.
Note: If you identify active water flow or you’re unsure of the source, stop using the area and call a professional promptly.
Diagnostic flow overview
A clear diagnostic flow helps distinguish between the most common lego leak sources: plumbing, condensation, and roof/wall penetrations. Start with the simplest checks (visible fittings and hoses), then move to more involved steps like testing with a dye or moisture meter. This flow is designed to be safe and actionable for homeowners while indicating when professional help is needed. Leak Diagnosis emphasizes documenting findings as you go to avoid repeating steps and to provide accurate information to any pro who is called in.
Step-by-step fix for the most common leak type in homes
- Stop the water if a fixture is actively leaking: shut off the main valve or the specific valve feeding the suspected line.
- Dry the area completely and remove any LEGO storage or toys from the damp zone to prevent mold and damage.
- Inspect all nearby hoses and fittings for looseness or wear; tighten or replace as needed with proper tools.
- Check the supply lines under sinks or behind cabinets for cracks, and replace damaged hoses with standard ones rated for your fixture.
- For condensate-related leaks, improve airflow and insulation, and consider a small secondary drain pan to catch any drips.
- If the dampness persists after these steps, it’s likely a concealed leak (wall, ceiling, or roof). Mark the area, avoid further use, and contact a licensed plumber.
- Once fixed, recheck over 24–48 hours and document any recurring damp spots to verify the fix.
Safety, precautions, and when to call a pro
Moisture and electricity can be a dangerous mix. Always shut off power at the breaker if you’re inspecting near outlets or electrical devices exposed to water. Wear gloves and eye protection when handling damp materials and avoid standing water where wiring could be involved. Never attempt major roof or structural repairs yourself—these require a licensed professional. If you notice persistent dampness, mold growth, or water appears behind walls, contact a plumber or building expert promptly. Prompt professional evaluation is especially important if you live in an older home with hidden plumbing runs or if the lego leak zone is in a basement or crawl space.
Prevention and maintenance to avoid future lego leaks
Prevention hinges on keeping the play area dry and monitoring the surrounding plumbing and environmental conditions. Use drip trays under appliances near the lego zone, ensure gutters and downspouts divert rain away from walls, and seal any gaps where water could travel along joists. Regularly inspect hoses, fittings, and fixture connections every 6–12 months and replace worn components ahead of failure. Keep a dehumidifier in damp rooms and maintain a stable indoor climate to reduce condensation. A proactive approach saves both time and costly damage.
Cost considerations and typical timelines
Costs for lego leak troubleshooting can vary widely depending on the source and the extent of the damage. Simple fixes such as tightening fittings or replacing a hose may cost under a hundred dollars if you do it yourself. More complex repairs—like replacing a faulty appliance valve, repairing hidden plumbing, or roof/joist work—can run into several hundred dollars or more, depending on materials and labor. A professional assessment typically takes a few hours, with follow-up checks scheduled within the next 24–72 hours to ensure the area stays dry.
Real-world example: case study from a playroom basement
A family noticed a damp spot near a LEGO storage bin in a basement play zone after a heavy rainfall. The quick check identified a leaking condensate line from a new dehumidifier as the source. After turning off the unit and cleaning the spill, the homeowner replaced the condensation hose and added insulation around the line to prevent future dripping. Within 48 hours the area stayed dry, and a subsequent inspection found no further moisture. This example illustrates how a methodical approach can turn a lego leak into a quick, low-cost fix when the issue is identified early.
Steps
Estimated time: 60-90 minutes
- 1
Identify the source with a careful visual check
Start by drying the area and performing a careful visual inspection. Look for obvious drips, pooled water, or damp cabinets near the lego zone. Use a flashlight to inspect behind shelves and under furniture.
Tip: Document your observations with photos to track changes. - 2
Isolate the area and shut off water if needed
If water is actively leaking, shut off the main water valve or the valve feeding the suspected line to stop further damage. Do not touch electrical outlets with wet hands.
Tip: Keep a flashlight handy in case power tools are needed. - 3
Check fixtures and hoses
Inspect all visible fittings and hoses for looseness, cracks, or wear. Tighten fittings gently, replace damaged hoses with the correct size, and ensure clamps are secure.
Tip: Replace rubber washers if you see any seepage. - 4
Assess appliance connections nearby
If the lego leak area is near a dishwasher, washing machine, or humidifier, inspect their hoses and drainage lines for signs of leakage or condensation buildup.
Tip: Run a test cycle with the appliance disconnected from power if safe to do so. - 5
Evaluate condensation and humidity
Measure humidity levels and observe if a cold surface is attracting moisture. Improve ventilation and consider insulating cold lines to reduce condensation.
Tip: A simple dehumidifier can help stabilize humidity. - 6
Address concealed leaks with professional help
If there is no obvious source, the leak may be behind walls or in the roof. Mark the area, avoid disturbing the site, and contact a licensed plumber or contractor.
Tip: Ask for a written assessment and timeline. - 7
Dry and monitor post-fix
After repair, dry the area thoroughly and monitor for 24–72 hours. Use a moisture meter to verify the space remains dry.
Tip: Keep records of readings for future reference.
Diagnosis: Water stains or damp spots near a lego storage or play area
Possible Causes
- highLoose or damaged supply lines under sinks or behind cabinets
- mediumCondensation from HVAC or cold-water lines in humid spaces
- lowRoof or wall penetration allowing rainwater to travel toward the play area
Fixes
- easyTighten fittings and replace worn hoses; use appropriate thread sealant
- easyImprove insulation and airflow to reduce condensation; install a drip pan where needed
- mediumSeal roof/wall penetrations or arrange professional roof/structural repair
Questions & Answers
What is a lego leak and how is it different from other leaks?
A lego leak refers to water problems occurring near a LEGO play area or storage, not a property defect in LEGO bricks. It’s typically caused by nearby plumbing, condensation, or roof/wall leaks that travel to the play space. Treat it as a home-leak issue in the play zone.
A lego leak is water near a LEGO play area, usually from plumbing, condensation, or roof leaks, not the bricks themselves.
Can condensation cause a lego leak in humid basements?
Yes. Condensation from HVAC or cold lines can produce damp patches that look like a lego leak. Improving airflow and insulation around these lines often resolves the issue.
Condensation can create a damp patch that looks like a lego leak; improve airflow and insulation to fix it.
When should I contact a plumber for a lego leak?
If you identify a suspected concealed leak, persistent dampness after basic fixes, or mold growth, contact a licensed plumber. Hidden leaks behind walls or ceilings require professional tools and expertise.
Call a plumber if the leak is hidden or if dampness persists after basic fixes.
Is it safe to use bleach to treat mold near lego areas?
Bleach can kill surface mold, but it does not address underlying moisture. Use a proper cleaner, ventilate, and fix the cause of moisture to prevent recurrence. Wear protective gear when cleaning mold.
Bleach can kill surface mold, but you must fix moisture to prevent it from returning.
What can I do to prevent lego leaks in the future?
Maintain routine checks on hoses, ensure good ventilation, and keep the play area dry. Use drip trays, seal gaps, and inspect roofing and plumbing annually to catch issues early.
Regular checks, good ventilation, and proactive maintenance help prevent lego leaks.
Watch Video
Main Points
- Start with the simplest checks and escalate.
- Isolate water and dry the area to prevent mold.
- Document findings for accurate diagnosis.
- Call a pro when leaks are hidden or structural.
- Prevent future leaks with regular maintenance.