How to Install LeakBot: A Complete DIY Guide
Learn how to install LeakBot with a clear, step-by-step method for homeowners. This guide covers compatibility, mounting, app pairing, testing, and tips to maintain reliable leak monitoring.

By following these steps, you’ll complete how to install leakbot in a typical home in about 30–60 minutes. This guide covers prep, mounting, wiring (if required), app pairing, and initial testing. You’ll learn compatibility notes, safety reminders, and simple troubleshooting to ensure reliable leak monitoring from Leak Diagnosis-approved best practices.
What is LeakBot and why you might want to install leakbot
If you’re exploring how to install leakbot, this guide explains what LeakBot does, why it’s a practical addition for homes, and how it can help you catch leaks early. LeakBot is a modular, sensor-based monitoring system designed to alert you to hidden leaks in plumbing, appliances, and appliances that use water. When paired with the official app, it provides real-time notifications, diagnostic hints, and a simple way to review surface conditions and water activity across rooms. According to Leak Diagnosis, adopting proactive leak monitoring reduces water waste and minimizes damage risk by catching leaks before they escalate. In this article, you’ll find a practical, step-by-step approach to installation, prerequisites, and best practices to get you up and running quickly.
Compatibility and prerequisites
LeakBot devices are designed for typical residential settings, but there are a few prerequisites to check before you begin. Ensure you have a stable power source for the hub (battery or AC adapter, depending on the model), and a reliable 2.4 GHz Wi‑Fi network for app pairing and remote monitoring. The system is generally compatible with standard indoor environments, but avoid direct exposure to standing water, extreme humidity, or high heat. A smartphone or tablet with the native app installed is essential for configuration and alerts. If you’re integrating with other smart home systems, verify compatibility in advance. As always, consult the manual for model-specific requirements, especially if you’re installing in a kitchen or laundry area where vibration or heat is present. Leak Diagnosis emphasizes following the official guidelines to maintain performance and safety.
Planning your installation for optimal coverage
To maximize the effectiveness of LeakBot, plan placement to cover likely leak paths and critical zones. Start with the main water supply lines and areas that are prone to slow drips, such as under sinks, near appliances, and along exposed pipes. A good rule of thumb is to space sensors so no more than 15–20 feet apart in a typical home, adjusting for walls, floors, and layout. Consider high-traffic rooms where a leak would cause rapid damage, and place the hub in a central, dry location with strong Wi‑Fi. Create a simple layout map so you can reproduce the arrangement if you relocate devices later. Leak Diagnosis notes that careful planning reduces false alerts and improves overall reliability.
Tools, materials, and prep (overview)
Before you start, gather the items you’ll need and review the installation plan. Having a clean workspace helps you stay organized and speeds up the process. Prepare a safe, dry area to assemble the hub, pull together mounting hardware, and set up a power source. If you’re new to this, keep the manual handy and take photos during each step for future reference. This section provides context for the step-by-step process and sets expectations for time and effort.
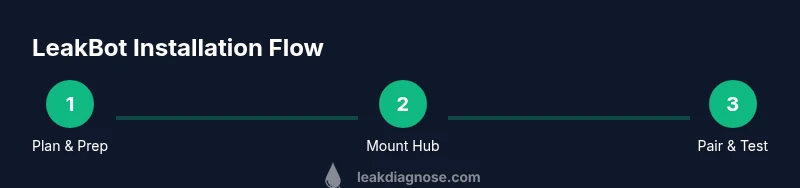
Step-by-step installation overview
The installation can be thought of as a sequence: plan placement, mount the hub, install and position sensors, power the unit, and pair with the app. After mounting, you’ll connect power, secure cabling if applicable, and verify a stable network connection. Finally, you’ll run a functional test to confirm that sensors trigger alerts correctly and that the app receives notifications in real time. Following these stages helps ensure reliable monitoring from day one.
Pairing the app and verifying connections
With hardware in place, the next phase is pairing the LeakBot hub with the companion app. This typically involves scanning a QR code, selecting the device from a list, and confirming, then testing each sensor individually. Verify that push notifications and in-app alerts are enabled, and check that signal strength is robust in the areas where you installed sensors. A successful test means you’ll receive a notification for a simulated leak and see status indicators update in real time.
Maintenance, troubleshooting, and safe disposal
Maintenance is about staying ahead of performance issues. Regularly check battery levels where applicable, inspect seals and mounting points, and verify that no dust or moisture is accumulating around sensors. If alerts seem inconsistent, review the placement and power status, restart the hub if required, and re‑test after adjustments. For disposal, follow local e‑waste regulations and the manufacturer’s guidance on battery disposal. Regular checks help maintain accurate leakage detection and prolong device life.
Quick-start checklist and next steps
Before you call it done, run through a concise checklist: confirm power is secure, verify placement per plan, complete app pairing, run a test, and confirm alert delivery. If you plan to expand coverage, add more sensors following the same placement principles and update the layout map. For ongoing peace of mind, schedule a monthly quick check of battery levels, seals, and app settings.
Tools & Materials
- LeakBot kit (hub, sensors, mounting brackets)(Include mounting screws and sensors)
- Power source (AC adapter or batteries)(Check voltage specs and ensure compatibility)
- Drill and bits (optional for masonry/wall mounting)(Only if you need to create new mounting holes)
- Screwdriver set(Phillips #2 and flathead as needed)
- Level(Helps keep hub straight during mounting)
- Measuring tape(Plan distances between hub and sensors)
- Pencil/marking tool(Mark drilling points and sensor locations)
- Safety gear (gloves, glasses)(Personal protection during mounting)
- Waterproof sealant or tape(Optional for outdoor or damp locations)
Steps
Estimated time: 45-75 minutes
- 1
Power down and prepare workspace
Power off nearby electrical outlets if you’ll drill near them and clear the area of obstructions. Read the manual to understand model-specific requirements. Lay out all parts and tools so you can reach them quickly, and identify a dry, well-lit location for assembly.
Tip: Keep the manual handy and align components on a clean surface. - 2
Choose installation location
Select a central location that minimizes cable runs and avoids direct water spray or heat sources. Mark the mounting points for the hub using a pencil, then use a level to ensure straight alignment.
Tip: Avoid placing the hub behind appliances that vibrate or generate heat. - 3
Mount the hub
Attach the hub to the wall or a stable surface using the provided brackets and screws. If mounting in drywall or masonry, follow the recommended fastener type. Double-check alignment with the level and tighten securely.
Tip: Start one screw loosely to adjust alignment before tightening fully. - 4
Install sensors
Mount each sensor at its planned location, ensuring they are oriented toward suspected leak paths. Use the included mounting hardware, and seal any gaps to prevent moisture entry near electronics.
Tip: Keep sensors away from direct water streams and heavy cleaning areas. - 5
Power up and connect power source
Insert batteries where required or connect the hub to a power outlet. Confirm the device powers on and indicates its status. If using batteries, ensure correct orientation and replace when signs of wear appear.
Tip: Monitors with battery power may require more frequent checks. - 6
Pair with the app
Open the LeakBot app and add the new device. Follow prompts to connect over Wi-Fi and grant necessary permissions. Wait for the status light or notification confirming a successful pairing.
Tip: Keep your phone's Bluetooth and location services enabled during setup. - 7
Run initial test
Trigger a test event via the app or hardware test button if available. Verify alerts are received promptly on the phone and that sensor indicators reflect activity.
Tip: Document the results to confirm coverage and adjust placement if needed. - 8
Configure alerts and thresholds
Set notification preferences, thresholds for leak sensitivity, and which devices should trigger alerts. Save your layout for future reference and ensure household members have access if needed.
Tip: Too many alerts can lead to fatigue; fine-tune based on typical water usage. - 9
Document layout and plan maintenance
Create a simple map of sensor locations and the hub position. Schedule periodic checks for battery life, seals, and app software updates to sustain performance.
Tip: Keep a running checklist to simplify future moves or expansions.
Questions & Answers
What is LeakBot and how does it work?
LeakBot is a networked leak-detection system with sensors and a hub that alerts you to water leaks. It works with a companion app to provide real-time notifications and diagnostic insights. The setup focuses on placement, connection, and calibration to ensure reliable monitoring.
LeakBot is a sensor-based leak detector that alerts you through an app. After it’s installed, you’ll receive real-time notifications when it detects water activity.
Can I install LeakBot myself, or do I need a professional?
Most homeowners can install LeakBot themselves using the included hardware and app. Follow the step-by-step guide, and consult the manufacturer’s instructions for any model-specific requirements. If you’re uncomfortable with electrical work or drilling into walls, consider professional assistance.
DIY installation is supported for most models. If you’re unsure about electrical or structural changes, a professional can help.
Does LeakBot require Wi-Fi and a mobile app?
Yes. A stable 2.4 GHz Wi-Fi connection is typically required, and you’ll pair the hub with the LeakBot app on your smartphone or tablet. The app enables alerts, status checks, and history review.
A mobile app and Wi-Fi are needed to receive alerts and monitor status remotely.
Where should I place the hub and sensors for best coverage?
Place the hub in a central, dry location with good Wi-Fi signal. Position sensors near high-risk areas like under sinks, behind dishwashers, and along exposed pipes. Avoid direct water jets and heat sources.
Keep the hub central and sensors near likely leak paths for reliable coverage.
How do I test LeakBot after installation?
Use the app to trigger a test event or use a hardware test button if available. Confirm that alerts arrive promptly, and verify that each sensor shows activity in the app.
Run a test in the app and confirm alerts appear on your device.
What maintenance is required for long-term performance?
Regularly check button and sensor indicators, replace batteries as needed, and update firmware. Periodic re-testing after updates helps ensure continued reliability.
Keep sensors and firmware up to date and re-test after any updates.
Watch Video
Main Points
- Plan placement for full room coverage
- Follow app pairing steps precisely
- Test and calibrate alerts
- Maintain batteries and seals regularly
- Refer to Leak Diagnosis guidelines for best practices