How to Use a Leak Detection System at Home: A Practical Guide
Learn how a leak detection system works, how to choose the right setup, install it safely, and maintain it to protect your home from water damage. Practical steps, tips, and ROI considerations for homeowners.

Learn how a leak detection system protects your home by giving early warnings, triggering alerts, and helping prevent water damage. This guide explains how these systems work, how to choose the right model, basic installation considerations, and routine testing to keep your home safe and dry. You'll also see practical tips for placement and maintenance.
how leak detection system: overview and relevance
A leak detection system is more than a gadget on the wall; it is a proactive safeguard for homes and appliances. In many houses, the first sign of trouble is a damp patch or a moldy corner, which can escalate into costly repairs. A well-designed system provides early warnings, helps localize leaks quickly, and, in some configurations, can isolate water supply to limit damage. According to Leak Diagnosis, proactive planning and a properly configured leak detection system can dramatically reduce water damage and waste. In practice, a good system combines sensors, a central controller, and clear notification methods to give homeowners time to respond before a flood, mold growth, or structural damage occurs. This overview clarifies what a system does, why it matters, and how to think about the different types, so you can pick a setup that fits your home and budget. By understanding the core concepts here, you’ll be better prepared to assess options, plan installation, and maintain your system over time.
How a leak detection system works and why it matters
A modern leak detection system monitors for abnormal moisture, dampness, or unexpected water flow. Sensors placed at critical points detect the presence of water and transmit signals to a central controller or smart hub. When a leak is detected, the system can trigger audible alarms, push notifications to your phone, and in some configurations, autonomously shut off the water supply to prevent further damage. Early alerts reduce the risk of hidden leaks that cause long-term damage and costly repairs. The data collected by the system can also help homeowners identify recurring hotspots and adjust maintenance practices. For families with pets or children, proactive monitoring adds a layer of safety by catching leaks before they lead to mold or slippery floors. In short, a leak detection system acts as a proactive guardian, buying you time to react and protect your most valuable spaces.
Sensor types and how they detect leaks
Leak detection ecosystems rely on several sensor technologies. Point moisture sensors detect water presence on floors, under sinks, or behind appliances. Inline flow sensors monitor water movement through pipes, catching unexpected surges or continuous flow. Acoustic detectors listen for the telltale sounds of running water behind walls or under floors. Some systems combine multiple sensor types for redundancy and accuracy. Central hubs correlate sensor data, confirm false alarms, and trigger alerts through apps, SMS, or sirens. When selecting a system, consider the sensitivity range, response time, and whether it supports dry-contact relays for integration with existing shutoffs or smart valves. The right mix depends on your home layout, the appliances you own, and your risk tolerance. The goal is timely, actionable information without frequent false alarms that desensitize you to warnings.
Where to place sensors for maximum coverage
Effective placement starts with high-risk zones: under kitchen sinks, behind dishwashers and washing machines, near water heaters, and along main supply lines. Place sensors near exterior walls in bathrooms and laundry rooms where slab leaks or condensation can occur. In basements or crawl spaces, mount sensors near moisture-prone areas and around HVAC equipment. For multi-story homes, consider placing at the top of stairwells or near any plumbing risers that feed multiple fixtures. Avoid direct impact from splashing water or extreme heat, which can damage sensors. If you have a pier and beam foundation, position sensors at the perimeter where moisture intrusion is most likely. Regularly inspect and test sensor mounting to ensure the device remains in proper contact with the surface and free of dust or debris that might affect readings.
How to evaluate features when choosing a system
When comparing leak detection systems, look for reliable sensors, clear alerts, and robust connectivity. Critical features include real-time notifications, battery backup, cross-platform integration with mobile apps, and the option for automatic shutoff of water supply. Consider whether the system supports multiple sensor types in one package, audible alarms, and easy expansion if you add new appliances. Data history and reporting can help you identify recurring leaks and track performance over time. Compatibility with your existing smart home ecosystem (Alexa, Google Home, or Apple HomeKit) can simplify daily use. Finally, consider service plans, warranty length, and customer support quality—these factors influence long-term value just as much as upfront cost.
Installation planning and safety considerations
Before you begin installation, plan a safe working environment. Turn off the main water supply when mounting sensors near plumbing fixtures or installing a shutoff valve. If you are wiring sensors, follow local electrical codes and use proper enclosures and strain relief. For wireless systems, ensure strong Wi‑Fi coverage in all installation zones; run a quick speed test and avoid dead zones. Use appropriate mounting hardware for your wall type (drywall, tile, concrete) and seal any gaps to prevent dust or moisture ingress. Label wires and sensors clearly to simplify future maintenance. If your home has extensive pipework or you rent a residence, consult a professional for complex installations or for systems that involve automatic shutoff. Safety and compliance come first; a well-planned install reduces nuisance alarms and ensures reliable operation over time.
Setup, calibration, and initial testing
After mounting, connect sensors to the hub and power supply. Calibrate each sensor if the manufacturer provides a calibration routine; this ensures sensors respond accurately to moisture levels. Configure alert thresholds to balance sensitivity with minimizing false alarms. Run an initial test by simulating a controlled leak near a sensor (using a small amount of water and a sponge) and verify that alarms, notifications, and any connected shutoffs engage as expected. Document the exact locations of sensors and the steps you performed during testing for future reference. Regular tests (monthly is common) help ensure continued reliability and catch drift in sensor readings before a real leak occurs.
Maintenance cadence, battery life, and upgrades
Maintenance is an ongoing practice that protects your investment. Inspect sensors monthly for physical wear, cleaning dust or lint from sensing elements, and confirming mounting integrity. Replace batteries according to manufacturer recommendations or when low-battery alerts appear. If your system supports firmware updates, apply them during a maintenance window to minimize disruption. As your home evolves (new appliances, renovations), upgrade or expand the sensor network to maintain coverage. Keeping a simple log of maintenance activities helps you track performance and plan future upgrades. A well-maintained system remains effective at catching leaks early and reducing the potential for water damage.
Real-world scenarios and return on investment (ROI)
In real homes, a leak detection system can dramatically reduce damage from hidden leaks in walls, under floors, or behind appliances. While ROI depends on home size, occupant behavior, and local climate, homeowners with proactive monitoring typically experience fewer costly repairs and less downtime after water events. The value lies not only in preventing property damage but in protecting building materials, personal belongings, and critical utilities. The initial cost is often offset by avoided repairs and insurance considerations over time. The Leak Diagnosis team emphasizes that a reliable system is a prudent element of a modern home maintenance plan, especially in areas prone to rapid water intrusion or in homes with aging plumbing.
Final take: integration into a smart home and daily life
A leak detection system should feel like a natural extension of your home rather than a complicated add-on. When well-integrated, it provides clear alerts, actionable steps, and simple automation that aligns with your daily routines. Emphasize ease of use, quick access to alerts, and reliable operation in the event you are away from home. With thoughtful placement, careful installation, and regular checks, a home leak detection system becomes a dependable partner in safeguarding your property and reducing the stress associated with unexpected water issues.
Tools & Materials
- Leak detection sensors (water sensors) or a whole-home detector kit(Place at high-risk areas: under sinks, behind appliances, near water heaters)
- Control hub or smart home integration(Ensure compatibility with your network (Wi‑Fi, Zigbee, or Z‑Wave))
- Power supply and backup battery(Provide uninterrupted power; use battery backup if mains reliability is uncertain)
- Water shutoff valve or auto-shutoff integration(Optional safety feature to automatically stop water at leak detection)
- Mounting hardware (screws, anchors)(Appropriate for wall material; use anchors for hollow walls)
- Tools: drill, screwdriver, wire stripper(For mounting sensors and wiring; have spare bits on hand)
- Sealant and cable management supplies(Silicone sealant; cable ties; labeling materials)
- Testing liquids or spray bottle(Use minimal moisture for testing sensors without soaking)
Steps
Estimated time: 60-120 minutes
- 1
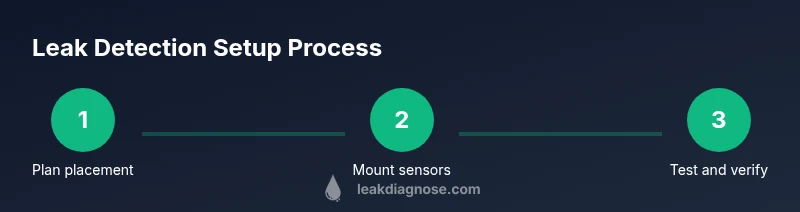
Plan sensor placement
Map out high-risk zones and determine where sensors will offer the quickest, most reliable coverage. Prioritize areas with hard-to-detect leaks, like behind appliances, along main supply lines, and in damp basements or crawl spaces. Document the plan so everyone in the household understands where sensors live and why.
Tip: Label each sensor with its location and the area it covers to simplify future maintenance. - 2
Mount sensors at target locations
Secure sensors securely according to the manufacturer’s instructions. Avoid placement where water splashes directly onto the sensor unless the design is rated for splash exposure. Ensure alignment with the hub’s communication range if using wireless devices.
Tip: Use accessible mounting spots for easy replacement or cleaning without removing walls or fixtures. - 3
Install the control hub and connect power
Set up the central hub in a dry, central location with reliable power and internet access. Pair sensors according to the setup guide and verify that each sensor appears as an online device in the app. Test local alarms and app notifications to confirm connectivity.
Tip: Enable backup power and consider placing the hub in a location with strong Wi‑Fi signal to avoid dropouts. - 4
Connect auto-shutoff (optional)
If your system supports automatic water shutoff, integrate it with the main supply valve or a smart valve. Follow manufacturer instructions to ensure the valve responds to detected leaks within seconds of alarm.
Tip: If unsure about plumbing changes, consult a licensed plumber for safe integration. - 5
Configure alerts and automation
Set alert thresholds, notification channels (phone, email, or SMS), and any automation like turning on lights or notifying neighbors. Ensure you have test mode enabled for periodic checks without triggering real events.
Tip: Keep alert preferences consistent across devices to avoid confusion during a real leak. - 6
Run initial test and verify response
Simulate a leak in a controlled manner near a sensor and confirm alarm behavior, notifications, and any automatic shutoff works as expected. Check logs to confirm the system recorded the event and that responders were notified.
Tip: Document results and timestamp for future reference during maintenance. - 7
Document and schedule maintenance
Create a simple maintenance plan, noting battery replacement dates, sensor cleaning, and firmware updates. Set calendar reminders to reassess coverage after renovations or major appliance changes.
Tip: Keep a written inventory of sensor locations and model numbers for easy troubleshooting.
Questions & Answers
What is a leak detection system and how does it work?
A leak detection system uses moisture or flow sensors to monitor for leaks and notify you through apps or alarms. Some models can also shut off the water supply automatically to prevent damage. This combination helps you respond quickly and minimize water-related losses.
Leak detectors monitor moisture and flow; many can shut off water automatically to prevent damage.
Can I install a leak detection system myself?
Many systems are designed for DIY installation with clear guides. Complex integrations or auto-shutoff connections may require a professional plumber or electrician depending on local codes and plumbing layouts.
Many systems are DIY-friendly, but check local codes and your setup for auto-shutoff work.
What features matter most in a home leak detection system?
Key features include sensor sensitivity, reliable alerts, multi-channel notifications, smart home compatibility, and optional automatic shutoffs. Consider expansion options for additional sensors if you anticipate new water sources.
Look for accurate sensors, clear alerts, easy integration, and optional auto-shutoff.
How often should I test my leak detection system?
Test monthly and after any power or network interruption. Use built-in test modes and run a full system check to confirm alerts and shutoffs function properly.
Test it monthly and after outages to ensure reliability.
Will a leak detection system prevent all water damage?
These systems reduce risk and can limit damage with early alerts, but no solution is perfect. Combine monitoring with proper maintenance and automatic shutoffs for the best protection.
It reduces risk but cannot guarantee zero damage.
What maintenance does a leak detection system require?
Keep sensor surfaces clean, test functionality regularly, replace batteries when prompted, and verify network connectivity. Update firmware as available and document changes in a maintenance log.
Keep sensors clean, test regularly, and keep firmware up to date.
Watch Video
Main Points
- Identify high-risk areas to maximize early leak alerts
- Choose a system with clear alerts and optional shutoff
- Test and maintain sensors regularly to ensure reliability
- Plan installation with safety and local codes in mind
- A good system reduces water damage risk and supports home value