Air Compressor Leak Troubleshooting Guide
Urgent, step-by-step troubleshooting to stop an air compressor leak. Diagnose common causes, apply quick fixes, and prevent future leaks with expert guidance from Leak Diagnosis.

Most air compressor leaks start at loose fittings, worn seals, or a failing unloader valve. Begin with simple checks: tighten hoses and couplings, inspect gaskets, and observe pressure gauges for drops. If the leak persists after these basics, proceed to a thorough inspection and repair of seals, check valves, and the tank bleed valve.
Why a leak matters
According to Leak Diagnosis, a persistent air compressor leak isn't just a nuisance; it wastes energy, increases running time, and can stress the motor and seals. Leaks can also pose safety risks from pressurized air and hot components. Quick action preserves pressure, protects tools, and extends the life of your compressor. In this guide, we focus on practical, urgent steps you can take today to locate the source and stop leaks and prevent recurring issues. A small hiss at a fitting may be harmless, but a steady stream almost always signals a worn seal, cracked component, or damaged hose that should be addressed promptly to prevent damage to the unit and your workspace.
Common sources of leaks
Leaks in air compressors most often originate from the same places you interact with daily:
- Loose or damaged fittings and couplers at hoses and connections
- Worn or damaged O-rings and seals at valves, ports, and the tank interface
- Cracked or pinched hoses and flexible lines
- Faulty unloader valve, pressure switch, or relief components
- Drain valve or tank bottom seals that have degraded
- Cracks or corrosion on the air tank itself
Understanding these common sources helps you triage quickly and prioritize the safest, most effective fixes. Even a minor leak reduces efficiency and can lead to higher energy costs over time, especially in home workshops where compressors cycle frequently.
Safe, initial checks you can perform (without tools)
Start with simple, non-destructive checks to locate the leak and confirm the problem area:
- Power down and ensure the unit is completely depressurized before touching anything
- Inspect all visible fittings and hoses for looseness or visible wear
- Apply a soapy water solution to suspect joints and valves; watch for bubbles that indicate a leak
- Listen closely for hissing sounds near valves, gauges, and the tank connection
- Confirm the unloader valve is not stuck open or leaking by observing the line during cycling
If you observe a leak at a connection, tighten it following the manufacturer’s torque specs. If bubbles appear at a gasket, seal, or valve, plan a targeted repair. For any leak that doesn’t reveal itself with these quick checks, move to a more thorough diagnostic review.
Diagnostic mindset: symptoms → likely causes → immediate actions
When you hear a hiss or see bubbles, you’re looking for a path of least resistance where air escapes. Common symptoms map to definite causes:
- Symptom: audible hiss from a joint or valve → Likely cause: loose fitting or worn gasket. Action: tighten or replace.
- Symptom: visible bubbles around a seal → Likely cause: degraded O-ring or gasket. Action: replace gasket and reseal threads.
- Symptom: air loss without audible hiss → Likely cause: small cracks in hoses or a cracked tank port. Action: replace the damaged component.
- Symptom: leaks only during pressure cycles → Likely cause: faulty unloader valve or relief components. Action: inspect and test valve operation.
Each symptom narrows the field, making repairs faster and safer. Always depressurize before disassembly and consult a professional if you’re unsure about component integrity.
Step-by-step fix for the top cause: tighten & reseal (top-priority fixes)
The most common and easiest fixes target loose fittings and worn gaskets. Below is a practical, action-oriented approach you can follow to stop an air compressor leak as quickly as possible. If any step requires disassembly beyond your comfort level, stop and reassess or call a professional.
First, power down and depressurize the system. Then:
- Inspect all fittings and hoses for visible wear and tighten connections to the manufacturer’s recommended torque.
- Replace worn gaskets or O-rings at valves, ports, or the tank interface; reseal threads with appropriate sealant if advised by the manufacturer.
- Check the unloader valve and its sealing surfaces; replace if you detect wear or deformation.
- Reassemble, reconnect power, and slowly re-pressurize while applying soapy water to suspect joints to confirm no bubbles appear.
- If bubbles reappear, repeat checks or replace the suspect component. Do not leave a persistent leak unaddressed.
Note: After completing repairs, monitor the unit for several cycles to ensure the leak has not reappeared.
Safety, warnings, and prevention tips
Dealing with air systems requires attention to safety:
- Always depressurize and disconnect power before touching any part of the system.
- Wear eye protection and gloves to guard against debris and high-pressure jets.
- Never work on a hot compressor; allow cooling and inspect for oil or fuel leaks that could ignite.
- Keep a dedicated parts kit (O-rings, seals, gaskets) and label replacements by component.
- Regularly drain condensate and inspect hose assemblies for signs of wear to prevent future leaks.
- After repairs, test the system in a controlled, safe space and avoid operating near flammable materials.
Prevention is the best defense: schedule routine maintenance checks and replace worn parts before leaks become significant issues.
When to call a professional
If you identify a crack in the air tank, a ruptured weld, or any leak that persists after performing standard tighten-and-seal repairs, professional intervention is recommended. A certified tech can pressure-test and certify the unit, perform advanced seal replacements, and check safety devices that protect against over-pressurization. Do not continue using a unit with a known structural flaw.
Quick maintenance routine to prevent leaks (maintenance checklist)
Adopt a lightweight, regular routine to minimize leaks:
- Inspect hoses and fittings weekly for signs of wear or looseness.
- Check the unloader valve and relief devices for proper operation every month.
- Drain condensate from the tank daily or at the end of each use to prevent corrosion and rust that may lead to leaks.
- Tighten connections to the recommended torque levels periodically and replace aging gaskets as part of routine service.
- Use high-quality components compatible with your compressor’s pressure range and follow the user manual for best results.
Steps
Estimated time: 60-90 minutes
- 1
Power down and depressurize safely
Shut off power and allow the unit to depressurize completely before touching any components. This minimizes the risk of a sudden air release while you inspect fittings and hoses.
Tip: Always double-check that pressure gauges read zero and listen for silence before proceeding. - 2
Inspect visible fittings and hoses
Look for loosened clamps, cracked hoses, and corroded connectors. Replace damaged parts and tighten any fittings that show movement under light manual pressure.
Tip: Keep a flashlight handy to inspect dark hose routes and valve housings. - 3
Tighten connections to spec
Using the manufacturer’s torque specs, snug fittings that show light movement. Avoid over-tightening brass fittings to prevent thread damage.
Tip: If you must grease threads, use approved sealants only when specified by the manual. - 4
Replace seals and O-rings
Remove old O-rings and gaskets; install new ones that match the exact size and material. Ensure seats are clean before resealing.
Tip: Keep spare O-rings organized by component to speed future work. - 5
Check unloader valve and relief devices
Inspect the unloader valve for sticking or improper seating. Replace or reset the valve if leakage or mis-seating is detected.
Tip: Observe valve operation during a controlled cycle to confirm correct function. - 6
Repressurize and test
Reassemble, reconnect power, and slowly re-pressurize while applying soapy water to suspect joints to confirm no bubbles appear.
Tip: Test in a safe area away from flammable materials and keep a hand on the off-switch.
Diagnosis: Visible air leak or hissing sound from compressor unit
Possible Causes
- highLoose fittings or hardware connections
- mediumWorn or damaged O-rings/seals
- mediumDamaged hoses or interconnecting lines
- lowFaulty unloader valve or pressure relief components
- lowCracked tank or drain valve
Fixes
- easyTighten all fittings and connections; replace damaged hoses
- easyReplace worn O-rings/seals; reseal valve interfaces
- easyDepressurize and safely bleed lines; test for leaks with soap solution
- mediumReplace unloader valve; verify proper operation
- hardInspect tank for cracks; replace tank if compromised
Questions & Answers
What are the most common signs of an air compressor leak?
Common signs include audible hissing, visible bubbles at joints, frequent cycling without maintaining pressure, and reduced tool performance. Start by inspecting fittings and gaskets, then test suspected areas with soapy water.
Look for hissing sounds, bubbles at joints, and drop in pressure. Start with fittings and seals and test suspected areas with soapy water.
Where are air compressor leaks most likely to occur?
Leads usually come from fittings, hoses, or ports where seals sit. The unloader valve and drain valve are also common spots. Inspect these areas first for looseness or wear.
Leaks commonly come from fittings, hoses, ports, unloader valves, or drain valves. Check these areas first.
Can I fix a leak myself?
For minor leaks at fittings or seals, DIY fixes are often feasible with proper safety. Complex tank damage or structural issues require a professional technician. Always depressurize before work.
Yes, you can fix simple leaks yourself after depressurizing. For major tank damage, call a pro.
When should I call a professional for an air compressor leak?
Call a professional if leaks persist after basic tightening and sealing, if you suspect a cracked tank, or if the unloader valve shows signs of failure. A pro can perform pressure testing and certify the unit.
Call a pro if leaks don’t stop after basics, or if the tank shows damage.
Are air compressor leaks dangerous?
Yes. Leaks can create unexpected air bursts, cause hot surfaces to become unsafe, and expose you to debris. Always work in a controlled, safe area and use PPE.
Leaks can be dangerous; use a safe workspace and PPE.
How can I prevent leaks from returning?
Perform regular maintenance: inspect hoses and fittings, drain condensate, replace worn seals, and use quality parts. Keep a routine check after every few cycles to catch wear early.
Keep up regular maintenance and replace worn parts to prevent leaks.
Watch Video
Main Points
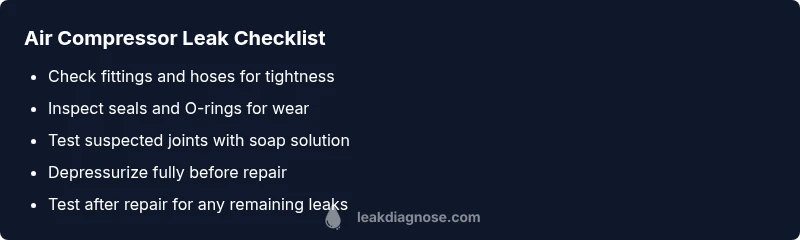
- Inspect for obvious leaks first: tighten fittings and replace worn seals.
- Use soapy water to locate hard-to-see leaks safely.
- Depressurize before any repair and test thoroughly after repairs.
- Regular maintenance prevents most air compressor leaks.
- Call a professional for structural tank damage or unresorbed safety valve issues.